Let’s face it—nothing beats the allure of chocolate. It’s like that old friend who knows just how to make you smile. When the craving hits, you can either dive into a box of chocolates or whip up a quick and delightful chocolate lava mug cake. Picture this: you return home after a long day. You want something sweet that’s also ridiculously easy to make. This recipe is like magic in a mug!
Not only is this treat ready in minutes, but it’s also a fun way to enjoy chocolate molten goodness without the need for fancy equipment or hours of baking. I’ve had more than my fair share of desserts, but this one holds a special place in my heart. So grab a mug and let’s get started!
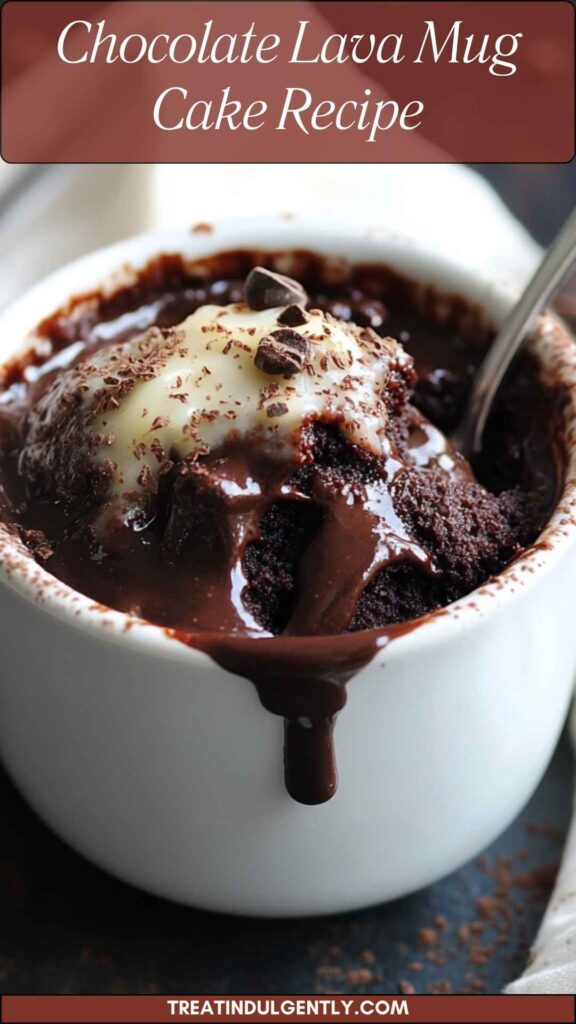
What is Chocolate Lava Mug Cake?
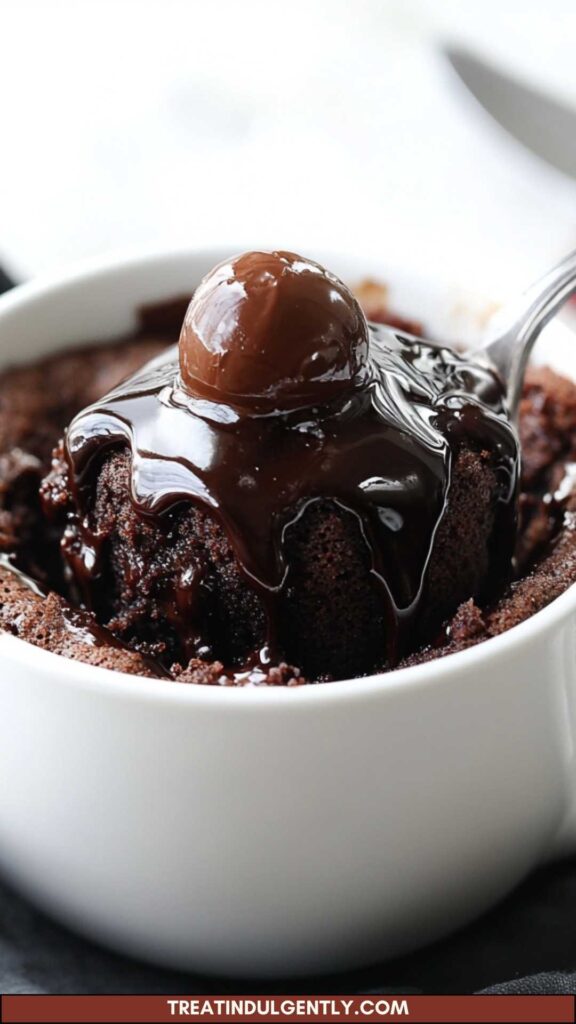
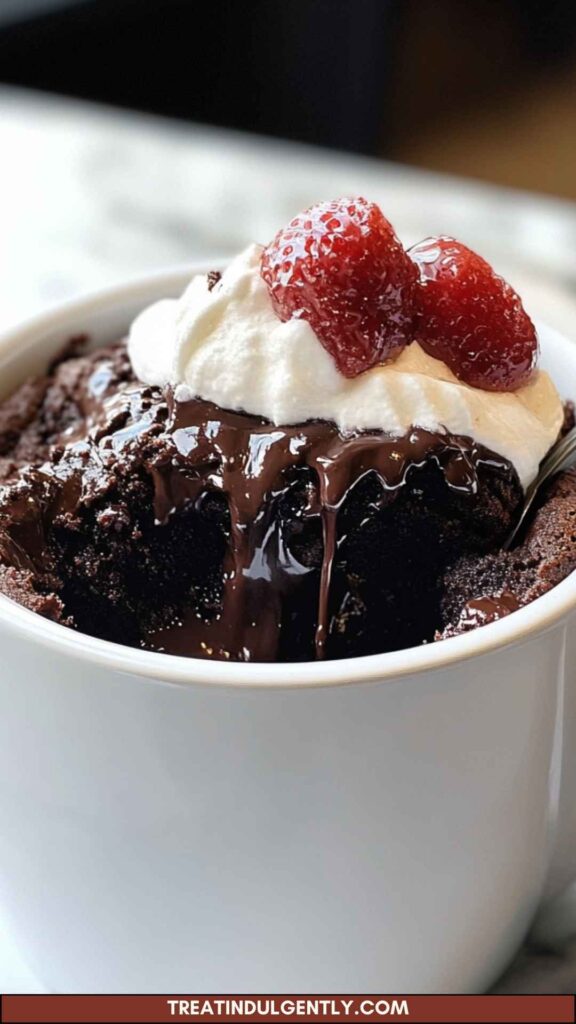
At its core, a chocolate lava mug cake is a single-serving dessert that combines the best of both worlds: cake and molten chocolate. Imagine cutting into a soft, fluffy cake only to reveal a delicious pool of gooey chocolate flowing out. It’s like a mini chocolate soufflé that’s delightfully indulgent.
This dish is typically prepared in a microwave and can be ready in just a few minutes. The beauty of a mug cake lies in its simplicity and the customized experience it offers. You can literally whip it up while watching your favorite show. Who wouldn’t want that?
What Does It Taste Like?
If you’ve ever sunk your teeth into molten chocolate cake, you can already guess that this mug cake delivers an equally delightful experience. The outer layer is soft, light, and spongy, while the inside offers a rich, warm flow of chocolate that envelops your taste buds in bliss.
It’s not just sweet; it possesses a depth of flavor thanks to the use of dark chocolate and cocoa powder. Each bite is a perfect balance between the intense chocolatey goodness and a subtle hint of sweetness.
Why This Recipe Works?
Let’s dig deeper into why this recipe is a hit. You might wonder what sets it apart from other dessert options. Well, here are some reasons:
1. Quick Preparation:
This recipe demands just a handful of minutes from start to finish. You can be savoring this delicious dessert in less time than it takes to order takeout.
2. Minimal Ingredients:
With a few pantry staples, this mug cake is the epitome of simplicity. You don’t need to run out for exotic ingredients, making it accessible anytime the cravings strike.
3. Customizable:
Feel free to add your twist! Whether it’s nuts, spices, or a dash of flavored extract, the options are endless. You can make each cake uniquely yours.
4. Individual Portion:
Each mug cake is a personal dessert. No need to share (unless you really want to). You can enjoy your cake guilt-free, whether that’s late at night or as an afternoon pick-me-up.
Ingredients for Chocolate Lava Mug Cake
To craft this magnificent mug cake, gather the following ingredients:
- 1 tablespoon (15 g) of espresso powder
- 2 tablespoons (40 g) of softened unsalted butter
- 2 tablespoons (40 mL) of boiling hot water
- ¼ cup (60 g) of fine sugar (superfine)
- 2 tablespoons (16 g) of unsweetened cocoa powder
- 3 squares (19 g) of dark chocolate, chopped
- ¼ cup (38 g) of self-rising flour
- 1 teaspoon (5 g) of vanilla extract
Step by Step Instructions
Next up, you’ll want to follow these straightforward steps to create your decadent dessert.
Step 1: Prepare Your Mug
Choose a microwave-safe mug. It’s important to use one that holds at least 8 ounces. This gives your cake enough room to rise.
Step 2: Mix Butter and Espresso
In the mug, add the softened butter and espresso powder. Stir them together until well combined. The espresso enhances the chocolate flavor, so don’t skip this step!
Step 3: Add Boiling Water
Next, pour in the boiling hot water. This step helps to melt the butter completely and incorporates the espresso into the mixture.
Step 4: Add Sugar and Cocoa Powder
Now, mix in the superfine sugar and unsweetened cocoa powder. Stir well until fully blended. You should see a smooth chocolatey mixture forming.
Step 5: Incorporate Chocolate
It’s time to fold in the chopped dark chocolate. This will create the gooey lava center. Don’t rush; make sure every bit of chocolate is submerged in the batter.
Step 6: Add Flour and Vanilla Extract
Now, sprinkle in the self-rising flour and add the vanilla extract. Gently mix until you see no dry flour. The batter should be thick and luscious.
Step 7: Microwave
Place your mug in the microwave. Heat it on high for about 30 to 40 seconds. Keep a watchful eye because microwaves vary in power. You want the cake to be set around the edges but still soft in the center.
Step 8: Let It Stand
After microwaving, let the mug cake sit for about a minute. This allows it to firm up a bit and cool down slightly.
Step 9: Serve and Enjoy!
What’s next? Dig in! You can enjoy your cake straight from the mug or transfer it to a plate. Consider adding toppings like ice cream, whipped cream, or fresh fruit.
Notes
Here are some helpful tips to make your lava cake experience even better:
- Microwave Power: Adjust your cooking time based on your microwave’s wattage; a higher wattage may require less time.
- Don’t Overcook: Overcooking leads to a less gooey center. Remember, it will continue to cook slightly after removal.
- Creative Toppings: Personalize your dessert with toppings like nuts or flavored syrup for an extra fancy touch.
- Serving Suggestions: Pair it with ice cream, fresh berries, or drizzle chocolate sauce for a gourmet feel.
- Troubleshooting: If your cake doesn’t lava, check your chocolate ratios. More chocolate often leads to a more molten center.
How to Store the Leftovers?
Storing any leftovers can be a bit tricky since mug cakes are best enjoyed fresh. If you happen to have any left, let it cool completely, then cover it with plastic wrap or place it in an airtight container. It can stay in the refrigerator for up to two days. However, I won’t lie; the taste may not be as rich the next day.
Sides for Chocolate Lava Mug Cake
Here are fun sides to consider when serving your lava cake:
1. Ice Cream:
A classic pairing! The cold ice cream contrasts beautifully with the warm mug cake—an unbeatable combination!
2. Fresh Berries:
Add a touch of freshness with strawberries, blueberries, or raspberries. They not only brighten the dish visually but also add a slight tartness that complements the rich chocolate.
3. Whipped Cream:
A dollop of whipped cream can take this dessert to a new level. Light and airy, it balances the dense chocolate perfectly.
4. Chocolate Sauce:
For the chocolate lovers out there, drizzle some chocolate sauce on top. It’s like giving your dessert an extra dose of happiness.
Alternative Choices for Ingredients
If you find you’re missing an ingredient, fear not! There are options you can use:
1. Coffee Instead of Espresso Powder:
If you don’t have espresso powder, brewed coffee in a pinch can substitute and still bring out the chocolate flavor.
2. Coconut Oil for Butter:
Coconut oil can replace unsalted butter if you’re looking for a dairy-free option. Just melt it and proceed as usual.
3. Granulated Sugar Instead of Superfine Sugar:
Regular granulated sugar works fine in a pinch. Just be aware it may take a bit longer to dissolve.
4. All-Purpose Flour Instead of Self-Rising Flour:
If you don’t have self-rising flour, simply combine all-purpose flour with a pinch of baking powder to achieve a similar effect.
Conclusion
Crafting a chocolate lava mug cake is one of those simple joys in life. With just a handful of ingredients and a few minutes of time, you can create an enticing dessert that is impossible to resist. Whether you’re serving it at a gathering or enjoying it alone, the chocolate lava mug cake offers warmth and delight, and its ooey-gooey center continues to please cravings.
So, go on, indulge. Don’t be shy when it comes to topping options; get creative and make it your own. Remember, the best moments in life are often accompanied by cake. What are you waiting for? Get those mugs ready, and let’s start baking!
You’ll also like the following recipes!
- Carnival Cruise Chocolate Lava Cake Copycat Recipe
- How to Make Applebee’s Chocolate Lava Cake
- Gluten Free Chocolate Lava Cake

Chocolate Lava Mug Cake Recipe – Treat Indulgently
Description
When it comes to enjoying a warm chocolate lava mug cake, the right pairing can elevate your experience. Imagine indulging in this chocolatey delight alongside a scoop of vanilla ice cream. The creamy texture perfectly complements the molten center. Or how about a drizzle of caramel sauce? That added sweetness creates a delightful contrast.
If you’re feeling adventurous, try pairing it with fresh fruit like strawberries or raspberries. The tartness cuts through the richness of the cake. Finally, for a more festive touch, a dollop of whipped cream garnished with nuts can add texture and balance to the flavors.
Ingredients
Instructions
Step 1: Prepare Your Mug
-
Choose a microwave-safe mug. It’s important to use one that holds at least 8 ounces. This gives your cake enough room to rise.
Step 2: Mix Butter and Espresso
-
In the mug, add the softened butter and espresso powder. Stir them together until well combined. The espresso enhances the chocolate flavor, so don't skip this step!
Step 3: Add Boiling Water
-
Next, pour in the boiling hot water. This step helps to melt the butter completely and incorporates the espresso into the mixture.
Step 4: Add Sugar and Cocoa Powder
-
Now, mix in the superfine sugar and unsweetened cocoa powder. Stir well until fully blended. You should see a smooth chocolatey mixture forming.
Step 5: Incorporate Chocolate
-
It’s time to fold in the chopped dark chocolate. This will create the gooey lava center. Don’t rush; make sure every bit of chocolate is submerged in the batter.
Step 6: Add Flour and Vanilla Extract
-
Now, sprinkle in the self-rising flour and add the vanilla extract. Gently mix until you see no dry flour. The batter should be thick and luscious.
Step 7: Microwave
-
Place your mug in the microwave. Heat it on high for about 30 to 40 seconds. Keep a watchful eye because microwaves vary in power. You want the cake to be set around the edges but still soft in the center.
Step 8: Let It Stand
-
After microwaving, let the mug cake sit for about a minute. This allows it to firm up a bit and cool down slightly.
Step 9: Serve and Enjoy!
-
What’s next? Dig in! You can enjoy your cake straight from the mug or transfer it to a plate. Consider adding toppings like ice cream, whipped cream, or fresh fruit.
Nutrition Facts
Servings 1
- Amount Per Serving
- Calories 794kcal
- % Daily Value *
- Total Fat 44.2g68%
- Saturated Fat 26.1g131%
- Cholesterol 31mg11%
- Sodium 407mg17%
- Total Carbohydrate 99g33%
- Dietary Fiber 18g72%
- Sugars 40g
- Protein 15g30%
* Percent Daily Values are based on a 2,000 calorie diet. Your daily value may be higher or lower depending on your calorie needs.
Note
- Microwave Power: Adjust your cooking time based on your microwave’s wattage; a higher wattage may require less time.
- Don’t Overcook: Overcooking leads to a less gooey center. Remember, it will continue to cook slightly after removal.
- Creative Toppings: Personalize your dessert with toppings like nuts or flavored syrup for an extra fancy touch.
- Serving Suggestions: Pair it with ice cream, fresh berries, or drizzle chocolate sauce for a gourmet feel.
- Troubleshooting: If your cake doesn’t lava, check your chocolate ratios. More chocolate often leads to a more molten center.


