You know what I love? The anticipation that builds as a dessert bakes in the oven. The aroma wafts through the kitchen, tickling your senses. Pretty soon, the buttery, chocolate goodness emerges from the warmth, and everything feels right in the world. But nothing quite beats the moment when you crack open a chocolate lava cake, revealing that gooey molten center. It’s like hitting the dessert jackpot!
Today, I’m unveiling the Carnival Cruise Chocolate Lava Cake recipe. It’s rich, decadent, and oh-so-indulgent. Trust me, after one bite, you’ll want to have this dessert more often than just during a special celebration. Now, let’s find out what makes this cake the stuff of legends.
What is Carnival Cruise Chocolate Lava Cake?
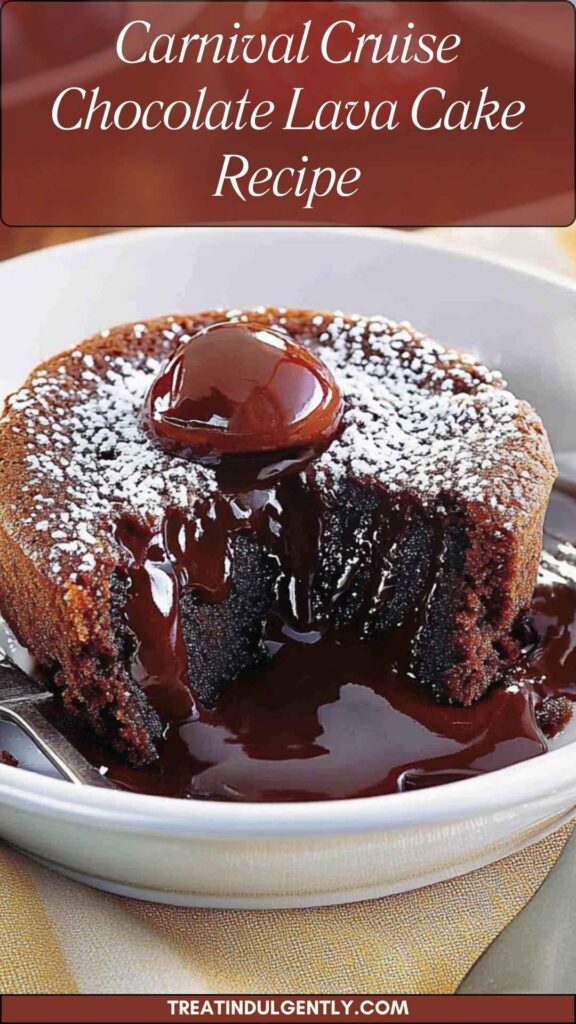
The Carnival Cruise Chocolate Lava Cake is more than just a dessert. It’s an experience. Growing up, I remember the first time I tasted it on a cruise. The ship rocked gently with the waves, but being on deck didn’t compare to the magic of this cake. It’s believed to have been inspired by the famed “molten chocolate cake” phenomenon that delights diners in fine restaurants.
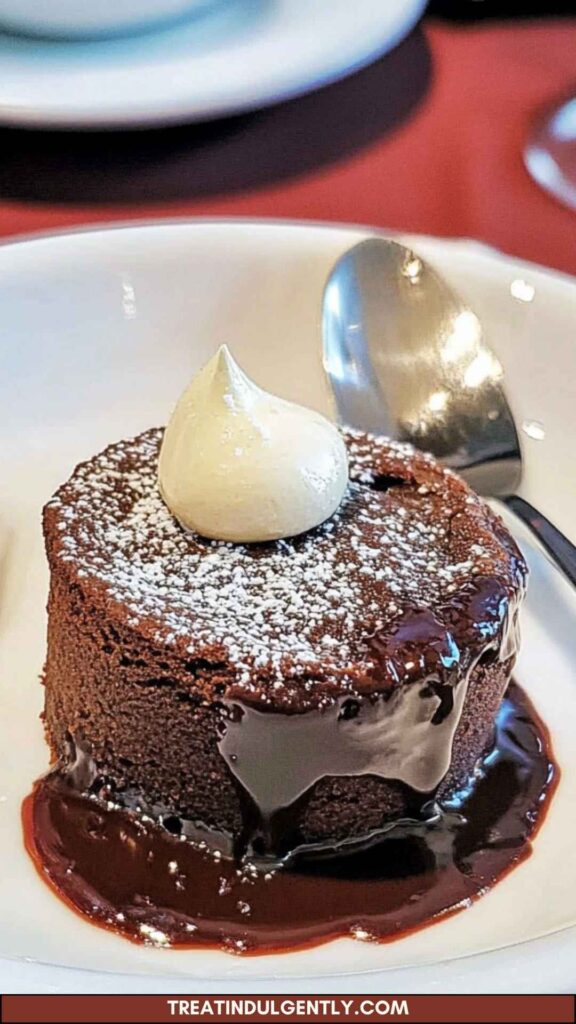
Made with a rich chocolate base, this cake has a unique twist. When you cut into it, a velvety liquid chocolate center flows out, creating a lava-like effect. This is what makes it the talk of the table. The recipe is easy to follow, requiring common ingredients you likely have in your pantry.
Why You’ll Love This Carnival Cruise Chocolate Lava Cake Recipe
Why do I hold this cake so dear? The answer is simple: it’s a warm hug served on a plate. Here’s why you’re going to adore it:
1. Quick Cooking Time: The preparation takes around ten minutes, and it bakes in about 12. Before you know it, you’ll have an impressive dessert ready.
2. Decadent Texture: The outer layer presents a delicate crust while the interior remains soft and gooey. Each bite is a journey through textures.
3. Impressive Presentation: Serving a lava cake always draws gasps. The dramatic unveiling of the molten chocolate warms even the coldest of hearts.
4. Flexibility: You can easily tweak this recipe. Want more spice? Add a pinch of cayenne. Or, go beyond and toss in some orange zest for an unexpected zest.
5. Satisfying Chocolate Fix: If you are a chocolate lover, this cake is a dream come true. It silences cravings in the most satisfying way possible.
Grab your apron, and let’s make some magic in the kitchen!
The Ingredients You Will Need To Make Carnival Cruise Chocolate Lava Cake Recipe
Here’s the list of everything you’ll need. But trust me, don’t just skip to the grocery store yet. I’ll take you step by step through the magic!
- 2 teaspoons unsalted butter (for greasing ramekins)
- 2 large eggs
- 2 egg yolks
- 6 ounces unsalted butter (melted)
- 6 ounces dark baking chocolate (preferably 60% cacao)
- 3/4 cup granulated sugar
- 1/2 teaspoon pure vanilla extract
- 1/4 teaspoon fine sea salt
- 1/4 cup all-purpose flour
- 2 tablespoons powdered sugar (for garnish)
- 1 tablespoon espresso powder
- 1/4 teaspoon cayenne pepper (for a kick)
Let’s roll up our sleeves. It’s time to create some chocolate dreams!
Directions
Step 1: Prepare the Ramekins
Start by preheating your oven to 425°F (220°C). Greasing the ramekins with unsalted butter is essential. This prevents any potential sticking later on. Use a brush or paper towel for even distribution. After greasing, sprinkle a bit of flour inside each ramekin, shaking out the excess.
Step 2: Melt the Chocolate and Butter
Next, grab a medium bowl. Cut the dark chocolate into small pieces to ensure it melts evenly. Add the unsalted butter. You can use the microwave in 30-second bursts, stirring in between, or do a double boiler method. Either way, you want it silky and combined.
Step 3: Mix the Eggs and Sugar
In another bowl, whisk together the large eggs, egg yolks, and granulated sugar until light and creamy. This step is crucial. You’re incorporating air, which gives your cake a beautiful rise.
Step 4: Combine Ingredients
Once your chocolate mixture is ready, let it cool slightly. Then, carefully combine it with the egg mixture. Gently fold in the pure vanilla extract, fine sea salt, and espresso powder. Finally, sift the all-purpose flour into the mix, folding it in gently until you see no flour streaks.
Step 5: Fill the Ramekins
Now for the fun part! Pour the chocolate batter into the prepared ramekins, filling them about 3/4 full. This gives it room to rise while still preserving the molten center.
Step 6: Bake
Place the filled ramekins on a baking sheet for easier handling. Slide them into the preheated oven. Bake for 12 to 14 minutes. When they are done, the edges should be firm while the center remains soft.
Step 7: Let It Cool
Once out of the oven, let them rest for a minute or two. Be sure not to wait too long since the cake will continue cooking in the ramekin.
Step 8: Plate and Serve
Run a knife around the edges of each cake before carefully inverting them onto individual plates. Dust with powdered sugar, and don’t forget those fresh berries or ice cream!
Notes
Here are some handy tips to ensure your lava cake turns out perfect:
- Cool the chocolate mixture slightly: Adding hot chocolate to the egg mixture can cook the eggs, resulting in unwanted scrambles.
- Watch the baking time: Each oven is different, so start checking at the 12-minute mark. You want them set but still slightly jiggly in the center.
- Using a toothpick: If doing the toothpick test, insert it gently into the center. It should come out with a little coated batter, ideally not clean.
- Ramekin size matters: Ensure you use 6-ounce ramekins. Larger ones may require more baking time, ruining the center.
- Flavor variations: Feel free to experiment. Adding a pinch of cinnamon or orange zest can elevate the taste even further!
Storage Tips
Storing leftover lava cake? If you have any, store them in an airtight container. It should last up to two days in the fridge. If you wish to freeze them, wrap each ramekin with plastic wrap and place them in a freezer bag. They can stay frozen for up to three months.
Serving Suggestions
Elevate your chocolate lava cake experience with these ideas:
- Serve Warm with Vanilla Ice Cream: Nothing beats the classic! The melting ice cream complements the warm chocolate perfectly.
- Add Fresh Berries: Sliced strawberries or raspberries on the side make for a refreshing treat. They balance the sweetness.
- Drizzle with Caramel Sauce: For an indulgent touch, drizzle some gooey caramel on top. It’s a sweet combination that takes it to another level.
- Opt for a Mint Garnish: A sprig of mint adds freshness. Its aroma stimulates the senses, creating excitement before the first bite.
- Finish with a Dusting of Cocoa Powder: For the chocoholics, a light dusting enhances the visual appeal, making it even more decadent.
What Other Substitutes Can I Use in Carnival Cruise Chocolate Lava Cake Recipe?
There may be times when you can’t find all the ingredients. No worries! Here are some effective substitutes:
- Applesauce for Butter: Swap out melted butter for an equal amount of unsweetened applesauce for a healthier option.
– Baking Chocolate for Dark Chocolate: In a pinch? Use semi-sweet chocolate instead. It will change the flavor slightly but remain delicious.
– Almond Flour for All-Purpose Flour: Feeling gluten-free? Almond flour can be substituted. Adjust the amount, as almond flour is denser.
– Maple Syrup for Granulated Sugar: Try maple syrup if seeking natural sweetness. Use about half the amount.
– Cocoa Powder for Dark Chocolate: In a desperate situation? Use cocoa powder mixed with butter. Keep proportion in check to maintain consistency.
Conclusion
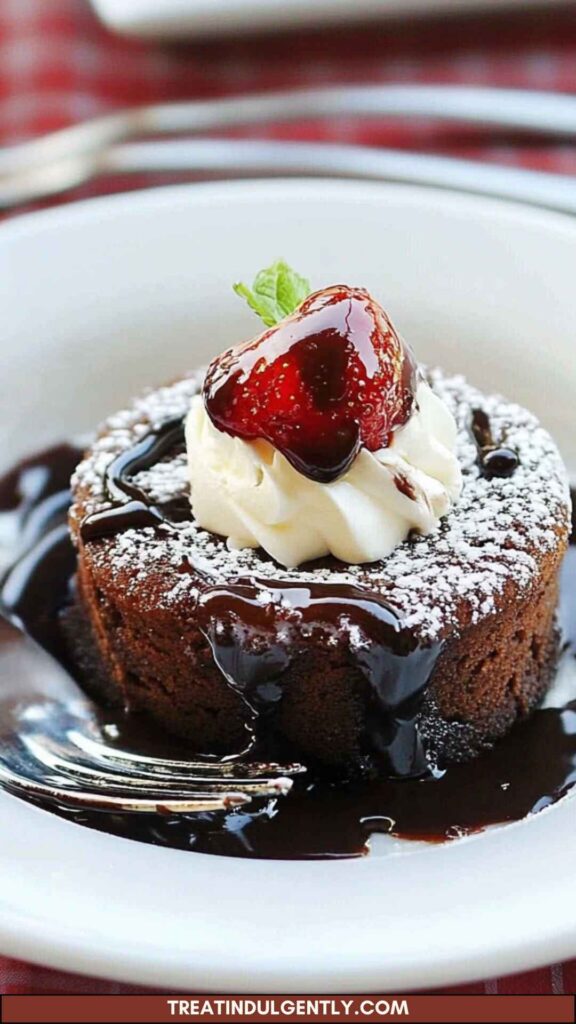
Ultimately, the Carnival Cruise Chocolate Lava Cake is not just a dessert but an experience that tantalizes your senses. It brings together warmth and elegance, making it perfect for any gathering or quiet night at home. From its rich chocolate flavor to the gooey center, each bite is meant to be savored.
So, the next time you want to impress your friends or treat yourself, turn your kitchen into a cruise ship galley—one tablespoon of melted chocolate at a time! Enjoy the journey of cooking this magic. Your taste buds will thank you, and I guarantee people will be coming back for seconds. Enjoy your delicious adventure!
You’ll also like the following recipes!
- Applebee’s Chocolate Lava Cake Copycat Recipe
- Best Gluten Free Chocolate Lava Cake Recipe
- How to Make Chili’s Chocolate Lava Cake

Carnival Cruise Chocolate Lava Cake Recipe – Treat Indulgently
Description
When it comes to elevating the indulgence of Carnival Cruise's chocolate lava cake, the right accompaniments can truly enhance the experience. Vanilla ice cream is a classic choice, with its cold creaminess contrasting beautifully against the warm, gooey chocolate; as the ice cream melts into the cake, it creates a delightful fusion.
Fresh berries, such as strawberries or raspberries, add a burst of tartness that cuts through the sweetness while providing a vibrant pop of color. A dollop of freshly whipped cream introduces a soft texture that complements every bite, making it feel even more decadent.
For a bold twist, a sip of espresso or rich coffee pairs beautifully, embracing the cake's chocolate depth. Finally, a sprig of fresh mint not only refreshes the palate between bites but also adds an unexpected twist, making each forkful a delightful journey. With these perfect pairings, the stage is set for a truly grand dessert experience.
Ingredients
Instructions
Step 1: Prepare the Ramekins
-
Start by preheating your oven to 425°F (220°C). Greasing the ramekins with unsalted butter is essential. This prevents any potential sticking later on. Use a brush or paper towel for even distribution. After greasing, sprinkle a bit of flour inside each ramekin, shaking out the excess.
Step 2: Melt the Chocolate and Butter
-
Next, grab a medium bowl. Cut the dark chocolate into small pieces to ensure it melts evenly. Add the unsalted butter. You can use the microwave in 30-second bursts, stirring in between, or do a double boiler method. Either way, you want it silky and combined.
Step 3: Mix the Eggs and Sugar
-
In another bowl, whisk together the large eggs, egg yolks, and granulated sugar until light and creamy. This step is crucial. You’re incorporating air, which gives your cake a beautiful rise.
Step 4: Combine Ingredients
-
Once your chocolate mixture is ready, let it cool slightly. Then, carefully combine it with the egg mixture. Gently fold in the pure vanilla extract, fine sea salt, and espresso powder. Finally, sift the all-purpose flour into the mix, folding it in gently until you see no flour streaks.
Step 5: Fill the Ramekins
-
Now for the fun part! Pour the chocolate batter into the prepared ramekins, filling them about 3/4 full. This gives it room to rise while still preserving the molten center.
Step 6: Bake
-
Place the filled ramekins on a baking sheet for easier handling. Slide them into the preheated oven. Bake for 12 to 14 minutes. When they are done, the edges should be firm while the center remains soft.
Step 7: Let It Cool
-
Once out of the oven, let them rest for a minute or two. Be sure not to wait too long since the cake will continue cooking in the ramekin.
Step 8: Plate and Serve
-
Run a knife around the edges of each cake before carefully inverting them onto individual plates. Dust with powdered sugar, and don’t forget those fresh berries or ice cream!
Nutrition Facts
Servings 4
- Amount Per Serving
- Calories 756kcal
- % Daily Value *
- Total Fat 52.9g82%
- Saturated Fat 29.9g150%
- Cholesterol 375mg125%
- Sodium 188mg8%
- Total Carbohydrate 59g20%
- Dietary Fiber 5g20%
- Sugars 33g
- Protein 12g24%
* Percent Daily Values are based on a 2,000 calorie diet. Your daily value may be higher or lower depending on your calorie needs.
Note
- Cool the chocolate mixture slightly: Adding hot chocolate to the egg mixture can cook the eggs, resulting in unwanted scrambles.
- Watch the baking time: Each oven is different, so start checking at the 12-minute mark. You want them set but still slightly jiggly in the center.
- Using a toothpick: If doing the toothpick test, insert it gently into the center. It should come out with a little coated batter, ideally not clean.
- Ramekin size matters: Ensure you use 6-ounce ramekins. Larger ones may require more baking time, ruining the center.
- Flavor variations: Feel free to experiment. Adding a pinch of cinnamon or orange zest can elevate the taste even further!


