Let’s talk about moments. Moments that matter. You know, those times when you gather with family or friends, and you want the dessert to be the grand finale. For me, nothing does the trick like a mouth-watering chocolate lava cake. But what if you follow a gluten-free lifestyle? No need for worry! Today, I am excited to share a gluten-free chocolate lava cake recipe that will make your taste buds sing.
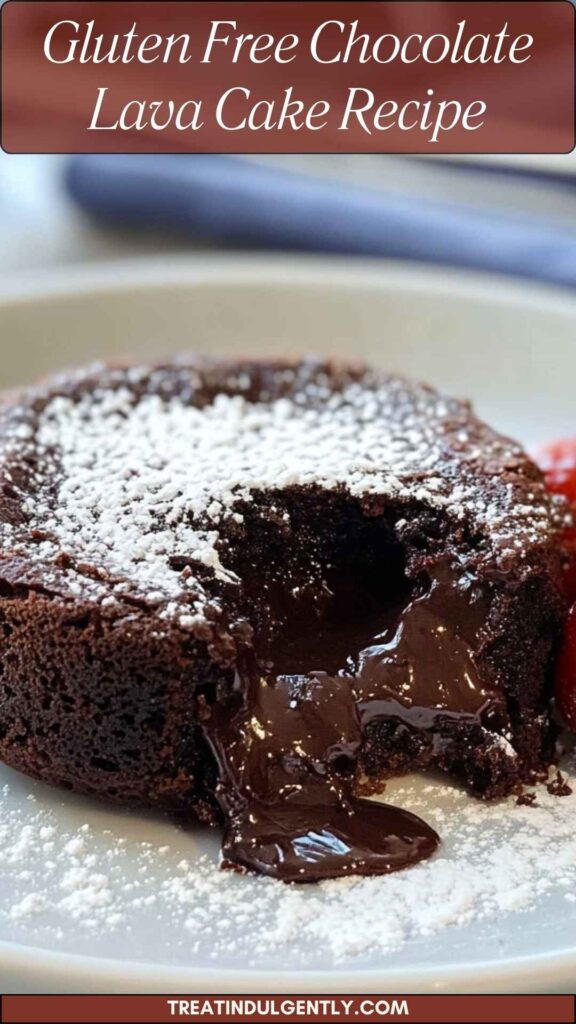
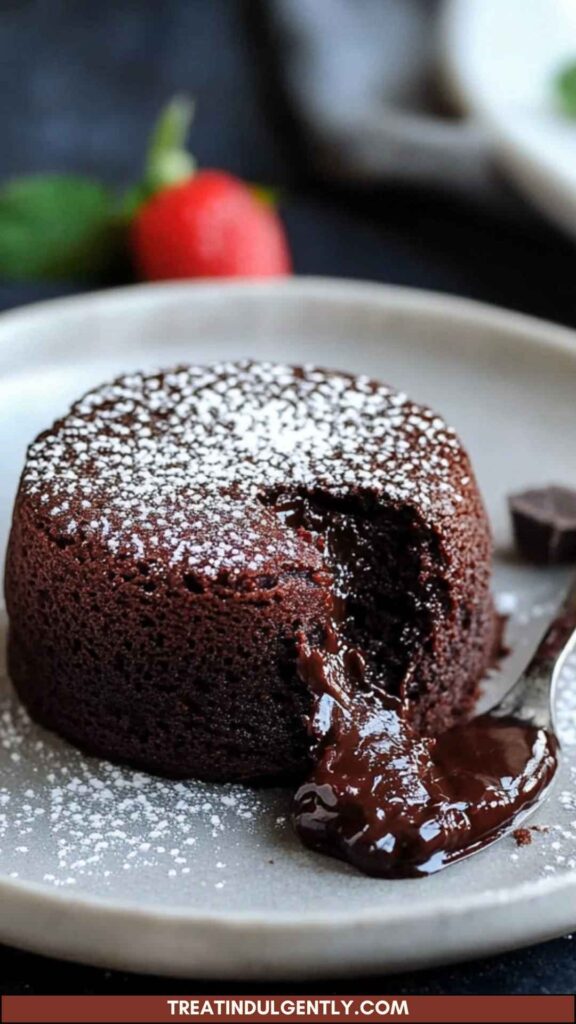
Imagine serving this rich dessert, watching the molten chocolate flow out as you slice into it. It transforms even the simplest gathering into a special occasion. The best part? You can make this cake using gluten-free ingredients without sacrificing flavor. So grab your apron; we’re about to embark on a delicious journey!
What is Gluten-Free Chocolate Lava Cake?
It’s quite simple. A gluten-free chocolate lava cake is a decadent dessert made without wheat flour. Instead, we use gluten-free flour blends to achieve a texture that’s just as delightful. The cake has a firm outer layer while the inside remains gooey and luscious, creating a delightful contrast. Gluten-free diets can often leave you feeling deprived of certain indulgent treats. That’s precisely why this recipe is crucial – it fills that void without compromising your dietary needs.
Why This Recipe Works?
Let’s unpack why this gluten-free chocolate lava cake recipe is not just another dessert, but an essential addition to your culinary repertoire.
1. Rich Flavor Profile:
This cake features a combination of dark chocolate and espresso powder. The dark chocolate brings depth while the espresso powder enhances the chocolate flavor. This fusion makes the cake satisfyingly rich, ensuring every bite is heavenly.
2. Simple Ingredients:
The ingredients required for this recipe are common and easily accessible. You likely have most of them in your pantry already, which means you can whip this up any day. This accessibility makes it a go-to option for a last-minute dessert.
3. Quick Preparation Time:
With a prep time of just about 15 minutes and a baking time of 12 minutes, you can have this cake ready for your guests in no time. This makes it ideal for busy weeknights or spontaneous dinner invites.
4. Versatile & Customizable:
You can personalize this recipe to suit your taste buds. Want it more citrusy? Add lemon zest. Prefer a nutty twist? Toss in some almond flour. The choices are endless!
Ingredients You’ll Need to Make This Gluten-Free Chocolate Lava Cake
Here’s what you need:
- 2 large eggs (100 g), at room temperature
- 1 tablespoon (15 g) espresso powder
- 4 tablespoons (56 g) unsalted butter, plus extra for greasing
- 1 teaspoon orange zest
- ½ teaspoon pure vanilla extract
- 2 large egg yolks (50 g), at room temperature
- 5 ounces dark or semi-sweet chocolate, coarsely chopped
- ¼ cup (50 g) granulated sugar
- 3 tablespoons (27 g) all-purpose gluten-free flour blend
(any finely ground blend will work, with or without xanthan gum) - 1 tablespoon (5 g) unsweetened Dutch-processed cocoa powder
- ⅛ teaspoon kosher salt
- Confectioners’ sugar for dusting
How To Make These?
Time to roll up those sleeves! Here’s a step-by-step guide to creating your chocolate lava masterpiece.
Step 1: Preheat the Oven
Begin by preheating your oven to 425°F (220°C). This temperature ensures a beautifully cooked cake with the molten center we love.
Step 2: Prepare the Ramekins
Next, grab four ramekins and grease them generously with butter. This step will ensure the cakes slip out effortlessly after baking. Place them on a baking tray for easy handling.
Step 3: Melt the Chocolate and Butter
In a heatproof bowl, combine the chopped chocolate and butter. Place it over a pot of simmering water (double boiler method) and stir gently until melted. Alternatively, you can use the microwave. Just heat in 30-second bursts until smooth.
Step 4: Mix Eggs and Sugar
In another bowl, whisk together the eggs, egg yolks, and granulated sugar. You want the mixture to become pale and fluffy. This step incorporates air, vital for a light cake.
Step 5: Combine the Mixtures
Slowly pour the melted chocolate mixture into the egg mixture. Blend until perfectly combined. Be cautious not to scramble the eggs with hot chocolate.
Step 6: Add the Dry Ingredients
Next, sift in the gluten-free flour, cocoa powder, espresso powder, orange zest, and salt. Fold gently to combine, ensuring no lumps remain. Your batter is now ready!
Step 7: Pour into Ramekins
Divide the batter evenly among the prepared ramekins. Filling them about ¾ full will leave room for expanding during baking.
Step 8: Bake
Pop the tray into your preheated oven. Bake for 12-14 minutes. The edges should look firm, but the center will be soft. Keep an eye on them!
Step 9: Let Them Rest
Once baked, allow the cakes to rest for 1 minute. This tiny pause will help prevent them from collapsing when unmolded.
Step 10: Serve and Indulge
Carefully run a knife around the edges and invert onto plates. Dust with confectioners’ sugar, and serve immediately. Enjoy the delightful flow of chocolate!
Tips
To ensure success with your lava cake, keep these tips in mind:
- Use High-Quality Chocolate: The chocolate is the star here, so choose a good quality dark or semi-sweet chocolate.
- Room Temperature Ingredients: Ensure your eggs and butter are at room temperature. This aids in smooth mixing and better texture.
- Monitor Baking Time: Every oven has its quirks. Start checking your cakes at 12 minutes to get that perfect gooey center.
- Try Different Flavors: Mix it up! Consider adding spices like cinnamon or cardamom for a unique flavor experience.
- Don’t Skip the Resting Time: Allowing the cake to rest for a minute after baking is crucial. It helps the cake set properly for easier serving.
Nutrition Information
gluten free chocolate lava cake recipe nutrition facts
How to Store the Leftovers?
If you find yourself with leftover lava cakes, don’t fret! Simply store them in an airtight container in the refrigerator for up to three days. To reheat, microwave them for about 20 seconds. You want the inside to be warm again, but be careful not to overcook them.
What Are Some Recommended Side Dishes for Gluten-Free Chocolate Lava Cake?
Pairing is an art. Here are four delicious options that complement your lava cake wonderfully.
1. Vanilla Ice Cream:
Classic and easy! The cold creaminess of vanilla ice cream enhances the warm chocolate perfectly. It’s a pairing that’s hard to beat.
2. Fresh Berries:
A medley of strawberries, blueberries, and raspberries adds a bright, fruity note. Their tartness cuts through the richness of the cake beautifully.
3. Whipped Cream:
Lightly sweetened whipped cream adds an airy contrast. It’s simple: just whip some heavy cream with a bit of sugar and vanilla.
4. Salted Caramel Sauce:
If you enjoy a sweet and savory dynamic, drizzle some salted caramel over the cake. This creates a delightful blend of flavors.
If the Items Are Not Available in Your Pantry, What Are Some Substitute Options for the Ingredients?
Running low on ingredients? No problem! Here’s how to make substitutions.
1. Eggs:
If you’re vegan or out of eggs, you can use flaxseed meal instead. Combine 1 tablespoon of flaxseed meal with 2.5 tablespoons of water to replace one egg.
2. Dark Chocolate:
If you don’t have dark chocolate, semi-sweet chocolate works just fine. Alternatively, use cocoa powder mixed with a bit of more butter.
3. Gluten-Free Flour:
Running short on gluten-free flour? Consider using almond flour or coconut flour. They’ll change the texture slightly, but still yield delicious results.
4. Sugar:
For a healthier alternative to granulated sugar, consider using coconut sugar or maple syrup. Just remember to adjust the liquid in your recipe if you use syrup.
Conclusion
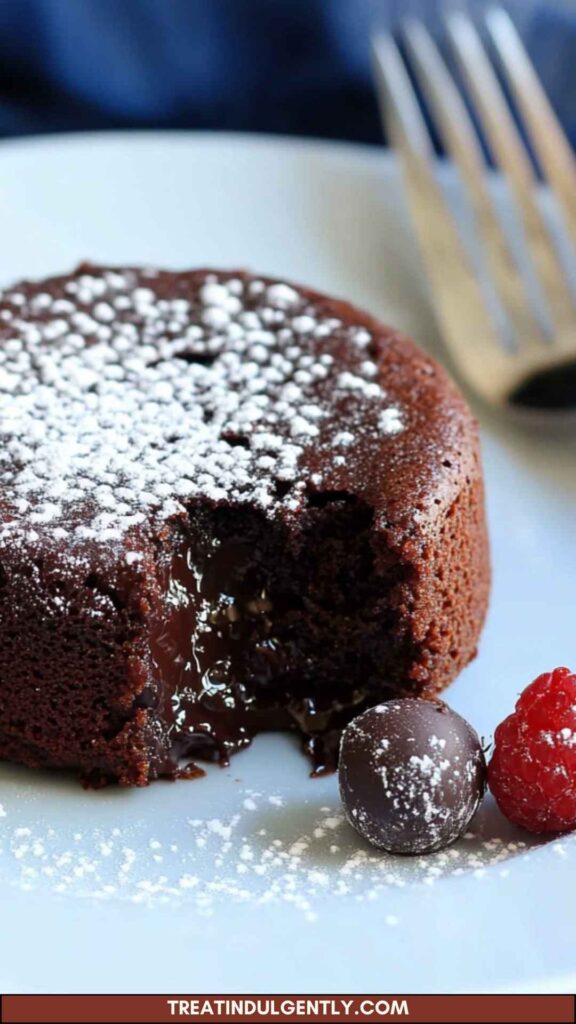
You’re just a few simple steps away from creating a stunning gluten-free chocolate lava cake that will impress family and friends alike. With this recipe in your arsenal, you can bring a touch of elegance to any gathering.
Serve it up with the perfect accompaniments, and watch as everyone delights in the warm, rich chocolate. Enjoy every bite, knowing you’ve created something extraordinary that fits into a gluten-free lifestyle. So, are you ready to impress with this delicious dessert? Let’s get baking!
You’ll also like the following recipes!

Gluten Free Chocolate Lava Cake Recipe – Treat Indulgently
Description
A warm, gooey chocolate lava cake glistening on your table. It’s calling out for accompaniments that will elevate the experience. Just like a classic dinner always has an appetizer and dessert, you don’t want the lava cake to stand alone.
Pair it with a scoop of creamy vanilla ice cream, allowing the ice cream to melt slightly into the warm center of the cake. You could also serve it with fresh berries, like strawberries or raspberries, whose tartness balances the sweetness.
A dollop of whipped cream can add an airy texture alongside the richness of the cake. Lastly, consider a drizzle of salted caramel sauce to bring an added layer of flavor. Each of these options enhances the enjoyment of your gluten-free chocolate lava cake.
Ingredients
Instructions
Step 1: Preheat the Oven
-
Begin by preheating your oven to 425°F (220°C). This temperature ensures a beautifully cooked cake with the molten center we love.
Step 2: Prepare the Ramekins
-
Next, grab four ramekins and grease them generously with butter. This step will ensure the cakes slip out effortlessly after baking. Place them on a baking tray for easy handling.
Step 3: Melt the Chocolate and Butter
-
In a heatproof bowl, combine the chopped chocolate and butter. Place it over a pot of simmering water (double boiler method) and stir gently until melted. Alternatively, you can use the microwave. Just heat in 30-second bursts until smooth.
Step 4: Mix Eggs and Sugar
-
In another bowl, whisk together the eggs, egg yolks, and granulated sugar. You want the mixture to become pale and fluffy. This step incorporates air, vital for a light cake.
Step 5: Combine the Mixtures
-
Slowly pour the melted chocolate mixture into the egg mixture. Blend until perfectly combined. Be cautious not to scramble the eggs with hot chocolate.
Step 6: Add the Dry Ingredients
-
Next, sift in the gluten-free flour, cocoa powder, espresso powder, orange zest, and salt. Fold gently to combine, ensuring no lumps remain. Your batter is now ready!
Step 7: Pour into Ramekins
-
Divide the batter evenly among the prepared ramekins. Filling them about ¾ full will leave room for expanding during baking.
Step 8: Bake
-
Pop the tray into your preheated oven. Bake for 12-14 minutes. The edges should look firm, but the center will be soft. Keep an eye on them!
Step 9: Let Them Rest
-
Once baked, allow the cakes to rest for 1 minute. This tiny pause will help prevent them from collapsing when unmolded.
Step 10: Serve and Indulge
-
Carefully run a knife around the edges and invert onto plates. Dust with confectioners' sugar, and serve immediately. Enjoy the delightful flow of chocolate!
Nutrition Facts
Servings 4
- Amount Per Serving
- Calories 285kcal
- % Daily Value *
- Total Fat 21.8g34%
- Saturated Fat 12.6g63%
- Cholesterol 109mg37%
- Sodium 94mg4%
- Total Carbohydrate 22g8%
- Dietary Fiber 2g8%
- Sugars 17g
- Protein 3g6%
* Percent Daily Values are based on a 2,000 calorie diet. Your daily value may be higher or lower depending on your calorie needs.
Note
- Use High-Quality Chocolate: The chocolate is the star here, so choose a good quality dark or semi-sweet chocolate.
- Room Temperature Ingredients: Ensure your eggs and butter are at room temperature. This aids in smooth mixing and better texture.
- Monitor Baking Time: Every oven has its quirks. Start checking your cakes at 12 minutes to get that perfect gooey center.
- Try Different Flavors: Mix it up! Consider adding spices like cinnamon or cardamom for a unique flavor experience.
- Don’t Skip the Resting Time: Allowing the cake to rest for a minute after baking is crucial. It helps the cake set properly for easier serving.


