Have you ever sipped on a refreshing, chilled glass of limoncello while basking in the sun? Imagine the tangy flavors dancing on your palate, the burst of zesty lemon taking you straight to the Italian countryside. Pairing this delightful drink with some good food can elevate your experience even more.
Picture enjoying it alongside a rich tiramisu or drizzling it over a scoop of vanilla gelato. Even a simple slice of lemon cake can be a match made in heaven.
In this journey, we’ll dive into the art of making homemade limoncello. I’ll guide you through every step, share my experiences, and provide you with insider tips.
By the end of this article, you’ll be ready to impress your friends and family with your own batch of this Italian liqueur. So, grab your lemons, and let’s get started!

What is Homemade Limoncello?
Homemade limoncello is a delightful, sweet Italian lemon liqueur known for its bright, tangy flavor. Traditionally made from the peel of lemons, it captures the essence of fresh citrus, making it a perfect palate cleanser after meals.
While you can find store-bought varieties, nothing compares to the rich and vibrant taste of a homemade batch.
To prepare limoncello, you typically use high-proof alcohol like vodka, allowing the lemon peels to infuse their flavor. The result is a golden-yellow liqueur that is served ice-cold in small glasses. Some love it straight, while others enjoy it as a complement to dessert or mixed into cocktails.
What Does It Taste Like?
The taste of homemade limoncello is simply a refreshing revelation. It’s sweet with a robust tartness from the lemons. The zestiness evokes sunny days and warm nights. This drink is not only pleasing to the taste buds but also invigorates your spirit.
While sipping, you’ll notice the smoothness of the vodka combined with the zingy kick of lemon. It’s as if the sun has squeezed itself into your glass. And the best part? It’s a burst of flavor that can be enjoyed straight from the freezer.
Why This Recipe Works
When I set out to craft my limoncello recipe, I didn’t want it to fall flat. After years of experimentation, I can say this approach delivers every time. Here’s why:
1. Fresh Ingredients Matter
Using fresh lemons is crucial. When you’re selecting your lemons, opt for organic ones. They’re free from pesticides and have the brightest zest. The zest contains the essential oils that bring out the lemon flavor. Trust me, you want that authentic taste.
2. The Right Alcohol Makes a Difference
For limoncello, I always choose a high-proof vodka, as its neutral taste perfectly complements the lemon flavors. The higher alcohol content allows better extraction of the essence from the peels, leading to a fuller flavor profile. Avoid vodka with added flavors; stick to a pure product for the best results.
3. Patience Pays Off
Good things come to those who wait. The infusion process requires time. I recommend letting it steep for at least two weeks. This period allows the vodka to fully absorb the lemon zest’s vibrant flavors. You’ll notice a marked improvement in taste compared to shorter infusions.
4. Balance is Key
The right sweetness is essential. That’s where sugar comes into play. Finding the perfect balance between the tartness of the lemons and the sweetness of the sugar is an art form. The recipe I share will ensure you get that delightful equilibrium in every sip.
Ingredients For Homemade Limoncello
Here’s what you’ll need to whip up your very own limoncello:
- 1 bottle (750 ml) vodka
- 2 to 3 sprigs of fresh thyme
- 1 teaspoon vanilla extract
- 10 fresh organic lemons
- 1 to 4 cups of granulated sugar

Step by Step Instructions
Now, let’s get down to the nitty-gritty of how to make this delightful drink.
Step 1: Prepare the Lemons
Start by washing your lemons thoroughly. If possible, choose unwaxed lemons for the best flavor.
Using a vegetable peeler, remove the yellow zest from the lemons, being careful to avoid the bitter white pith underneath. Place the zest into a large glass jar.
Step 2: Add the Vodka
Pour the vodka over the lemon peels in the jar. Make sure the zest is fully submerged. Seal the jar tightly and give it a gentle shake. This step isn’t just to stir things up; it ensures the flavors start to mingle immediately.
Step 3: Infuse the Flavors
Store the jar in a cool, dark place. Let it sit for about 2 weeks, shaking it gently every couple of days. You won’t believe how lovely that smell is as the lemons infuse!
Step 4: Make the Simple Syrup
After the infusion period, it’s time to prepare the simple syrup. In a saucepan, combine 1 cup of sugar with 1 cup of water. Heat gently, stirring until the sugar has fully dissolved.
You can taste as you go, adjusting the sweetness by adding more sugar if desired. Once done, allow it to cool completely.
Step 5: Strain and Combine
After your infusion period, strain the lemon-infused vodka through a fine mesh sieve or cheesecloth into another clean container to remove the peels.
Combine the strained liquid with the cooled simple syrup. Stir well to incorporate.
Step 6: Chill and Serve
Bottle your homemade limoncello in clean, sterilized glass bottles. Let it sit for an additional week in the fridge to marry the flavors. Finally, serve it chilled from the freezer. Enjoy the delight of your creation!
Notes
Making limoncello is a fun project, but here are some tips to enhance your experience:
- Use a good quality vodka: It impacts the final flavor. Don’t settle for the cheapest option.
- Stick to fresh lemons: Their zest is more flavorful than bottled alternatives.
- Experiment with herbs: Thyme adds a unique twist if you want to try something different.
- Taste test: Adjust sugar levels as needed. Everyone’s sweetness threshold is different!
- Bottle carefully: Strain efficiently to avoid any leftover bits that could spoil the aesthetic.
How To Store The Leftovers?
If you’re lucky enough to have any limoncello left after a gathering, store it in a cool, dark place or, for longer shelf life, just keep it in the freezer.
Limoncello doesn’t freeze because of the alcohol content. It’s best enjoyed chilled, so having it in the freezer is perfect!
Sides for Homemade Limoncello
What should you serve alongside limoncello? Here are some complimentary dishes to consider:
1. Tiramisu
Everybody loves tiramisu—who can resist its rich flavors? The creamy coffee and cocoa notes contrast beautifully with the zesty limoncello. After a heavy meal, a light sip of limoncello will cleanse the palate.
2. Lemon Tart
The citrusy flavors of a lemon tart heighten the experience of limoncello. The balance between the sweet, crispy crust and tart filling harmonizes elegantly with the drink.
3. Gelato
Pairing limoncello with gelato creates a refreshing dessert. Whether you opt for classic vanilla or refreshing lemon gelato, the combination will have your taste buds dancing.
4. Ricotta Cheesecake
A slice of ricotta cheesecake enhances your limoncello experience. The creaminess of the cheesecake complements the bright notes of the liqueur, making each bite a joy.
Alternative Choices for Ingredients
What if you find yourself short on some of the ingredients? Don’t worry! Here are alternative choices:
1. Vodka Substitutes
If vodka isn’t available, you can use a high-proof grain alcohol like Everclear. It’s strong but effective for infusions.
2. Sugar Alternatives
For a healthier touch, try using honey or agave nectar. These natural sweeteners provide a different flavor profile but work well in drinks.
3. Lemons for Zest
In a pinch, you can use bottled lemon juice, but freshness is always best. Try using clementines for a different citrus taste too.
4. Herbal Infusions
If you want to switch things up with herbs, consider using rosemary or basil. Both have unique flavors that can add a new layer to your limoncello.

Conclusion
Making homemade limoncello is a delightful experience that opens the door to Italian culinary tradition. With simple ingredients and a bit of patience, you can create something truly special. The next time you gather with friends or family, surprise them with your own batch.
It’s more than just a drink; it’s a celebration of creativity, a splash of sunshine, and a great way to bring people together. So, take this recipe, get those lemons, and let your limoncello journey begin! Cheers!
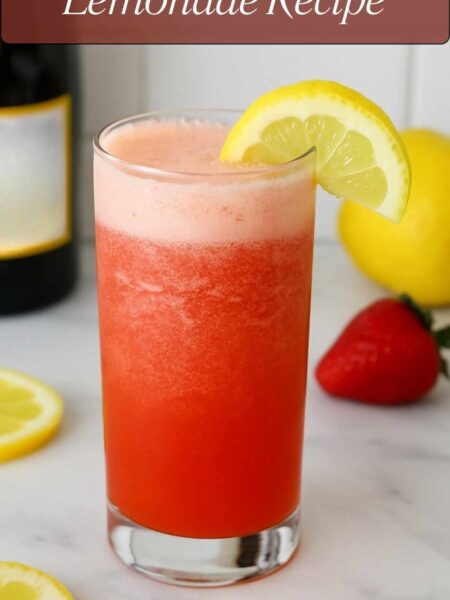
You’ll also like the following recipes!
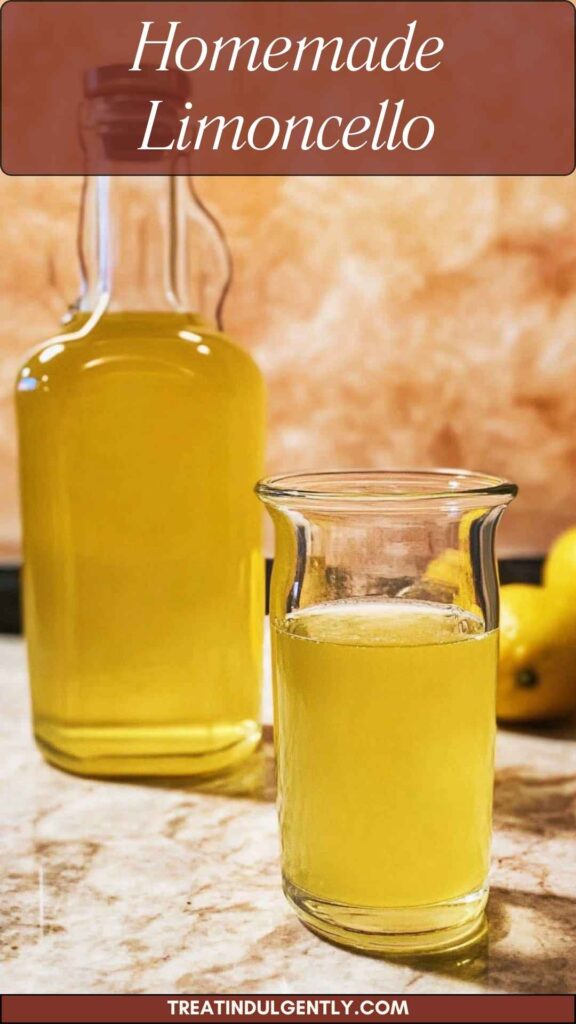

Homemade Limoncello – Treat Indulgently
Description
Have you ever sipped on a refreshing, chilled glass of limoncello while basking in the sun? Imagine the tangy flavors dancing on your palate, the burst of zesty lemon taking you straight to the Italian countryside. Pairing this delightful drink with some good food can elevate your experience even more.
Picture enjoying it alongside a rich tiramisu or drizzling it over a scoop of vanilla gelato. Even a simple slice of lemon cake can be a match made in heaven.
Ingredients
Instructions
Step 1: Prepare the Lemons
-
Start by washing your lemons thoroughly. If possible, choose unwaxed lemons for the best flavor.
Using a vegetable peeler, remove the yellow zest from the lemons, being careful to avoid the bitter white pith underneath. Place the zest into a large glass jar.
Step 2: Add the Vodka
-
Pour the vodka over the lemon peels in the jar. Make sure the zest is fully submerged. Seal the jar tightly and give it a gentle shake. This step isn't just to stir things up; it ensures the flavors start to mingle immediately.
Step 3: Infuse the Flavors
-
Store the jar in a cool, dark place. Let it sit for about 2 weeks, shaking it gently every couple of days. You won’t believe how lovely that smell is as the lemons infuse!
Step 4: Make the Simple Syrup
-
After the infusion period, it’s time to prepare the simple syrup. In a saucepan, combine 1 cup of sugar with 1 cup of water. Heat gently, stirring until the sugar has fully dissolved.
You can taste as you go, adjusting the sweetness by adding more sugar if desired. Once done, allow it to cool completely.
Step 5: Strain and Combine
-
After your infusion period, strain the lemon-infused vodka through a fine mesh sieve or cheesecloth into another clean container to remove the peels.
Combine the strained liquid with the cooled simple syrup. Stir well to incorporate.
Step 6: Chill and Serve
-
Bottle your homemade limoncello in clean, sterilized glass bottles. Let it sit for an additional week in the fridge to marry the flavors. Finally, serve it chilled from the freezer. Enjoy the delight of your creation!
Nutrition Facts
Servings 8
- Amount Per Serving
- Calories 63kcal
- % Daily Value *
- Total Fat 0.1g1%
- Sodium 1mg1%
- Total Carbohydrate 17g6%
- Sugars 14g
* Percent Daily Values are based on a 2,000 calorie diet. Your daily value may be higher or lower depending on your calorie needs.
Note
- Use a good quality vodka: It impacts the final flavor. Don’t settle for the cheapest option.
- Stick to fresh lemons: Their zest is more flavorful than bottled alternatives.
- Experiment with herbs: Thyme adds a unique twist if you want to try something different.
- Taste test: Adjust sugar levels as needed. Everyone’s sweetness threshold is different!
- Bottle carefully: Strain efficiently to avoid any leftover bits that could spoil the aesthetic.