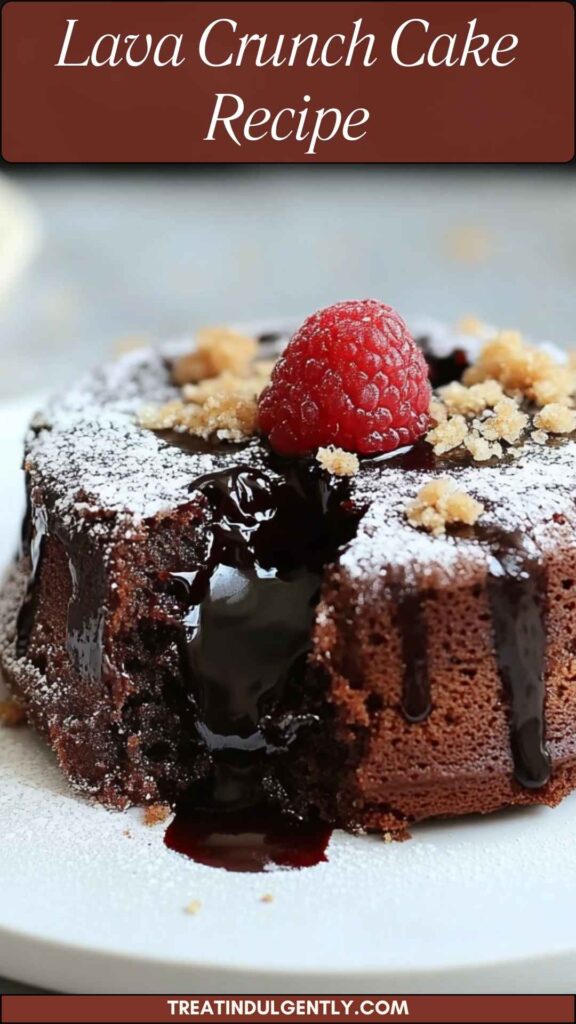
Let me take you on a delightful culinary journey. Picture this: you’re at a gathering, perhaps a celebration, and someone presents a dessert that steals the show. It glistens, inviting a fork to dive in. That dessert, my friends, is none other than lava crunch cake. It’s not just a treat; it’s an experience.
This cake is a chocolate lover’s dream come true with its rich flavor and an irresistible gooey center that oozes out with every bite. I’ve spent years perfecting this recipe and can assure you, it’s a crowd-pleaser.
From birthdays to holidays, anytime you serve lava crunch cake, it’s like bringing a piece of magic to your table. Why? Because no one can resist that warm, flowing chocolate center. It’s no surprise that it’s become a favorite in my family and among my friends. The recipe is straightforward, yet it brings pure joy to every occasion.
What is Lava Crunch Cake?
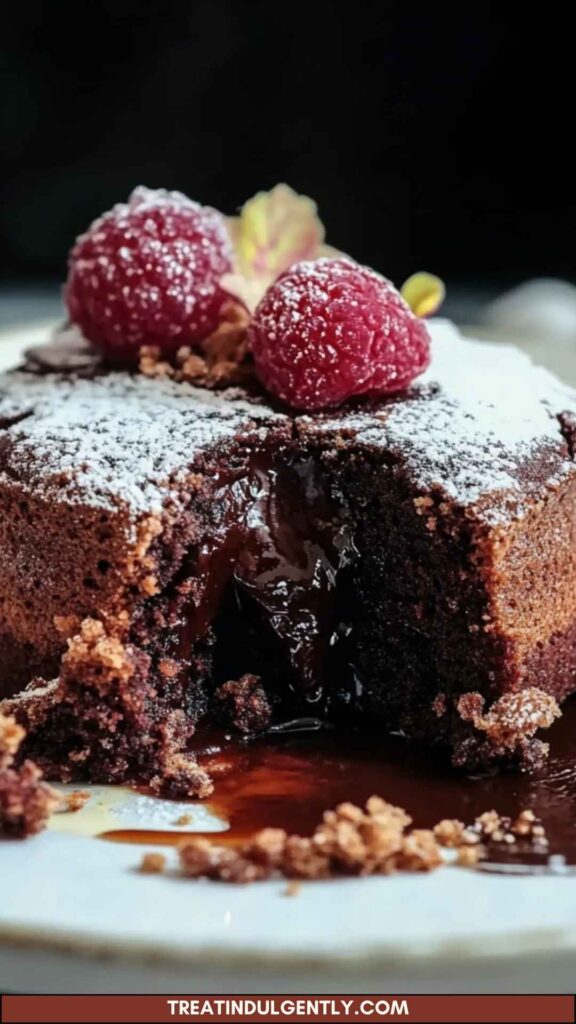
Lava crunch cake is a dessert that marries chocolate cake and molten chocolate. The outer layer is firm, yielding to reveal a rich, flowing center. The cake boasts a slight crunch around the edges, hence the name.
The concept stems from the classic molten chocolate cake. However, this version enhances the textural contrast, creating something special.
You might be wondering how this creation came to be. The idea of blending different textures made sense to me one day when I was experimenting with chocolate recipes. I wanted something indulgent, but with a twist. Thus, the lava crunch cake was born, designed to surprise and delight.
What is the Flavor Profile of This Dish?
The flavor profile of lava crunch cake is nothing short of captivating. At first bite, you experience the richness of dark chocolate, deep and decadent.
As it melts in your mouth, the warm chocolate center bursts forth, echoing the intense chocolate flavor. The butter adds a luscious creaminess, while the hint of vanilla and espresso deepens the overall taste.
Imagine the experience: the sweetness combined with a touch of bitterness from the dark chocolate creates a well-rounded profile. The subtle saltiness balances the sugar, making every bite harmonious. It’s like a dance on your palate—sweet, rich, warm, and oh-so-indulgent.
Why You’ll Love This?
What’s not to love? If you’re a chocolate lover, this cake is practically a hug in dessert form. Its warm, gooey center ensures each forkful is a new experience. The best part? It’s easy to whip up. You can impress guests without spending hours in the kitchen. This dish is exceptionally versatile. It’s perfect for a family dinner, a birthday celebration, or even a cozy night in.
Plus, it’s a dessert that delivers on quality and taste without being overly complicated. You might even find yourself making it on a whim. After all, who could resist that melting, rich chocolate goodness?
Ingredients
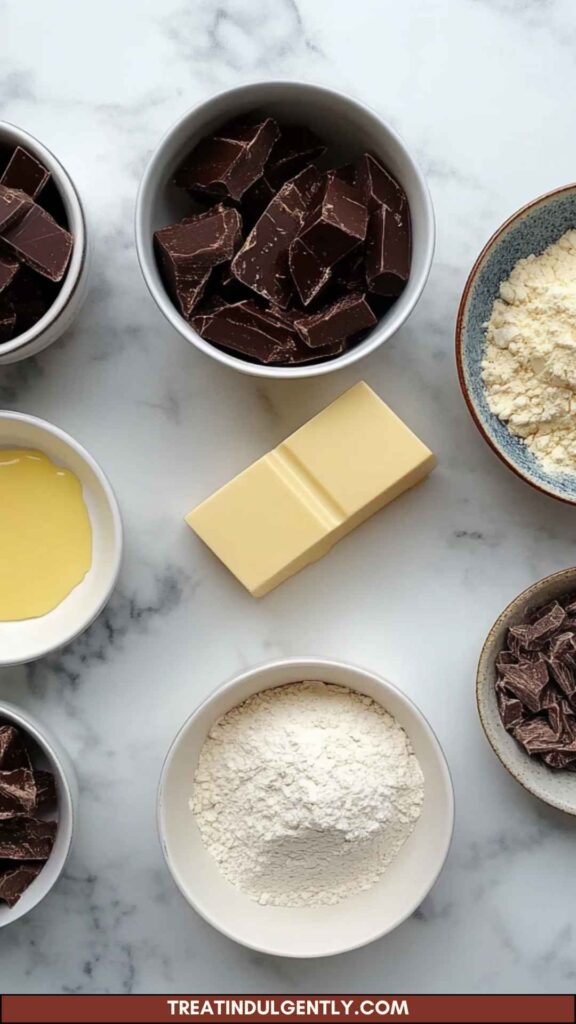
Here is what you will need to create this magical dessert:
- 3 large eggs
- 1 cup granulated cane sugar
- 1/4 teaspoon sea salt
- 4 tablespoons all-purpose flour
- 1 1/4 sticks of unsalted butter, softened
- 1 cup coarsely chopped dark chocolate
- 1 teaspoon vanilla extract
- 1/4 teaspoon espresso powder
These ingredients combine to create the indulgent chocolate flavor that makes lava crunch cake a delight.
Step-by-Step Instructions
Step 1: Preheat the Oven
First, preheat your oven to 425°F (220°C). This ensures that your lava crunch cake bakes evenly and rises perfectly. While this is happening, prepare your baking dish. Grease it well to prevent sticking.
Step 2: Prepare the Chocolate Mixture
In a microwave-safe bowl, combine the coarsely chopped dark chocolate and softened unsalted butter. Microwave them in 20-30 second intervals, stirring after each, until fully melted. This usually takes about 1 to 2 minutes. Be careful not to overheat the mixture; it should be smooth and consistent.
Step 3: Whisk the Eggs and Sugar
In a mixing bowl, whisk together the eggs, granulated sugar, and sea salt. Whisk until the mixture becomes pale and thick. This step is crucial; it incorporates air, which will help with the cake’s texture.
Step 4: Combine the Chocolate and Eggs
Once the chocolate mixture has cooled slightly, add it to the egg mixture. Stir gently until combined. It’s vital not to cook the eggs with hot chocolate, so just take your time here.
Step 5: Fold in the Dry Ingredients
Next, sift the all-purpose flour, vanilla extract, and espresso powder into the wet mixture. Carefully fold these in until you see no more dry flour. Remember, overmixing can lead to a dense cake, which we definitely don’t want!
Step 6: Pour into Baking Dish
Pour the batter into your prepared baking dish. This might be a ramekin or a muffin tin if you want individual servings. Be sure to fill them only halfway to allow for rising.
Step 7: Bake
Now, it’s time to bake. Place your baking dish in the preheated oven and bake for approximately 12-14 minutes. You want the edges to be firm, but the center should still jiggle slightly when you shake the pan.
Step 8: Let it Rest
Once baked, remove the cake from the oven. Let it rest for about 2 minutes. This step allows the cake to firm up while retaining its lava-like center.
Step 9: Serve
Carefully invert the baking dish onto a plate. Gently release the cake by tapping it if necessary. Serve immediately while it’s warm. Top it with ice cream, fresh berries, or a dusting of powdered sugar.
Tips & Tricks
- Use quality chocolate: A good quality dark chocolate makes all the difference. Look for something above 60% cocoa for depth of flavor.
- Don’t overbake: This is key. Every oven is different; check on your cake a minute or two before the suggested time.
- Prep in advance: You can prepare the batter and chill it until you’re ready to bake. This allows flavors to meld beautifully.
- Experiment with flavors: Add orange zest or mint extract for a twist. Don’t shy away from creativity!
- Perfect serving temperature: For the ideal lava effect, serve right after inverting the cake.
Nutrition Information
Each serving contains approximately:
- Calories: 300
- Fat: 18g
- Carbohydrates: 35g
- Protein: 5g
These values can vary based on ingredients used. Always consider portion size when indulging.
How Can You Store This Lava Crunch Cake?
Store leftovers in an airtight container in the refrigerator for up to 3 days. When it’s time to enjoy it again, gently reheat it in the microwave for about 15 seconds. The chocolate will regain its gooey texture, making it just as delightful as the first serve.
Ingredient Alternatives
Sometimes, you run out of an ingredient. No worries! Here are some substitutes:
- Butter: You can use coconut oil as a dairy-free option. It provides moisture while enhancing the flavor.
- Dark chocolate: If you have semi-sweet chocolate on hand, it will work, though it’ll make the cake a bit sweeter. Adjust sugar if needed.
- Eggs: If you’re looking for a vegan alternative, try using flax eggs. For each egg, mix 1 tablespoon of ground flaxseed with 3 tablespoons of water, letting it sit until it thickens.
Conclusion
Lava crunch cake is more than a dessert; it’s an experience filled with joy and warmth. With its rich chocolatey goodness and gooey center, it promises to be a highlight at any gathering. Easy to prepare and endlessly customizable, this cake will have your family and friends coming back for more.
Now, armed with this know-how, it’s time for you to share the magic. Bake it, enjoy it, and watch as it transforms your gatherings into sweet memories. Whether you keep it simple or dress it up, this lava crunch cake is bound to be a winner. So, what are you waiting for? Get baking!
You’ll also like the following recipes!
- Pampered Chef Lava Cake Copycat Recipe
- How to Make Mini chocolate lava cake
- Best Microwave Lava Cake Recipe

Lava Crunch Cake Recipe – Treat Indulgently
Description
When you're diving into the mouthwatering world of lava crunch cake, consider pairing it with a scoop of vanilla ice cream. The cold creaminess beautifully balances the warm, gooey chocolate center.
Fresh berries, such as raspberries or strawberries, also make a delightful complement. They add a tart contrast that cuts through the richness of the cake. For a more decadent experience, drizzle some salted caramel sauce on top. This combination will elevate your dessert game to extraordinary heights.
Ingredients
New Ingredients:
Instructions
Step 1: Preheat the Oven
-
First, preheat your oven to 425°F (220°C). This ensures that your lava crunch cake bakes evenly and rises perfectly. While this is happening, prepare your baking dish. Grease it well to prevent sticking.
Step 2: Prepare the Chocolate Mixture
-
In a microwave-safe bowl, combine the coarsely chopped dark chocolate and softened unsalted butter. Microwave them in 20-30 second intervals, stirring after each, until fully melted. This usually takes about 1 to 2 minutes. Be careful not to overheat the mixture; it should be smooth and consistent.
Step 3: Whisk the Eggs and Sugar
-
In a mixing bowl, whisk together the eggs, granulated sugar, and sea salt. Whisk until the mixture becomes pale and thick. This step is crucial; it incorporates air, which will help with the cake's texture.
Step 4: Combine the Chocolate and Eggs
-
Once the chocolate mixture has cooled slightly, add it to the egg mixture. Stir gently until combined. It’s vital not to cook the eggs with hot chocolate, so just take your time here.
Step 5: Fold in the Dry Ingredients
-
Next, sift the all-purpose flour, vanilla extract, and espresso powder into the wet mixture. Carefully fold these in until you see no more dry flour. Remember, overmixing can lead to a dense cake, which we definitely don't want!
Step 6: Pour into Baking Dish
-
Pour the batter into your prepared baking dish. This might be a ramekin or a muffin tin if you want individual servings. Be sure to fill them only halfway to allow for rising.
Step 7: Bake
-
Now, it’s time to bake. Place your baking dish in the preheated oven and bake for approximately 12-14 minutes. You want the edges to be firm, but the center should still jiggle slightly when you shake the pan.
Step 8: Let it Rest
-
Once baked, remove the cake from the oven. Let it rest for about 2 minutes. This step allows the cake to firm up while retaining its lava-like center.
Step 9: Serve
-
Carefully invert the baking dish onto a plate. Gently release the cake by tapping it if necessary. Serve immediately while it’s warm. Top it with ice cream, fresh berries, or a dusting of powdered sugar.
Nutrition Facts
Servings 4
- Amount Per Serving
- Calories 300kcal
- % Daily Value *
- Total Fat 18g28%
- Total Carbohydrate 35g12%
- Protein 5g10%
* Percent Daily Values are based on a 2,000 calorie diet. Your daily value may be higher or lower depending on your calorie needs.
Note
- Use quality chocolate: A good quality dark chocolate makes all the difference. Look for something above 60% cocoa for depth of flavor.
- Don't overbake: This is key. Every oven is different; check on your cake a minute or two before the suggested time.
- Prep in advance: You can prepare the batter and chill it until you’re ready to bake. This allows flavors to meld beautifully.
- Experiment with flavors: Add orange zest or mint extract for a twist. Don’t shy away from creativity!
- Perfect serving temperature: For the ideal lava effect, serve right after inverting the cake.


