

Ingredients
Method
Step 1: Build Your Foundation Dough
- Start by preparing your workspace. You'll need a stand mixer with a dough hook attachment—while you can mix by hand, a stand mixer teaches you consistent kneading pressure, which is valuable for understanding dough development. If you don't have one, a handheld electric mixer works, though you'll need to finish by hand. Cut 4 tablespoons of softened unsalted butter into four equal pieces and place them in your mixer bowl. Add 3 and ½ cups of all-purpose flour (spooned and leveled—this is critical for proper hydration), ¼ cup granulated sugar, 2 teaspoons fine sea salt, and 1 tablespoon of your yeast. Turn the mixer to low-medium speed and let it run for exactly 1 minute. You're not trying to blend everything completely; you're distributing the yeast evenly so it activates uniformly throughout the dough. This prevents some areas from fermenting faster than others, which would compromise your lamination. With the mixer running, slowly pour in 1 and ½ cups of cold whole milk. Pour steadily but deliberately—rushing this step can cause lumps. Once all the milk is incorporated, increase the mixer speed to medium and begin kneading proper.
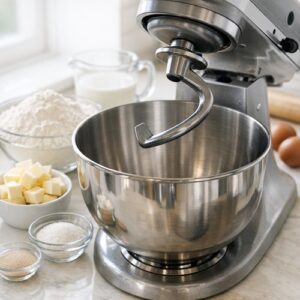
Step 2: Knead for Gluten Development
- Let your mixer run for a full 5 minutes. This is non-negotiable. You're not trying to develop maximum gluten like you would for bread—that would make your dough too elastic and difficult to laminate. Instead, you're developing enough gluten structure to hold the butter without tearing during folds, but leaving the dough slightly extensible and forgiving. If the dough feels sticky during kneading, sprinkle 1 teaspoon of flour at a time directly onto the dough or into the bowl. Add flour gradually. I cannot overstate this: you're better off with a slightly tacky dough than a dry one. Dry dough becomes brittle and cracks during lamination. After 5 minutes of kneading, perform the windowpane test. Tear off a piece roughly the size of a golf ball and gently stretch it between your fingers. Hold it up to a window or light source. If light passes through the stretched dough without it tearing, you've developed sufficient gluten. If it tears, continue kneading for another minute and test again. The dough should feel soft and slightly tacky when you press it with your finger—it should slowly bounce back rather than staying indented. This tells you the gluten is developed but the dough isn't overworked.
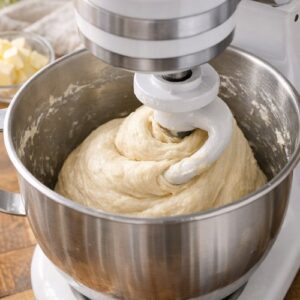
Step 3: Prepare the Dough for Its First Rest
- Remove the dough from the mixer bowl and, with lightly floured hands, shape it into a loose ball. I highly recommend using a silicone baking mat for this entire process—the non-stick surface prevents the dough from sliding during rolling, and the mat itself provides a visual measurement guide. Place your dough ball on the silicone mat and gently flatten it with your palms into a rough rectangle shape, about ½-inch thick. Cover the dough with plastic wrap or aluminum foil to prevent it from drying out. Transfer the entire mat to your refrigerator and allow the dough to rest for exactly 30 minutes. This rest is when gluten relaxes. The yeast begins slowly fermenting during this time, which develops flavor. You're not trying to achieve significant rise yet—that comes later. This is purely about relaxation and flavor development.

Step 4: Shape Your Dough for Lamination
- Remove your dough from the refrigerator. Don't let it come to room temperature—it should still feel cool to the touch. Using your hands first, begin flattening and stretching the dough gently. The dough will feel like soft play-dough at this stage because it's been chilling but not deeply frozen. Using a rolling pin and working on your silicone mat, roll the dough into a precise 14 by 10-inch rectangle. Precision matters here because consistent thickness ensures even lamination. The dough will want to be oval-shaped and will resist—this is normal. Keep working the edges with your hands and rolling pin, allowing the dough to rest for 30 seconds every minute or so if it starts resisting too heavily. This prevents overworking and maintains extensibility. Once you've achieved your 14 by 10-inch rectangle, take a moment to admire what you've created. This is your foundation for lamination.

Step 5: Prepare Your Lamination Butter Block
- This is a critical step that many recipes gloss over. You need to create a butter block that's pliable but firm—soft enough to spread without tearing, but cold enough to maintain its shape. Take 1 and ½ cups of unsalted butter at room temperature (this is around 68-70°F, which is cooler than a warm kitchen but warmer than straight from the refrigerator). Add 2 tablespoons of all-purpose flour to the butter. Using a rubber spatula or your hands, work the flour into the butter until completely incorporated. The flour prevents the butter from sliding around when you fold the dough. Pat this butter mixture into a 9 by 8-inch rectangle on a piece of parchment paper. If your kitchen is warm, you can refrigerate this for 10 minutes to firm it up slightly. The butter should be consistently soft throughout—there should be no hard or cold spots. Press it gently; your finger should leave a slight indent that fills back in slowly.
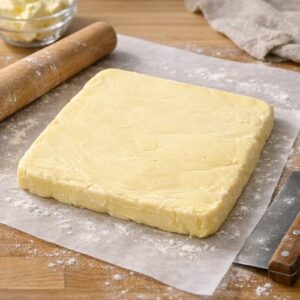
Step 6: Execute Your First Lamination Fold (Book Fold)
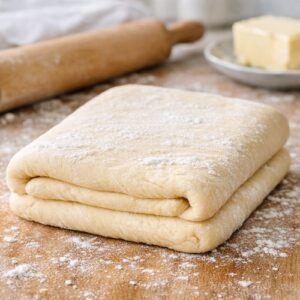
- This is where the magic begins. Place your 14 by 10-inch dough rectangle on your work surface. Position your butter block in the center of the dough, leaving equal margins on all sides. Fold the left third of the dough over the butter, then fold the right third over that, creating three layers of dough with butter in between. You've now created what's called a "book fold"—and you've trapped butter between dough layers for the first time. Press the edges gently to seal. Rotate this folded dough 90 degrees (so what was facing left now faces you). You're about to perform your second book fold. Before you do, press the package gently with the rolling pin to even out any air pockets. Then roll the package into another 14 by 10-inch rectangle. Fold left third over center, right third over that. You've now completed two book folds, creating multiple layers of butter and dough. Wrap this in plastic and refrigerate for 30 minutes on a baking sheet. This rest allows gluten to relax again and butter to firm up.

Step 7: Complete Your Lamination Sequence
- Remove your dough from the refrigerator. It will feel firmer now—this is perfect. Rotate 90 degrees and perform two more book folds exactly as you did before, rolling to 14 by 10 inches each time, folding left-center-right each time. After the fourth fold total, wrap and refrigerate for another 30 minutes. Complete your final lamination round: two more book folds after the 30-minute rest. You've now performed six book folds total, which creates 729 individual layers of butter and dough. This is why laminated dough feels so special when you bite into it. After your final folds, refrigerate the dough for at least 2 hours, preferably overnight. This extended rest is essential—it allows the dough to fully relax and the butter to become completely firm and distinct from the dough.
Step 8: Shape Into Croissants
- Remove your dough from the refrigerator. It should feel firm and cold. Place it on your silicone mat and, with a sharp knife or pastry cutter, cut it into triangles. Each triangle should have a base of about 4 inches and a height of about 7 inches. Place each triangle on your work surface. Starting from the base, gently roll it toward the point, creating tension that helps the croissant maintain its shape during baking. As you reach the point, tuck it slightly under the croissant. The tension you create in the dough determines whether your croissant puffs into a beautiful crescent or spreads flat. Place shaped croissants on parchment-lined baking sheets, curving them slightly into crescent shapes. Cover loosely with plastic wrap and allow them to proof at room temperature for 2 to 3 hours, until they're visibly puffy and airy to the touch.

Step 9: Apply Your Egg Wash and Bake
- Preheat your oven to 400°F. Whisk together 1 large egg and 2 tablespoons of whole milk. Brush this mixture gently onto each croissant—the egg proteins will set and create that gorgeous golden-brown exterior. Don't brush too aggressively or you'll deflate your carefully proofed croissants. Bake for 18 to 22 minutes, until the croissants are deep golden brown and sound crispy when you tap them. The exterior should shatter when you bite into it, and you should see distinct layers. If your croissants are browning too quickly, tent with foil after 12 minutes. Allow them to cool on a wire rack for at least 10 minutes before serving. They'll continue to firm up as they cool, and the layers will become even more pronounced.

Notes
- Greasy, Slick Dough with Visible Butter Streaks - your butter was too warm or too soft when you began laminating. The butter smeared into the dough instead of creating layers. Next time, ensure your butter block is at exactly 65-70°F and your kitchen is cool (under 70°F if possible). If you're in a warm climate, work with shorter time windows and refrigerate more frequently.
- Croissants That Spread Flat Instead of Puffing - this usually means insufficient tension during shaping or over-proofing before baking. When you roll your triangles, create deliberate tension by rolling firmly. Also, reduce proofing time slightly (aim for puffy but not jiggly). Your proofed croissants should feel airy when gently poked but still have some firmness.
- Dense, Compact Croissants Without Visible Layers - your folds were compressed too heavily, squishing out the butter pockets. Apply lighter pressure during rolling and folding. Let the dough rest for 30 seconds every minute during rolling. Your rolling pin should glide gently, not press aggressively.
- Croissants That Brown Unevenly or Burn at Edges - your oven temperature is too high or your baking sheet placement is off. Use an oven thermometer to verify actual temperature. Rotate your baking sheets halfway through baking. If edges brown before the top, move your sheet to a lower oven rack for the remaining time.
- Dough That Resists Rolling or Tears During Folding - you've developed too much gluten or didn't allow adequate rest between folds. Reduce kneading time by 30 seconds on your next batch. Always rest for full 30 minutes between fold sequences, and don't skip the overnight rest before shaping.