
This post contains affiliate links. As an Amazon Associate I earn from qualifying purchases.

Learning to make butter croissants isn’t just about creating one sublime pastry—it’s about mastering the lamination technique that will unlock dozens of other recipes in your kitchen forever. Once you understand how to create those delicate, shattering layers of butter and dough, you’ll be able to confidently make everything from braided brioche to chocolate-filled pain au chocolat. I’ve watched this single technique transform home bakers from hesitant to genuinely confident, and I’m thrilled to teach you exactly how I do it.
Master the Lamination Technique (And Never Struggle With Layered Pastries Again)
I’ll never forget the morning my grandmother pulled a sheet of golden croissants from her oven in her small kitchen outside San Juan. I was maybe seven years old, and I watched her fold butter into dough with the precision of someone who understood something sacred about the process. She didn’t rush. She didn’t overthink it. She simply knew, in her hands, exactly when the dough was ready to fold again. That moment stayed with me through culinary school and into my practice as a registered dietitian. I realized much later that what she was teaching me went beyond technique—she was showing me how to be present, patient, and purposeful in the kitchen.
Lamination is the art of creating hundreds of paper-thin layers of butter and dough through a series of strategic folds and rests. It’s not complicated, but it does demand your attention and respect. The butter must be cold but pliable, the dough must be properly hydrated, and timing must be honored. When these elements align, you create something that feels like magic: a pastry that shatters under your teeth and reveals layer upon layer of buttery richness.
The Core Technique Explained
At its heart, lamination is about creating a controlled distribution of solid fat within dough through repeated folding. Here’s the science: when you encase cold butter between layers of dough and then fold that package strategically, you’re not trying to blend the butter into the dough. Instead, you’re maintaining separation. As the dough bakes, water in the dough creates steam, which pushes the layers apart. The butter, now melted, leaves behind pockets of air. This is what creates those signature shattered layers.
The technique requires understanding dough temperature and gluten development. Your dough needs enough gluten structure to hold the butter without tearing, but not so much that it becomes tough and elastic. The resting periods—which many home bakers try to skip—are when gluten relaxes and dough becomes extensible enough to fold without resistance. Temperature control is equally critical. If your butter is too soft, it’ll smear into the dough instead of creating distinct layers. If it’s too hard, it’ll crack and break apart during folding.
This is why I always emphasize the importance of working in a cool kitchen and taking your time. There’s genuine nutrition science supporting this too: the lamination process, when done properly, creates a dough structure that your digestive system can more easily process compared to heavily worked, dense doughs.
What This Technique Unlocks
Once you master lamination, your pastry repertoire expands exponentially. You’ll approach any layered dough recipe with confidence, knowing you’ve trained your hands and your instincts. Here are some of the magnificent recipes waiting for you:
- Danish Pastries – uses identical lamination but allows for sweet fillings and glazes
- Pain au Chocolat – laminated dough with chocolate bars, a natural progression from croissants
- Puff Pastry – an even more intensively laminated dough that creates more dramatic shattering
- Kouign-Amann – caramelized laminated pastry that teaches you how sugar interacts with layered dough
- Mille-Feuille – showcases your laminated dough layers as the star ingredient
- Croissant aux Amandes – croissants topped with almond cream, building on your base technique
The Ingredients – Chosen to Teach the Technique
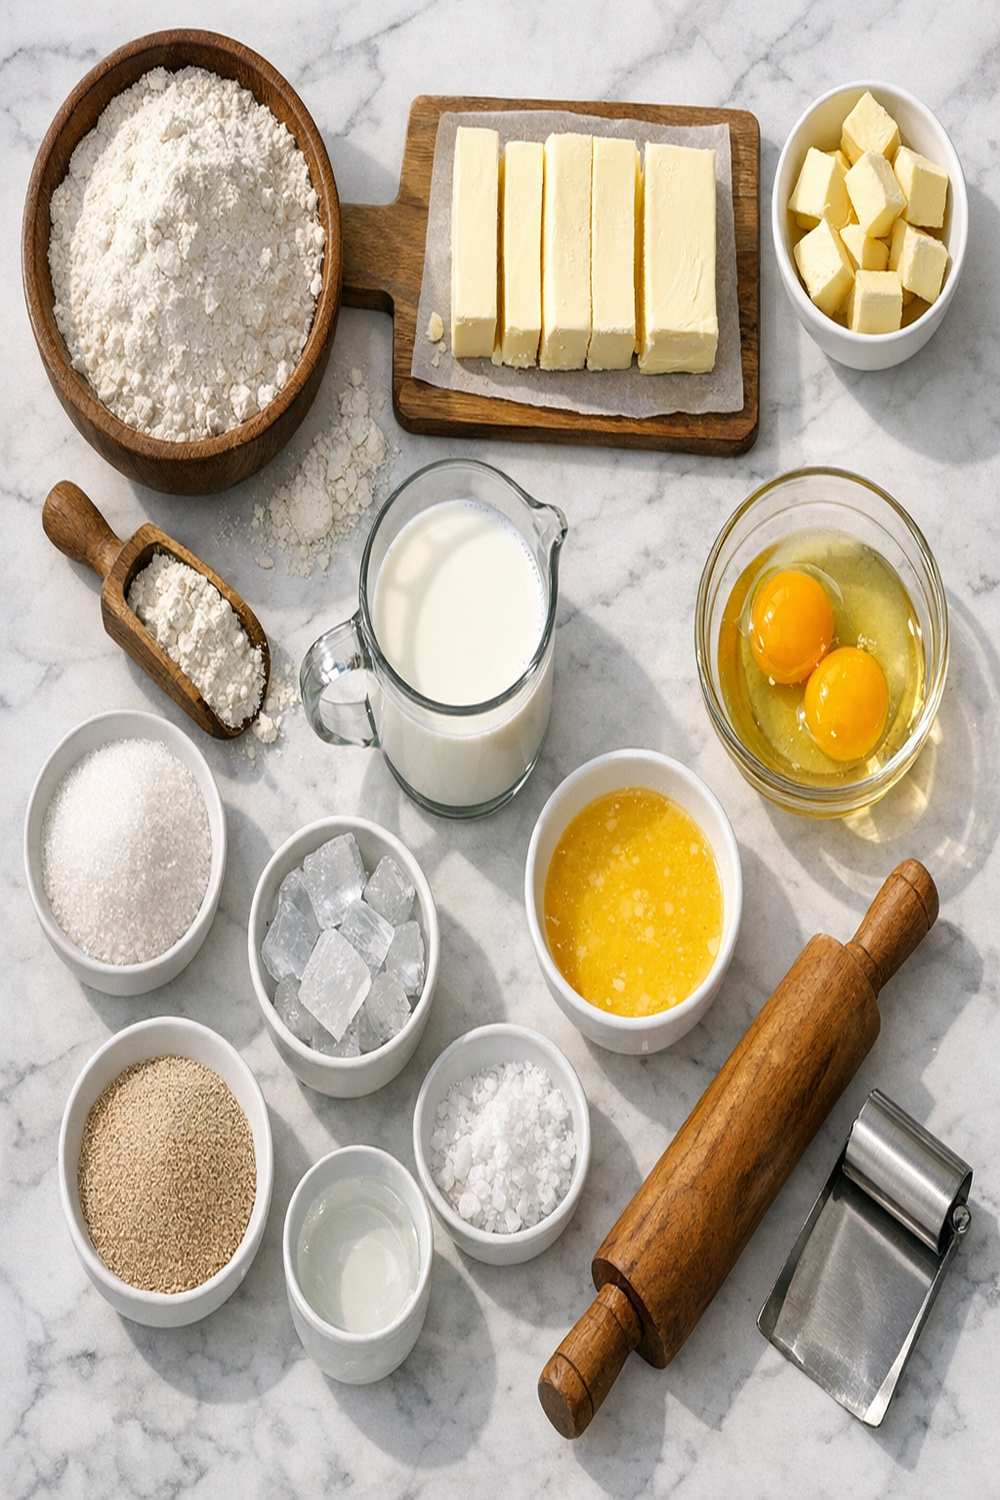
Every ingredient in this recipe serves a specific teaching purpose. I’ve intentionally chosen high-quality components because lamination demands excellence at every step. When you’re working with premium ingredients, you develop respect for the process. You slow down. You pay attention.
For the Dough Base
- 2 teaspoons fine sea salt (controls fermentation speed and strengthens gluten)
- 1 and ½ cups cold whole milk (full-fat dairy creates richer flavor and better dough extensibility)
- 1 tablespoon active dry yeast or instant yeast (teaches you dough fermentation timing)
- ¼ cup granulated sugar (provides food for yeast and mild sweetness that doesn’t overpower butter)
- 4 tablespoons unsalted butter at room temperature (preliminary enrichment that’s distinct from lamination butter)
- 3 and ½ cups all-purpose flour (spooned and leveled, never packed—this measurement directly affects hydration balance)
For the Lamination
- 1 and ½ cups unsalted butter at room temperature (this is your primary lamination agent—quality matters immensely here, and I recommend European-style butter with higher fat content)
- 2 tablespoons all-purpose flour (prevents butter from sliding around during lamination)
For Assembly and Finish
- 2 tablespoons whole milk (creates glossy, golden finish during baking)
- 1 large egg (room temperature for your egg wash)
- Additional flour for dusting and shaping (throughout the process)
Expert’s Nutritional Tip: As a registered dietitian, I want to acknowledge that croissants are an indulgent treat, not an everyday food. However, the lamination process creates a pastry structure that’s surprisingly digestible compared to dense, heavily kneaded doughs. The extended fermentation time allows beneficial bacteria to begin breaking down gluten, and the butter distribution means your digestive system encounters smaller quantities at a time rather than dense gluten clusters. This is why one beautiful, properly-made croissant can be more satisfying than two hastily-made ones. Quality over quantity—always.
The Masterclass: How to Make Butter Croissants
What follows is not just a recipe—it’s a teaching framework. I want you to understand the “why” behind every step so you can troubleshoot if needed and feel genuinely confident in your technique. Read through the entire recipe before beginning. Set up your kitchen properly. This deserves your full attention.
Step 1: Build Your Foundation Dough
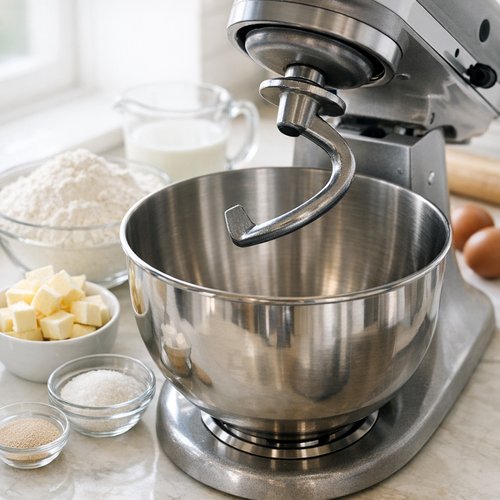
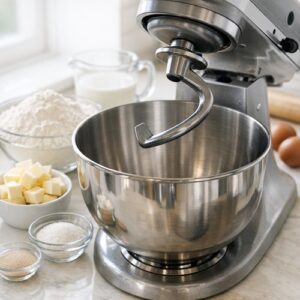
Start by preparing your workspace. You’ll need a stand mixer with a dough hook attachment—while you can mix by hand, a stand mixer teaches you consistent kneading pressure, which is valuable for understanding dough development. If you don’t have one, a handheld electric mixer works, though you’ll need to finish by hand.
Cut 4 tablespoons of softened unsalted butter into four equal pieces and place them in your mixer bowl. Add 3 and ½ cups of all-purpose flour (spooned and leveled—this is critical for proper hydration), ¼ cup granulated sugar, 2 teaspoons fine sea salt, and 1 tablespoon of your yeast.
Turn the mixer to low-medium speed and let it run for exactly 1 minute. You’re not trying to blend everything completely; you’re distributing the yeast evenly so it activates uniformly throughout the dough. This prevents some areas from fermenting faster than others, which would compromise your lamination.
With the mixer running, slowly pour in 1 and ½ cups of cold whole milk. Pour steadily but deliberately—rushing this step can cause lumps. Once all the milk is incorporated, increase the mixer speed to medium and begin kneading proper.
Step 2: Knead for Gluten Development
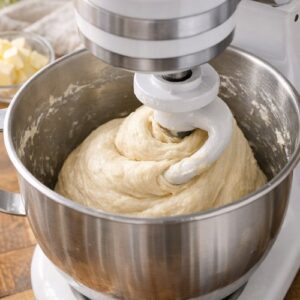
Let your mixer run for a full 5 minutes. This is non-negotiable. You’re not trying to develop maximum gluten like you would for bread—that would make your dough too elastic and difficult to laminate. Instead, you’re developing enough gluten structure to hold the butter without tearing during folds, but leaving the dough slightly extensible and forgiving.
If the dough feels sticky during kneading, sprinkle 1 teaspoon of flour at a time directly onto the dough or into the bowl. Add flour gradually. I cannot overstate this: you’re better off with a slightly tacky dough than a dry one. Dry dough becomes brittle and cracks during lamination.
After 5 minutes of kneading, perform the windowpane test. Tear off a piece roughly the size of a golf ball and gently stretch it between your fingers. Hold it up to a window or light source. If light passes through the stretched dough without it tearing, you’ve developed sufficient gluten. If it tears, continue kneading for another minute and test again.
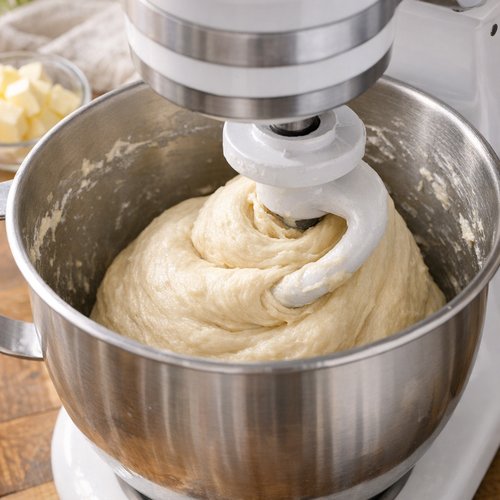
The dough should feel soft and slightly tacky when you press it with your finger—it should slowly bounce back rather than staying indented. This tells you the gluten is developed but the dough isn’t overworked.
Step 3: Prepare the Dough for Its First Rest
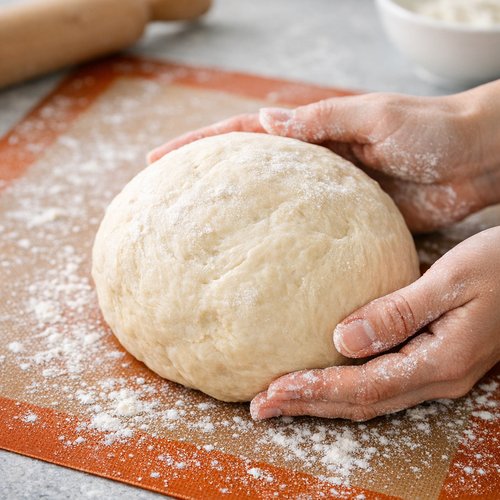
Remove the dough from the mixer bowl and, with lightly floured hands, shape it into a loose ball. I highly recommend using a silicone baking mat for this entire process—the non-stick surface prevents the dough from sliding during rolling, and the mat itself provides a visual measurement guide.
Place your dough ball on the silicone mat and gently flatten it with your palms into a rough rectangle shape, about ½-inch thick. Cover the dough with plastic wrap or aluminum foil to prevent it from drying out. Transfer the entire mat to your refrigerator and allow the dough to rest for exactly 30 minutes.
This rest is when gluten relaxes. The yeast begins slowly fermenting during this time, which develops flavor. You’re not trying to achieve significant rise yet—that comes later. This is purely about relaxation and flavor development.
Step 4: Shape Your Dough for Lamination
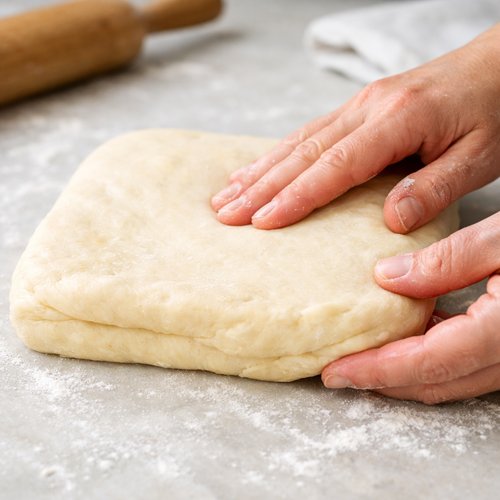
Remove your dough from the refrigerator. Don’t let it come to room temperature—it should still feel cool to the touch. Using your hands first, begin flattening and stretching the dough gently. The dough will feel like soft play-dough at this stage because it’s been chilling but not deeply frozen.
Using a rolling pin and working on your silicone mat, roll the dough into a precise 14 by 10-inch rectangle. Precision matters here because consistent thickness ensures even lamination. The dough will want to be oval-shaped and will resist—this is normal. Keep working the edges with your hands and rolling pin, allowing the dough to rest for 30 seconds every minute or so if it starts resisting too heavily. This prevents overworking and maintains extensibility.
Once you’ve achieved your 14 by 10-inch rectangle, take a moment to admire what you’ve created. This is your foundation for lamination.
Step 5: Prepare Your Lamination Butter Block
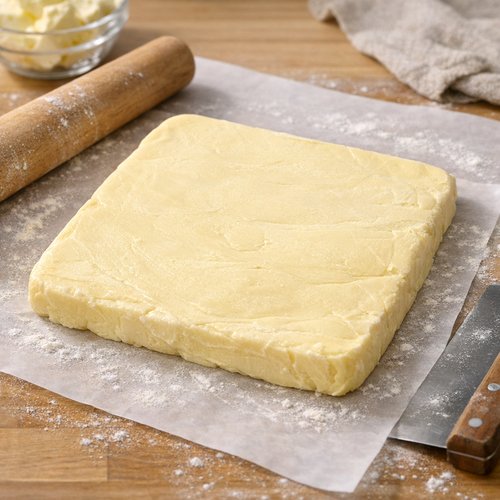
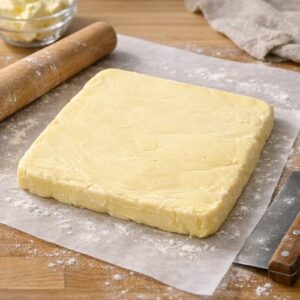
This is a critical step that many recipes gloss over. You need to create a butter block that’s pliable but firm—soft enough to spread without tearing, but cold enough to maintain its shape.
Take 1 and ½ cups of unsalted butter at room temperature (this is around 68-70°F, which is cooler than a warm kitchen but warmer than straight from the refrigerator). Add 2 tablespoons of all-purpose flour to the butter. Using a rubber spatula or your hands, work the flour into the butter until completely incorporated. The flour prevents the butter from sliding around when you fold the dough.
Pat this butter mixture into a 9 by 8-inch rectangle on a piece of parchment paper. If your kitchen is warm, you can refrigerate this for 10 minutes to firm it up slightly. The butter should be consistently soft throughout—there should be no hard or cold spots. Press it gently; your finger should leave a slight indent that fills back in slowly.
Step 6: Execute Your First Lamination Fold (Book Fold)
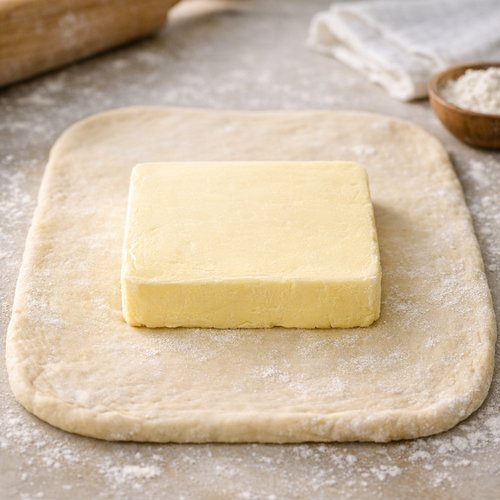
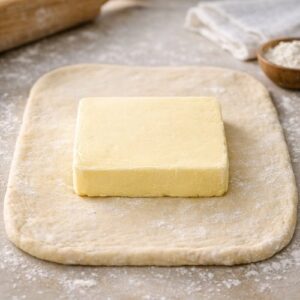
This is where the magic begins. Place your 14 by 10-inch dough rectangle on your work surface. Position your butter block in the center of the dough, leaving equal margins on all sides.
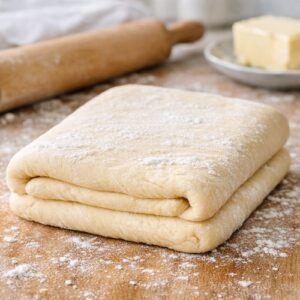
Fold the left third of the dough over the butter, then fold the right third over that, creating three layers of dough with butter in between. You’ve now created what’s called a “book fold”—and you’ve trapped butter between dough layers for the first time. Press the edges gently to seal.
Rotate this folded dough 90 degrees (so what was facing left now faces you). You’re about to perform your second book fold. Before you do, press the package gently with the rolling pin to even out any air pockets. Then roll the package into another 14 by 10-inch rectangle.
Fold left third over center, right third over that. You’ve now completed two book folds, creating multiple layers of butter and dough. Wrap this in plastic and refrigerate for 30 minutes on a baking sheet. This rest allows gluten to relax again and butter to firm up.
Step 7: Complete Your Lamination Sequence
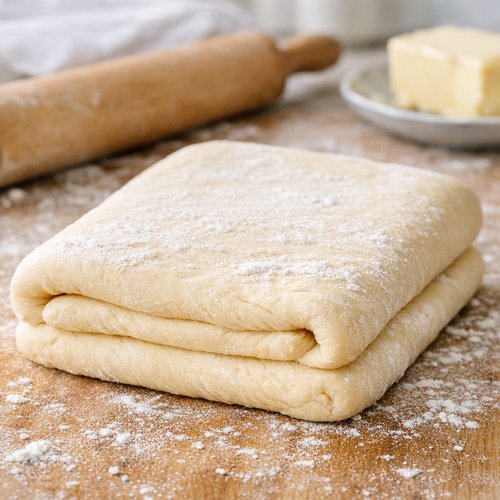
Remove your dough from the refrigerator. It will feel firmer now—this is perfect. Rotate 90 degrees and perform two more book folds exactly as you did before, rolling to 14 by 10 inches each time, folding left-center-right each time. After the fourth fold total, wrap and refrigerate for another 30 minutes.
Complete your final lamination round: two more book folds after the 30-minute rest. You’ve now performed six book folds total, which creates 729 individual layers of butter and dough. This is why laminated dough feels so special when you bite into it.
After your final folds, refrigerate the dough for at least 2 hours, preferably overnight. This extended rest is essential—it allows the dough to fully relax and the butter to become completely firm and distinct from the dough.
Step 8: Shape Into Croissants
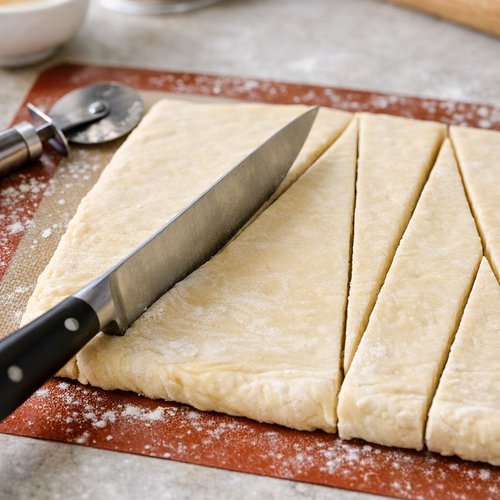
Remove your dough from the refrigerator. It should feel firm and cold. Place it on your silicone mat and, with a sharp knife or pastry cutter, cut it into triangles. Each triangle should have a base of about 4 inches and a height of about 7 inches.
Place each triangle on your work surface. Starting from the base, gently roll it toward the point, creating tension that helps the croissant maintain its shape during baking. As you reach the point, tuck it slightly under the croissant. The tension you create in the dough determines whether your croissant puffs into a beautiful crescent or spreads flat.
Place shaped croissants on parchment-lined baking sheets, curving them slightly into crescent shapes. Cover loosely with plastic wrap and allow them to proof at room temperature for 2 to 3 hours, until they’re visibly puffy and airy to the touch.
Step 9: Apply Your Egg Wash and Bake
Preheat your oven to 400°F. Whisk together 1 large egg and 2 tablespoons of whole milk. Brush this mixture gently onto each croissant—the egg proteins will set and create that gorgeous golden-brown exterior. Don’t brush too aggressively or you’ll deflate your carefully proofed croissants.
Bake for 18 to 22 minutes, until the croissants are deep golden brown and sound crispy when you tap them. The exterior should shatter when you bite into it, and you should see distinct layers. If your croissants are browning too quickly, tent with foil after 12 minutes.
Allow them to cool on a wire rack for at least 10 minutes before serving. They’ll continue to firm up as they cool, and the layers will become even more pronounced.

How to Know You’ve Mastered the Lamination Technique
True mastery has specific sensory indicators. You’ll recognize them when you see them, and they’ll give you confidence in future laminated dough projects.
- The Shatter Test – when you bite into a properly laminated croissant, the exterior should shatter audibly and visibly into thin flakes. These aren’t big chunks breaking off—they’re delicate, papery layers breaking apart. This tells you your lamination created true separation between butter and dough.
- The Layer Visibility – when you break a croissant in half, you should see distinct horizontal lines of layers running through it. If you see 50+ visible lines, your lamination is excellent. If you see fewer than 20, your folds may have been compressed too much during resting.
- The Oven Spring – your croissants should visibly puff during the first 8 minutes of baking. This dramatic rise tells you steam is being created between layers, which is exactly what you want.
- The Golden Color – properly laminated croissants brown deeply and evenly. Pale croissants often indicate insufficient proofing or oven temperature that’s too low, preventing steam from generating properly between layers.
- The Butter Aroma – your kitchen should smell luxuriously buttery and slightly yeasty. This combination indicates proper fermentation and adequate butter content.
Common Lamination Mistakes and How to Fix Them
- Greasy, Slick Dough with Visible Butter Streaks – your butter was too warm or too soft when you began laminating. The butter smeared into the dough instead of creating layers. Next time, ensure your butter block is at exactly 65-70°F and your kitchen is cool (under 70°F if possible). If you’re in a warm climate, work with shorter time windows and refrigerate more frequently.
- Croissants That Spread Flat Instead of Puffing – this usually means insufficient tension during shaping or over-proofing before baking. When you roll your triangles, create deliberate tension by rolling firmly. Also, reduce proofing time slightly (aim for puffy but not jiggly). Your proofed croissants should feel airy when gently poked but still have some firmness.
- Dense, Compact Croissants Without Visible Layers – your folds were compressed too heavily, squishing out the butter pockets. Apply lighter pressure during rolling and folding. Let the dough rest for 30 seconds every minute during rolling. Your rolling pin should glide gently, not press aggressively.
- Croissants That Brown Unevenly or Burn at Edges – your oven temperature is too high or your baking sheet placement is off. Use an oven thermometer to verify actual temperature. Rotate your baking sheets halfway through baking. If edges brown before the top, move your sheet to a lower oven rack for the remaining time.
- Dough That Resists Rolling or Tears During Folding – you’ve developed too much gluten or didn’t allow adequate rest between folds. Reduce kneading time by 30 seconds on your next batch. Always rest for full 30 minutes between fold sequences, and don’t skip the overnight rest before shaping.
Practice Variations to Build Your Skill
Mastery comes through deliberate practice with increasing complexity. These three variations build on your foundational croissant technique while teaching you how lamination principles adapt:
Variation 1: The Butter-Only Croissant (Your Foundation) – this is exactly the recipe you’ve just learned. Make these until you achieve consistent layer visibility and proper shattering. Complete three successful batches before moving to variation two. This might take 2-3 weeks of practice, and that’s perfect.
Variation 2: Pain au Chocolat (Adding Fillings) – once you’ve mastered plain croissants, challenge yourself by adding dark chocolate bars to the dough before your final fold. This teaches you how additional ingredients affect steam distribution and lamination. The chocolate will slightly disrupt steam patterns, so you’ll learn to adjust your proofing and baking times accordingly.
Variation 3: Puff Pastry (Intensified Lamination) – this is the advanced technique. Puff pastry requires more folds with no yeast, creating even more dramatic layers. The principles are identical to croissant lamination, but without fermentation, you rely entirely on steam and butter distribution for lift. This teaches you the pure mechanics of lamination without the yeast variable.
Make-Ahead Guide: Strategic Meal Prep for Croissants
As a registered dietitian and busy person, I’ve developed a strategic approach to croissant production that respects both quality and time management:
The Two-Day Method (Recommended): Complete your dough mixing and first 30-minute rest on Day 1. Perform all six book folds and the 2-hour final rest on Day 1. Wrap the fully laminated dough and refrigerate overnight. On Day 2, shape, proof, and bake. This breaks the process into manageable chunks and allows your subconscious mind to process technique between sessions.
Freezing Laminated Dough: After your final folds and 2-hour rest, you can freeze your entire laminated dough package for up to 3 weeks. Wrap it tightly in plastic wrap then foil. When ready to use, thaw in the refrigerator overnight, then shape, proof, and bake as normal.
Freezing Shaped Croissants: Shape your croissants, place them on a baking sheet, and freeze them uncovered for 2 hours until solid. Transfer to a freezer bag and freeze for up to 2 weeks. When ready to bake, place frozen shaped croissants on a baking sheet, cover loosely, and allow them to proof and thaw simultaneously at room temperature for 3-4 hours. Bake directly from cold—do not let them come completely to room temperature before baking.
Baked Croissants: Freshly baked croissants are best served within 4 hours, while they’re still warm and crispy. However, you can store them in an airtight container at room temperature for up to 2 days. Refresh them by wrapping loosely in foil and warming in a 300°F oven for 5 minutes before serving. Do not refrigerate, as cold temperatures speed up staling.
Can I Store Butter Croissants?
Room Temperature (Best Option): Store baked croissants in an airtight container at room temperature for up to 2 days. They’ll gradually lose crispness as they absorb ambient moisture, which is why fresh-baked is always superior.
Refrigeration (Not Recommended): Do not refrigerate baked croissants. Cold temperatures accelerate staling and transform your beautiful layers into a dense, unpleasant texture within hours.
Freezing (Great Option): Freeze baked croissants in an airtight freezer container for up to 3 weeks. Thaw at room temperature for 30 minutes and refresh in a 300°F oven for 5 minutes to restore crispness.
Laminated Dough: Freeze your fully laminated but unbaked dough for up to 3 weeks. Thaw overnight in the refrigerator before shaping.
Shaped but Unbaked Croissants: Freeze shaped croissants for up to 2 weeks. Bake directly from frozen, adding 3-4 minutes to baking time and watching carefully to prevent over-browning.
Nutrition Information
Each croissant (based on making 16 croissants from this dough) contains approximately:
- Calories: 285
- Total Fat: 17g (saturated fat 10g)
- Carbohydrates: 28g
- Protein: 5g
- Fiber: 1g
- Sodium: 290mg
These calculations are based on USDA Food Data Central values for all-purpose flour, unsalted butter, whole milk, and yeast. The significant fat content comes from butter, which provides satiety and supports absorption of fat-soluble vitamins. The lamination process creates a more digestible structure than dense, heavily kneaded doughs, which means your digestive system processes the carbohydrates more gradually, preventing blood sugar spikes.
Expert’s Nutritional Perspective: Yes, croissants are indulgent. That’s the entire point. One beautifully made croissant with full-fat dairy and quality butter is more nutritionally satisfying than two low-fat, mass-produced croissants. The butter supports fat-soluble vitamin absorption (vitamins A, D, E, K), the yeast fermentation develops B vitamins, and the extended fermentation time begins breaking down gluten, making the protein more bioavailable. When you make croissants from scratch, you’re not eating “empty calories”—you’re eating real food created through real technique. That distinction matters.
What to Serve With Butter Croissants?
The beauty of a properly made croissant is that it needs very little accompaniment. The pastry should be the star. However, I have some thoughtful pairing suggestions that let your technique shine:
- Strong Coffee (Espresso or French Press) – the bitterness and intensity of excellent coffee provide the perfect counterpoint to buttery richness. The tannins in quality coffee also aid digestion of fatty foods. Choose single-origin coffees with bright acidity.
- Unsweetened Jam (Apricot, Quince, or Cherry) – the tartness cuts through butter without overwhelming the delicate layers. Avoid overly sweetened commercial jams that mask the croissant’s flavor. Make your own if possible—the acidity is naturally lower in homemade preparations.
- High-Quality Salted Butter and Sea Salt – yes, more butter. A small amount of cold, salted butter on a warm croissant creates an additional layer of richness with textural contrast. The sea salt heightens the butter’s flavor without making it taste salty.
- Cultured Butter and Honeycomb – if you can find European-style cultured butter, its tangy notes pair beautifully with the sweet, floral notes of honeycomb. This combination creates a sophisticated breakfast or afternoon treat.
- Fresh Berries and Whipped Crème Fraîche – for a light but luxurious pairing, serve your croissant with whipped unsweetened crème fraîche and fresh raspberries or strawberries. The tartness and brightness contrast perfectly with buttery sweetness. You might also enjoy exploring pastry cream recipes for more sophisticated filling applications.
- Soft Cheese and Honey – room-temperature brie, comté, or fresh chèvre with a drizzle of quality honey creates an elevated morning or afternoon plate.
Seasonal Variations: How to Adapt Your Croissants Year-Round
Spring (March-May): The optimal season for croissant making. Cooler kitchens naturally support lamination. Create croissants with candied citrus zest mixed into the dough for brightness. Make pain au rhubarb by adding rhubarb compote before shaping. Keep your kitchen at 65-68°F if possible, and you’ll find lamination feels effortless.
Summer (June-August): Your greatest challenge. Your kitchen is warm, which softens butter and makes lamination difficult. Work early in the morning before temperatures rise. Freeze your butter block overnight instead of just refrigerating. Extend resting periods in the refrigerator by 10 minutes. Create almond-topped croissants
Fall (September-November): The second-best season. The natural temperature drop makes lamination manageable again. This is the perfect time to make croissants filled with spiced apple compote or pumpkin purée. Add 1 teaspoon of warm spices (cinnamon, nutmeg, clove) to your dough for a seasonal note. Winter (December-February): Your ideal season if your kitchen is heated above 70°F. Otherwise, you might struggle with overly stiff dough if your kitchen is cold. Allow dough to rest at room temperature for 5-10 minutes between folds to prevent it from becoming too firm to roll. Create croissants with dark chocolate pieces and candied orange peel for a festive variation. Tearing during folding indicates insufficient gluten development or excessive gluten tension. On your next batch, ensure you knead for the full 5 minutes (the windowpane test should pass clearly). Additionally, never skip the 30-minute rests between folds—these rests allow gluten to relax and become extensible. If your dough tears during the first fold, refrigerate it for 45 minutes instead of 30 and try again. The extra time makes a significant difference in extensibility. Cakiness (instead of shattering flakiness) usually means two things: either your folds weren’t distinct enough—the butter smeared into the dough creating a uniform texture—or you didn’t achieve sufficient fermentation and steam generation. For the former issue, ensure your butter block is at exactly
Butter Croissant Recipe
Ingredients
Method




Notes
FAQs: Mastering Lamination Questions
Why is my dough tearing when I fold it?
My croissants are cakey instead of flaky—where did I go wrong?