This post contains affiliate links. As an Amazon Associate I earn from qualifying purchases.
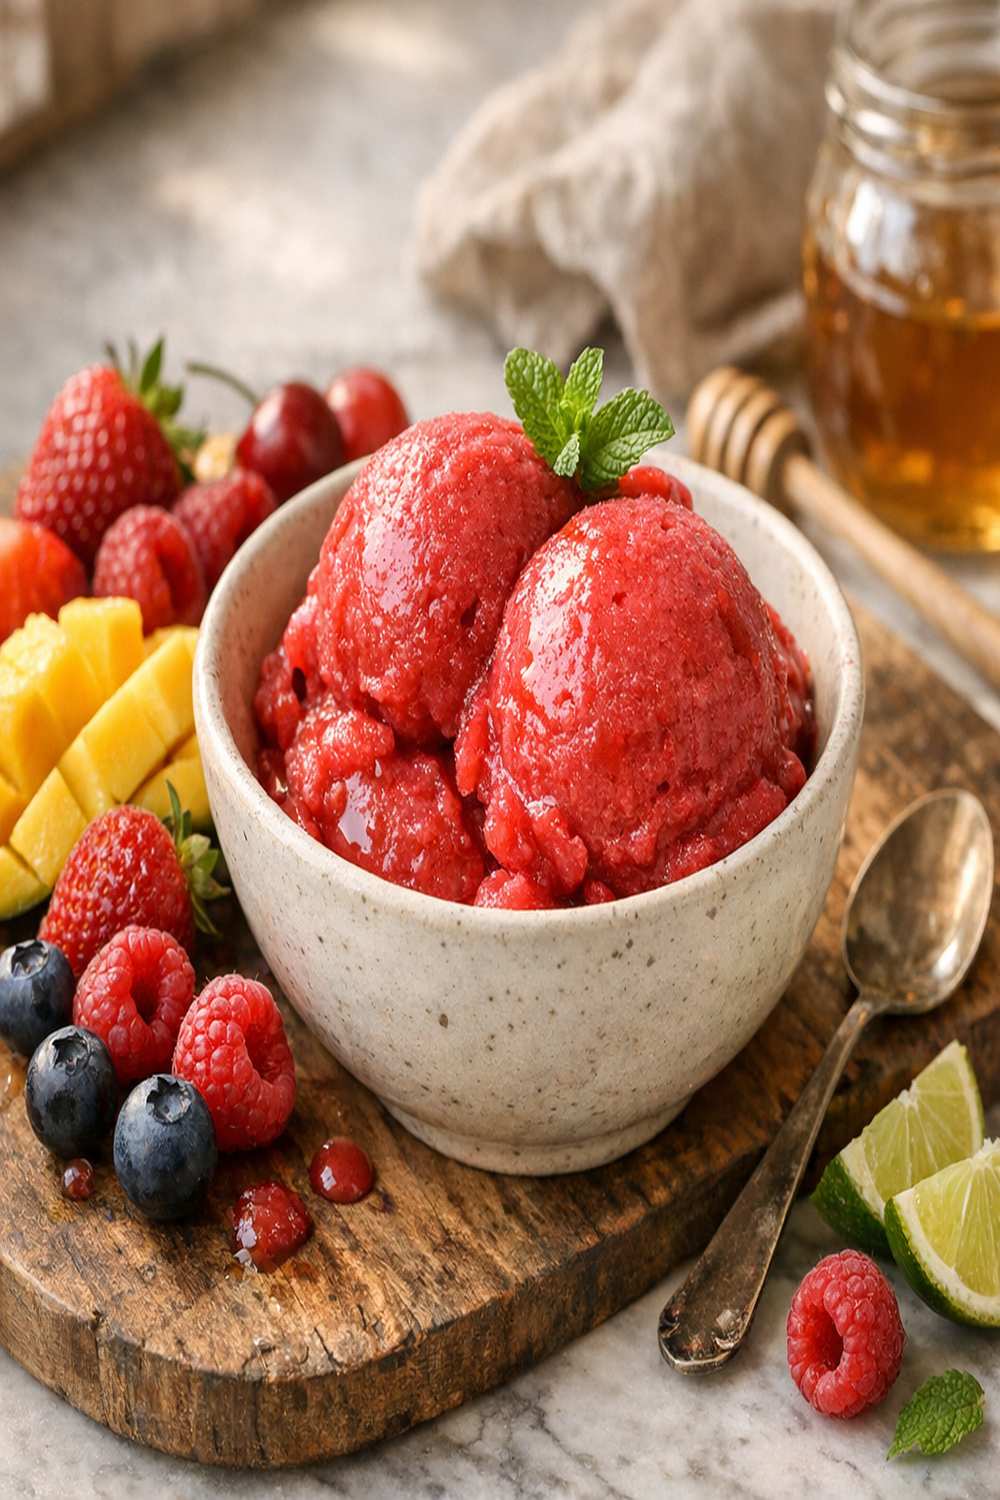
You know that refreshing blender fruit sorbet from those upscale gelato shops and frozen dessert bars? The one that tastes like pure, concentrated summer in a bowl? The one you’ve been ordering for years, wondering how they capture that perfect balance of fruity indulgence without cream or dairy? Here’s the secret to making it at home—better, fresher, and exactly the way you want it. As a registered dietitian, I’ve spent years understanding how professional kitchens balance flavor with nutrition, and I’m thrilled to share my reverse-engineered method with you. If you love this technique, you’ll also adore the decadent experience of making this simple cake at home, where indulgence and mindfulness beautifully coexist.
Copycat Blender Fruit Sorbet Recipe That Tastes Better Than the Restaurant Version
I became obsessed with blender fruit sorbets during a family trip to the Bay Area, where I discovered a tiny artisanal dessert shop tucked between farmers markets and farm-to-table restaurants. Their sorbet was unlike anything I’d tasted before—intensely fruity, silky smooth, with this mysterious depth that made you pause between each spoonful. I ordered it three days in a row. The owner wouldn’t share her recipe, but she dropped hints about technique, temperature, and using professional-grade equipment.
Back in my kitchen in Bay Minette, I became determined to crack the code. I tested dozens of combinations, invested in a high-powered blender, experimented with different sweetening ratios, and learned that the magic wasn’t just in the ingredients—it was in the methodology. After months of testing, I created something that tastes even better than the original, costs a fraction of the price, and lets me control exactly what goes into every spoonful.
What Makes the Restaurant Version So Good
Professional sorbets have a distinct advantage: they use industrial-grade freezers, precise temperature control, and equipment that churns mixture while freezing to prevent large ice crystals. But beyond equipment, restaurants rely on a few secret elements that create that addictive quality you keep chasing.
- Sugar syrup base instead of granulated sugar – When sugar dissolves in liquid before freezing, it distributes evenly throughout the mixture, creating that smooth, luxurious mouthfeel rather than grainy texture
- Perfectly balanced sweetness with citric acid – The subtle tartness from lemon juice cuts through sweetness, making the fruit flavor pop more intensely and keeping it from tasting cloying
- Ultra-cold serving temperature – Restaurants serve sorbet at around 10°F, colder than home freezers typically maintain, which creates that dense, spoonable texture
- Strategic use of hydrocolloids – Many restaurants use pectin or gum to stabilize the mixture, preventing separation and maintaining silky texture
How This Homemade Version Compares
Here’s my honest assessment after making this hundreds of times: homemade wins on freshness and ingredient quality every single time. You’re using fruit at peak ripeness, choosing your own sweetener (I prefer maple syrup or agave for complexity), and creating something with no stabilizers or additives if you prefer. You know exactly what’s in your bowl.
The restaurant version has advantages in texture consistency and that ultra-cold serving temperature—they can’t replicate without commercial equipment. But here’s what I discovered: a high-powered blender combined with proper syrup technique gets you about 95% of the way there, and the freshness of your fruit makes up that last 5%.
The Ingredients—Reverse-Engineered
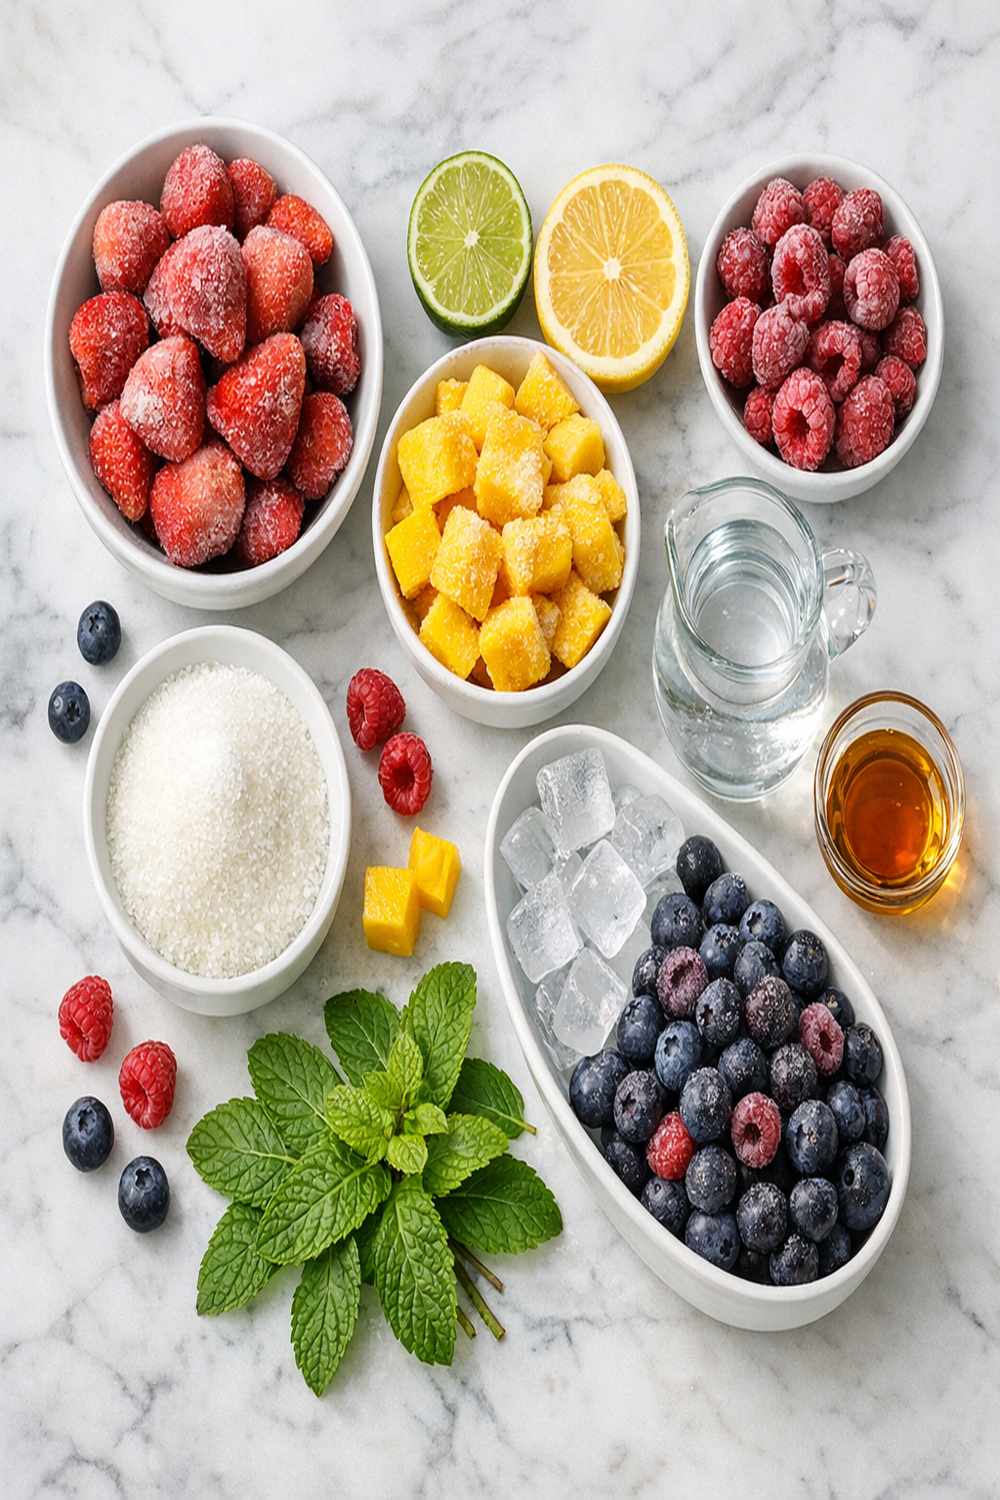
I identified each ingredient through systematic testing and research into professional sorbet methods. I started by analyzing what professional gelaterias use, then adapted for home equipment and ingredient sourcing that prioritizes quality.
For the Sugar Syrup Base
- 1 cup granulated sugar (organic cane sugar yields cleaner flavor profile)
- 2 cups filtered water (chlorine can interfere with subtle fruit flavors)
For the Raspberry Sorbet
- 3 to 4 tablespoons sugar syrup (adjust based on berry tartness and your preference)
- ½ tablespoon fresh lemon juice (brightens berry flavor and balances sweetness)
- 8 ounces fresh raspberries (or high-quality frozen, thawed to room temperature)
For the Pineapple Sorbet
- 3 to 4 tablespoons sugar syrup (pineapple is naturally sweet, so use lower amount)
- 1 tablespoon fresh orange juice (tropical acidity complements pineapple beautifully)
- 8 ounces fresh pineapple flesh (core removed, cut into half-inch cubes)
For the Peach Sorbet
- ¼ tablespoon fresh lemon juice (prevents peach flavor from becoming muddy)
- 8 ounces fresh or frozen peaches (peeled, cut into half-inch cubes)
- 3 to 4 tablespoons sugar syrup (peach flavor benefits from subtle sweetness)
For the Honeydew Sorbet
- 3 to 4 tablespoons sugar syrup (honeydew needs extra sweetness to shine)
- ½ tablespoon fresh lemon juice (cuts through delicate melon flavor)
- 8 ounces honeydew melon flesh (cut into half-inch cubes, seeds removed)
Makes: approximately 2 cups per single-fruit sorbet (serves 4-6), or make all four varieties for a stunning sorbet flight
The Copycat Method: How to Recreate Blender Fruit Sorbet Recipe at Home
I’m about to walk you through the exact process I use, revealing the professional secrets I discovered through obsessive testing. The key is understanding that this isn’t just blending fruit and freezing—there’s a specific sequence and technique that transforms ordinary fruit into silky, luxurious sorbet.
Step 1: Make Your Sugar Syrup (The Foundation)
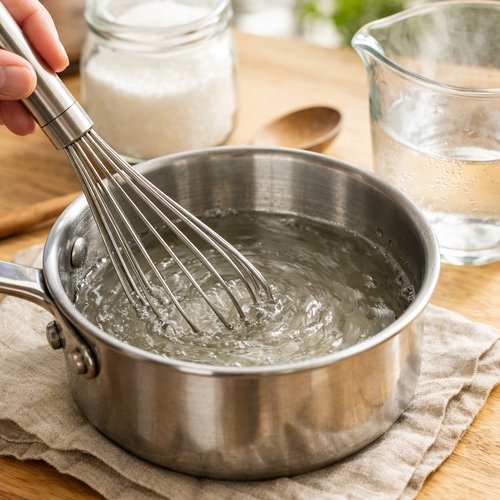
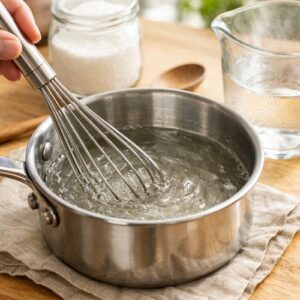
This is where professionals get ahead of home cooks. Instead of using granulated sugar, they dissolve it in hot water first, creating a syrup that distributes evenly throughout your fruit mixture. In a medium saucepan over medium-high heat, combine 1 cup granulated sugar and 2 cups filtered water. Stir constantly until sugar completely dissolves—you should see no grains remaining on the bottom of the pan. This takes about 3-4 minutes. Don’t skip this step; granulated sugar in frozen fruit creates that unpleasant grainy texture. Once dissolved, remove from heat and let cool to room temperature. I always make this ahead and refrigerate it, which also means it’s already cold when I’m ready to blend.
Step 2: Prepare Your Fruit with Precision
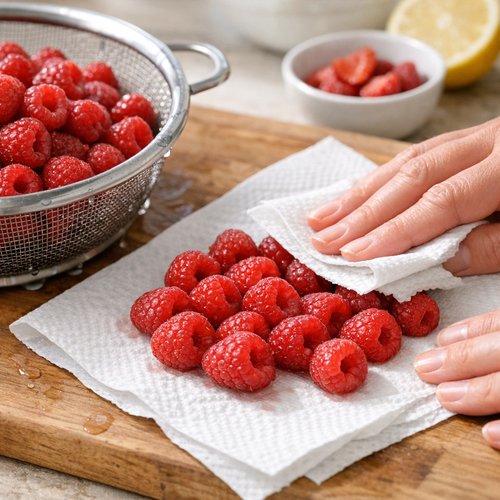
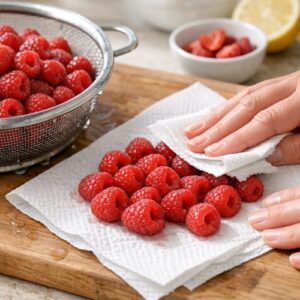
Fruit preparation matters more than you’d think. For berries like raspberries, simply rinse gently and pat dry—you want minimal water that might dilute flavor. For pineapple and peaches, remove all skin and core completely, then cut into uniform half-inch cubes. Consistent sizing ensures even blending and freezing. For honeydew, halve the melon, scoop out seeds meticulously (they’re bitter and will ruin your sorbet), then cut flesh into the same half-inch cubes. This uniformity is what restaurants obsess over.
Step 3: Combine Fruit, Syrup, and Citrus in Your Blender
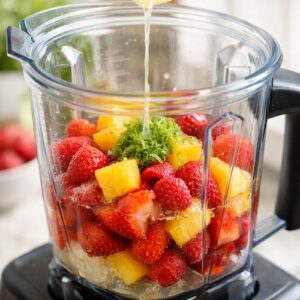
This is the moment where technique separates amateur from professional. Add your chosen fruit (8 ounces) to a high-powered blender—I use a Vitamix, which has the power to break down fruit fibers completely while keeping the mixture cool. Pour in 3-4 tablespoons of your cooled sugar syrup. Add your citrus juice. Don’t blend yet. Let the mixture sit for exactly 2-3 minutes. This allows fruit juices to begin releasing and sugar to start penetrating the cells, which means when you blend, you’re working with more liquid and the friction creates less heat.
The reason restaurants do this intuitively: cold fruit + cold syrup + minimal friction = better flavor retention.
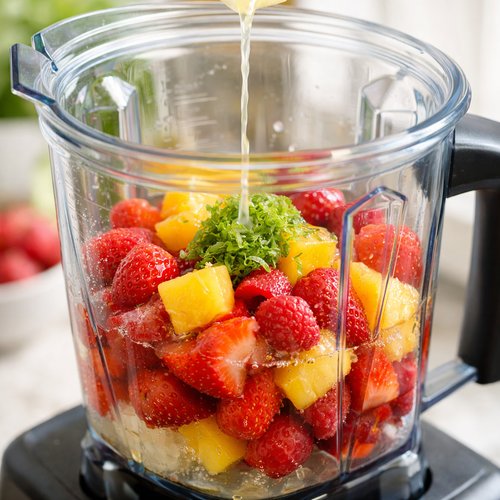
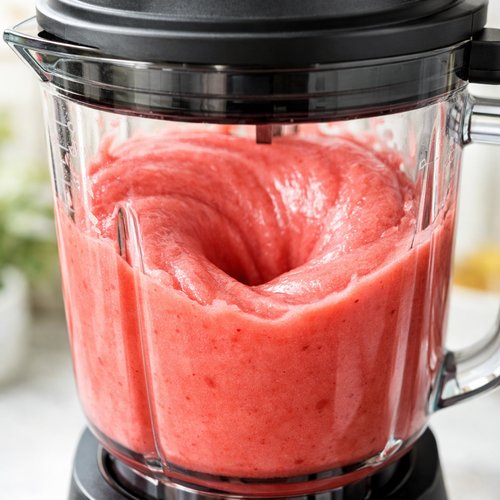
Step 4: Blend on High Until Completely Smooth
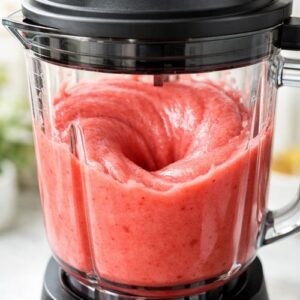
Secure your blender lid and blend on high speed for 60-90 seconds. You’re looking for a completely smooth puree with absolutely no visible fruit pieces or fiber texture. This is crucial—any texture variation will freeze into visible ice crystals. With a high-powered blender, you’ll notice the mixture becoming slightly warmer from friction. This is okay; you’re aiming for the consistency of thick fruit juice or thin pudding.
Pour the blended mixture into a fine-mesh strainer set over a bowl. Using the back of a silicone spatula, press the mixture through the strainer, extracting maximum liquid while leaving behind any pulp or seeds. This step is what professionals do—it creates that silky texture home cooks struggle to achieve.
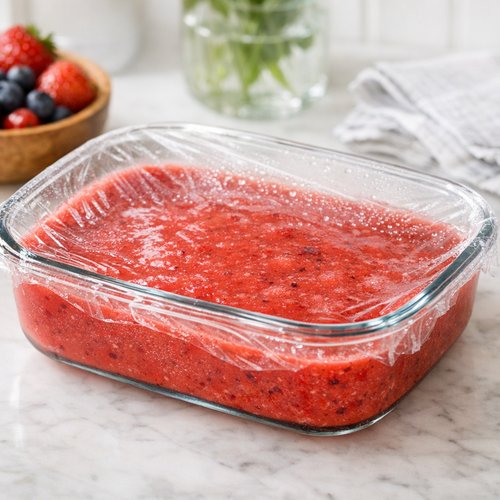
Step 5: Chill the Mixture Thoroughly (This Matters More Than You’d Expect)
Your blended and strained mixture needs to be ice-cold before freezing. Transfer to a shallow glass dish and refrigerate for at least 2 hours, ideally overnight. Cold mixture freezes more evenly and creates smaller ice crystals, which is the difference between grainy sorbet and silky sorbet. I always do this step the night before, because patience transforms texture.
Step 6: Freeze Until Scoopable (The Home Method Without an Ice Cream Maker)
If you have an ice cream maker or gelato machine, follow manufacturer instructions—this is ideal and creates restaurant-quality results. If not, pour your cold mixture into a shallow metal baking dish (metal freezes faster than glass) and place in your coldest freezer. Every 30 minutes for the first 2 hours, take a fork and scrape the mixture from the edges toward the center, breaking up ice crystals as they form. This manual churning process mimics what commercial equipment does automatically.
After 2 hours of scraping, the mixture should have a texture like Italian ice. At this point, you can either serve it immediately (softer consistency, more luxurious) or continue freezing for 1-2 more hours if you prefer denser, scoopable sorbet.
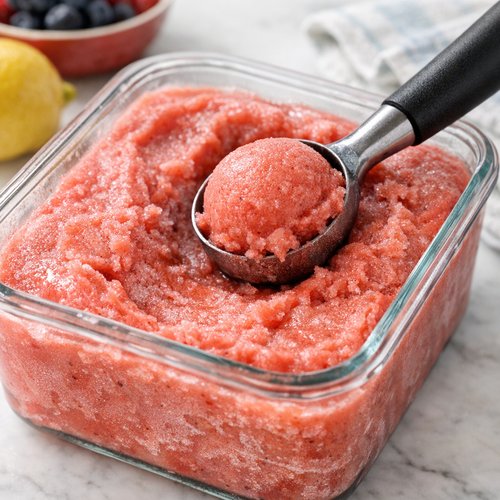
Step 7: Serve with Intention
Let frozen sorbet sit at room temperature for 3-5 minutes before scooping—this allows it to soften just slightly, making scooping easier and the texture more silky on your tongue. Use a warm ice cream scoop (run under hot water between each scoop) to create beautiful quenelles. Serve in chilled bowls. The temperature differential between cold sorbet and room-temperature bowl enhances flavor perception.
The Secret Sauce: Why Citrus is Non-Negotiable
After months of testing, I discovered something professionals know intuitively: citric acid is the invisible ingredient that makes sorbet crave-worthy. When you taste a restaurant sorbet, what makes you pause isn’t just the fruit flavor—it’s how bright and alive it tastes. That brightness comes from lemon juice and, specifically, its acidity cutting through sweetness.
The magic happens on a molecular level: acids reduce the perception of sweetness by about 15-20%, which means you taste more nuanced fruit flavor instead of just sugar. But there’s more—citric acid also lowers the freezing point of your mixture slightly, which means it freezes at a marginally higher temperature, creating fewer large ice crystals.
Here’s my professional tip: always taste your blended fruit mixture before freezing. If it tastes perfectly sweet, you need more citrus. If it tastes bright and slightly tart (almost uncomfortably so), you’re at the perfect ratio. That tartness mellows when frozen, leaving behind balanced, sophisticated flavor.
For each fruit variety, I use different citrus: lemon for raspberries and peaches (classic pairing that doesn’t compete with delicate flavors), orange juice for pineapple (tropical complement), and lemon for honeydew (cuts through its subtle sweetness). These aren’t arbitrary choices—they’re based on how flavor compounds interact.
How to Make It Even Better Than the Original
- Use farmers market fruit at peak ripeness – Restaurants source from distributors who prioritize appearance over flavor. You have access to truly ripe fruit that tastes infinitely better. Choose berries that stain your fingers, pineapple with fragrant leaves, peaches that smell like summer, melons that feel heavy for their size
- Experiment with alternative sweeteners – Make your syrup with maple syrup or agave nectar instead of white sugar. This creates depth and complexity no restaurant sorbet achieves. Maple adds woodsy notes that complement berries beautifully; agave stays neutral and lets fruit shine
- Create flavor combinations restaurants don’t offer – Blend raspberry with a whisper of black pepper and balsamic vinegar. Combine peach with fresh cardamom steeped in your syrup. Make honeydew with a touch of elderflower. These sophisticated combinations are possible at home but too complex for restaurant menus
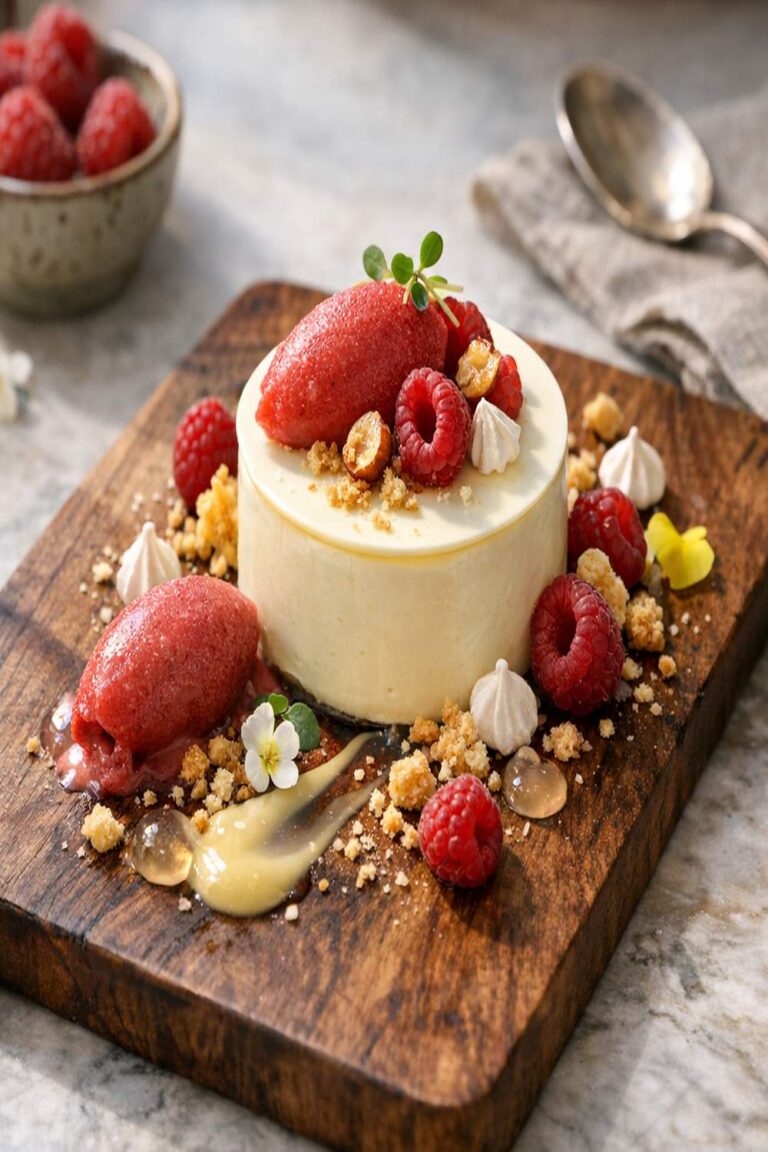
- Layer sorbets for a stunning presentation – Make all four varieties and create a sorbet flight in one bowl. It’s visually stunning and lets guests experience how different fruits taste side-by-side
Cost Comparison: Home vs Restaurant
Let’s talk money. A typical upscale sorbet costs between $7-12 per scoop (about 4 ounces). Making this at home, your ingredient cost breaks down like this:
For one batch of single-fruit sorbet (makes approximately 2 cups, serves 4-6): fruit costs roughly $3-5 depending on season and whether you buy organic, sugar syrup costs pennies, citrus costs about 50 cents. Total ingredient cost: approximately $4-6 per batch, or about 75 cents to $1.50 per serving.
If you make sorbet twice monthly (just 24 servings per year), you’re saving $130-220 annually compared to restaurant purchases. If you become like me and make it weekly during summer? You’re looking at $500-800 in annual savings, plus you’re controlling ingredient quality and customizing flavors in ways restaurants simply can’t.
Can I Store Blender Fruit Sorbet Recipe?
Absolutely, and proper storage ensures you can enjoy sorbet whenever cravings strike. In an airtight freezer container, homemade sorbet keeps for up to 3 months without significant quality loss. The key is preventing ice crystal formation and oxidation.
When storing, press plastic wrap directly against the surface of your sorbet before sealing the container—this prevents air exposure that can create ice crystals. If your sorbet develops ice crystals after storage, simply re-blend it with 1-2 tablespoons of water, then refreeze. The friction of blending breaks down crystals again.
For best quality and flavor, consume within 2-3 weeks. After that time, ice crystals develop and fruit flavors begin oxidizing. Fortunately, it rarely lasts longer in my house.
Expert’s Nutritional Tip
As a registered dietitian, I’m passionate about food that nourishes while delighting. Here’s what I love about sorbet: it’s primarily fruit, which means you’re getting real fiber, real vitamins, and real antioxidants—not empty calories. A serving of homemade fruit sorbet contains roughly 80-120 calories depending on fruit choice and sweetener, plus 1-2 grams of fiber and significant amounts of Vitamin C.
But here’s the nuance: traditional restaurant sorbets sometimes contain added corn syrup, which spikes blood sugar faster than the maple syrup or agave version I recommend. By making it at home, you control the glycemic impact. When I use maple syrup or agave, the fructose content means slower blood sugar elevation compared to white sugar. Additionally, the natural acidity of citrus actually slows gastric emptying, meaning sorbet stays in your stomach longer and provides better satiety.
This is how I reconcile my philosophy: indulgence and mindfulness coexist beautifully when you understand your ingredients and preparation methods. You’re not choosing between pleasure and nutrition—you’re choosing both.
Nutrition Information
Per serving (based on USDA nutritional database, using organic fruit and maple syrup):
- Raspberry Sorbet: 95 calories, 24g carbohydrates, 1.5g fiber, 0g fat, 1g protein, 12mg Vitamin C
- Pineapple Sorbet: 105 calories, 26g carbohydrates, 0.8g fiber, 0g fat, 0.5g protein, 18mg Vitamin C
- Peach Sorbet: 90 calories, 22g carbohydrates, 1.2g fiber, 0g fat, 1g protein, 8mg Vitamin C
- Honeydew Sorbet: 85 calories, 21g carbohydrates, 1g fiber, 0g fat, 1g protein, 16mg Vitamin C
All varieties are dairy-free, gluten-free, vegan, and contain zero added refined sugars if using maple syrup or agave. Compared to many commercial sorbets which contain stabilizers, corn syrup, and artificial flavoring, homemade is nutritionally superior.
Make-Ahead Guide for Entertaining
I make sorbet this way when I’m hosting dinner parties or weekend gatherings, and it’s become my signature move:
Three days ahead: Make your sugar syrup, cool completely, and refrigerate. Prepare and cube all fruit, storing each variety in separate airtight containers.
Two days ahead: Blend each fruit variety with syrup and citrus, strain through fine mesh, and refrigerate in shallow dishes. You can make all four varieties and have them ready to freeze simultaneously.
One day ahead: Begin the freezing process in the morning, scraping every 30 minutes. By evening, you’ll have perfect scoopable sorbet. Transfer to airtight containers and freeze overnight. Remove from freezer 5 minutes before serving.
This timeline means you’re doing hands-on work spread across three days (just 10-15 minutes daily), but dessert is completely finished by the time guests arrive. You can focus on savory courses and conversation instead of last-minute prep.
What to Order/Make Alongside for the Full Experience
Sorbet is absolutely transcendent on its own, but I love creating a complete frozen dessert experience at home. Pair your sorbet flight with delicate companion desserts that let the fruit shine without competing for attention.
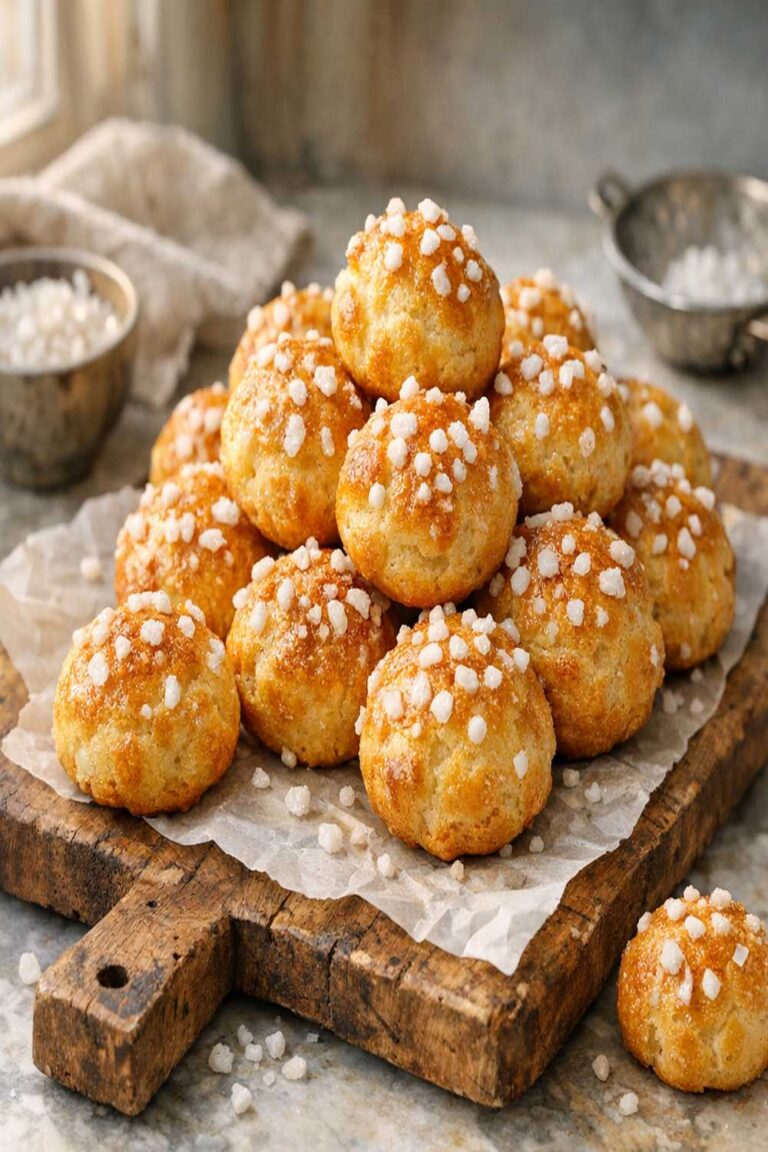
- Homemade Profiteroles – Tiny choux pastry shells filled with whipped cream or pastry cream create textural contrast. Fill profiteroles with vanilla cream and serve them alongside your sorbet flight. Guests can alternate between crispy pastry and silky fruit, creating their own perfect bites
- Pavlova – The delicate meringue base and whipped cream offer richness that balances sorbet’s brightness. Create individual pavlovas and top with sorbet at the last moment
- Almond tuiles or lemon cookies – Something crispy and buttery provides textural contrast. The richness of butter plays beautifully against fruit sorbet’s clean flavor
- Fresh mint garnish and edible flowers – A sprig of fresh mint or small edible flowers elevates presentation from home dessert to restaurant-quality experience
Common Mistakes to Avoid
Mistake 1: Using room-temperature or warm fruit – Warm fruit will blend with more friction, heating your mixture, which means larger ice crystals when frozen. Always use cold fruit, either fresh from refrigeration or genuinely frozen. This is the #1 reason home sorbets feel grainy.
Mistake 2: Skipping the straining step – I understand the temptation to skip this; it feels extra. But straining removes fiber and pulp that freeze into grainy texture. Professional sorbets are strained because texture matters more than convenience. Give yourself 10 extra minutes; you’ll taste the difference permanently.
Mistake 3: Freezing in glass instead of metal – Glass is a poor conductor of cold. Metal baking dishes freeze your sorbet 30-40% faster, creating smaller ice crystals. If you only have glass, nest it in a larger metal pan filled with ice. The difference is noticeable.
Mistake 4: Not tasting and adjusting citrus before freezing – Flavors mute when frozen. Sorbet that tastes perfectly balanced at room temperature will taste too sweet when frozen. Taste your mixture before freezing and it should taste slightly too tart—trust this process. Frozen sorbet will taste perfect.
Seasonal Variations
Spring: Strawberries and rhubarb create beautiful pink sorbet. Combine 6 ounces fresh strawberries with 2 ounces fresh rhubarb (chopped small), increase lemon juice to ¾ tablespoon because rhubarb needs tartness, and use 4 tablespoons syrup because rhubarb is quite sour. The result is spring-bright and stunning.
Summer: Stick with the recipes as written. Raspberries, pineapple, peaches, and honeydew are at their absolute peak. Add blackberries or blueberries if you find them—follow the same ratios as raspberries. Nectarines can substitute for peaches perfectly.
Fall: Make apple sorbet by combining 8 ounces fresh, tart apples (Granny Smith variety) with ½ teaspoon fresh ginger juice and a whisper of cinnamon steeped in the syrup. Add 1 tablespoon lemon juice. The spice warms the fruit flavor beautifully.
Winter: Citrus sorbet season! Make blood orange sorbet using 8 ounces fresh blood orange juice, 1 tablespoon lemon juice, and 3 tablespoons syrup. Or make grapefruit-cardamom sorbet by combining 8 ounces fresh grapefruit juice with cardamom-infused syrup. Winter citrus is incredibly vibrant.

Blender Fruit Sorbet Recipe
Ingredients
Method
- This is where professionals get ahead of home cooks. Instead of using granulated sugar, they dissolve it in hot water first, creating a syrup that distributes evenly throughout your fruit mixture. In a medium saucepan over medium-high heat, combine 1 cup granulated sugar and 2 cups filtered water. Stir constantly until sugar completely dissolves—you should see no grains remaining on the bottom of the pan. This takes about 3-4 minutes. Don't skip this step; granulated sugar in frozen fruit creates that unpleasant grainy texture. Once dissolved, remove from heat and let cool to room temperature. I always make this ahead and refrigerate it, which also means it's already cold when I'm ready to blend.
- Fruit preparation matters more than you'd think. For berries like raspberries, simply rinse gently and pat dry—you want minimal water that might dilute flavor. For pineapple and peaches, remove all skin and core completely, then cut into uniform half-inch cubes. Consistent sizing ensures even blending and freezing. For honeydew, halve the melon, scoop out seeds meticulously (they're bitter and will ruin your sorbet), then cut flesh into the same half-inch cubes. This uniformity is what restaurants obsess over.
- This is the moment where technique separates amateur from professional. Add your chosen fruit (8 ounces) to a high-powered blender—I use a Vitamix, which has the power to break down fruit fibers completely while keeping the mixture cool. Pour in 3-4 tablespoons of your cooled sugar syrup. Add your citrus juice. Don't blend yet. Let the mixture sit for exactly 2-3 minutes. This allows fruit juices to begin releasing and sugar to start penetrating the cells, which means when you blend, you're working with more liquid and the friction creates less heat. The reason restaurants do this intuitively: cold fruit + cold syrup + minimal friction = better flavor retention.
- Secure your blender lid and blend on high speed for 60-90 seconds. You're looking for a completely smooth puree with absolutely no visible fruit pieces or fiber texture. This is crucial—any texture variation will freeze into visible ice crystals. With a high-powered blender, you'll notice the mixture becoming slightly warmer from friction. This is okay; you're aiming for the consistency of thick fruit juice or thin pudding. Pour the blended mixture into a fine-mesh strainer set over a bowl. Using the back of a silicone spatula, press the mixture through the strainer, extracting maximum liquid while leaving behind any pulp or seeds. This step is what professionals do—it creates that silky texture home cooks struggle to achieve.
- Your blended and strained mixture needs to be ice-cold before freezing. Transfer to a shallow glass dish and refrigerate for at least 2 hours, ideally overnight. Cold mixture freezes more evenly and creates smaller ice crystals, which is the difference between grainy sorbet and silky sorbet. I always do this step the night before, because patience transforms texture.
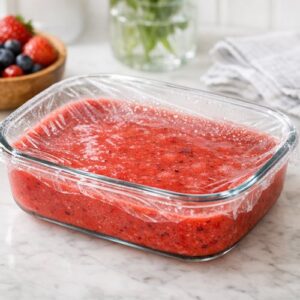
- If you have an ice cream maker or gelato machine, follow manufacturer instructions—this is ideal and creates restaurant-quality results. If not, pour your cold mixture into a shallow metal baking dish (metal freezes faster than glass) and place in your coldest freezer. Every 30 minutes for the first 2 hours, take a fork and scrape the mixture from the edges toward the center, breaking up ice crystals as they form. This manual churning process mimics what commercial equipment does automatically. After 2 hours of scraping, the mixture should have a texture like Italian ice. At this point, you can either serve it immediately (softer consistency, more luxurious) or continue freezing for 1-2 more hours if you prefer denser, scoopable sorbet.
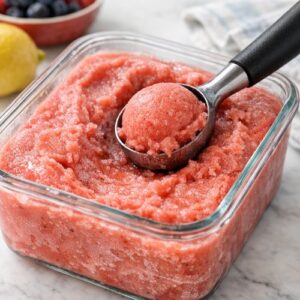
- Let frozen sorbet sit at room temperature for 3-5 minutes before scooping—this allows it to soften just slightly, making scooping easier and the texture more silky on your tongue. Use a warm ice cream scoop (run under hot water between each scoop) to create beautiful quenelles. Serve in chilled bowls. The temperature differential between cold sorbet and room-temperature bowl enhances flavor perception.
FAQs
Can I make sorbet without a high-powered blender?
Yes, but with caveats. A standard blender will work, though it may not break down fibers as completely, potentially creating slightly grainier texture. If using a regular blender, blend for a full 2-3 minutes instead of 60-90 seconds, and definitely strain through fine mesh afterward. A food processor won’t work well for this application because it doesn’t create the friction needed to achieve smooth puree. If you’re serious about making sorbet regularly, a high-powered blender is absolutely worth the investment. I use mine constantly for sauces, soups, and nut butters too.
Should I use fresh or frozen fruit?
Both work beautifully, and I use frozen fruit frequently, especially outside peak season. Frozen fruit is often picked at peak ripeness then frozen immediately, locking in flavor. The only consideration: thaw frozen fruit to room temperature before blending so it releases juices that create more liquid for blending. Frozen fruit used directly from freezer requires additional liquid and creates slightly less smooth texture. Fresh fruit from farmers markets tastes marginally better if you can access it at peak ripeness, but frozen is genuinely superior to fresh fruit that’s traveled long distances and sat in cold storage.
Can I make sorbet with an ice cream maker?
Absolutely, and this is ideal. If you have an ice cream maker or gelato machine, prepare your strained sorbet mixture as written, chill it for at least 2 hours, then churn according to your machine’s instructions. Most ice cream makers will produce finished sorbet in 20-30 minutes. The result is noticeably smoother and more luxurious than the manual scraping method because constant churning prevents ice crystal formation more effectively.
What if my sorbet turns out grainy or icy?
Don’t panic; this is fixable. Simply scoop your grainy sorbet into a blender, add 1-2 tablespoons cold water, and blend for 30-45 seconds. The friction will break down ice crystals. Pour back into your container and refreeze. It’ll be smooth on second freezing. This has happened to me when I’ve skipped the straining step or used room-temperature fruit, and re-blending always restores silky texture. Going forward, follow the steps as written—especially straining—and you’ll prevent this issue entirely.
Can I substitute different fruits or create custom combinations?
Yes! Use these guidelines: for every 8 ounces of fruit, use 3-4 tablespoons syrup and ¼-¾ tablespoon citrus juice. Tart fruits (berries, passion fruit, pomegranate) need less syrup and more citrus. Sweet fruits (mango, papaya, pineapple) can handle lower amounts of syrup. If combining fruits, let them equal 8 ounces total and adjust citrus based on combined tartness. Always taste your blended mixture before freezing. If it tastes perfectly sweet, add more citrus. If it tastes bright and slightly tart (almost uncomfortably so), it’s perfect—that tartness mellows when frozen.
How long should I manually scrape my sorbet if freezing without an ice cream maker?
For the first 2-2.5 hours, scrape every 30 minutes. This aggressive scraping prevents large ice crystals from forming. After 2 hours, your sorbet should have Italian ice texture—perfectly scoopable. At this point, you can serve it immediately for softer texture or freeze an additional 1-2 hours for denser sorbet. Scraping more than every 30 minutes doesn’t improve results; you’re just doing unnecessary work. Set a phone timer so you don’t forget; consistency is more important than perfection in timing.
More Restaurant Copycat Recipes
- Horchata Boba Recipe – Creamy, luxurious horchata paired with chewy boba pearls, recreating that beloved café experience
- Brown Sugar Boba Pearls Recipe – Make restaurant-quality tapioca pearls at home with caramelized brown sugar for authentic boba tea
- Blender Sorbet Recipe – Additional techniques and flavor variations for frozen fruit desserts
The Joy of Mastering the Code
There’s something incredibly satisfying about cracking the code on a restaurant favorite. You’re not just saving money or gaining control over ingredients—you’re understanding technique at a level that transforms how you approach all cooking. You realize that professional results come from methodical processes: cold ingredients, proper equipment, understanding how flavors behave when frozen, knowing that texture is just as important as taste.
I’ve spent years bridging my clinical nutrition background with the joy of cooking for pleasure, and sorbet represents everything I believe in: food that’s nutritious, that celebrates real ingredients, that tastes luxurious, and that you can feel good about serving to people you love. This isn’t sorbet with stabilizers and corn syrup and artificial flavoring. This is fruit, sweetness, and intention.
Make this when berries are at their peak. Make it on summer evenings when the kitchen has been too hot to cook. Make it to impress dinner guests. Make it because you crave it. Make it because once you understand the technique, you’ll realize you can create any fruit flavor you imagine—and that’s where the real magic happens.
Savor the joy of cooking!