This post contains affiliate links. As an Amazon Associate I earn from qualifying purchases.
These delicate French pastry puffs are the answer when you want something that feels decadent without requiring hours in the kitchen. I pair them with a simple blender sorbet recipe for a light yet luxurious dessert, or alongside quality espresso for an afternoon treat that honors the moment. They’re small enough to be mindful portions, yet indulgent enough to feel like pure celebration.
A Memory from My Family’s Kitchen
I’ll never forget the first time my abuela made these in her kitchen in San Antonio. She called them “bolitas de cielo”—little balls of heaven—and watching her pipe the delicate choux dough with such practiced ease made me understand that cooking isn’t just about feeding people. It’s about creating moments worth savoring.
That afternoon, we pulled these golden puffs from the oven, still warm and impossibly airy. She brushed them with a simple sugar glaze and sprinkled pearl sugar on top, and the kitchen filled with this magical crackle as we bit into them. I was maybe eight years old, but I remember thinking: this is what luxury tastes like, and it comes from knowing your ingredients and respecting the process.
Now, as a registered dietitian, I understand the beautiful intersection of what makes these work—the science of choux pastry, the nutritional mindfulness of proper portions, and the emotional nourishment that comes from treating yourself to something truly special. These chouquettes are that lesson in edible form.
What is a Chouquette?
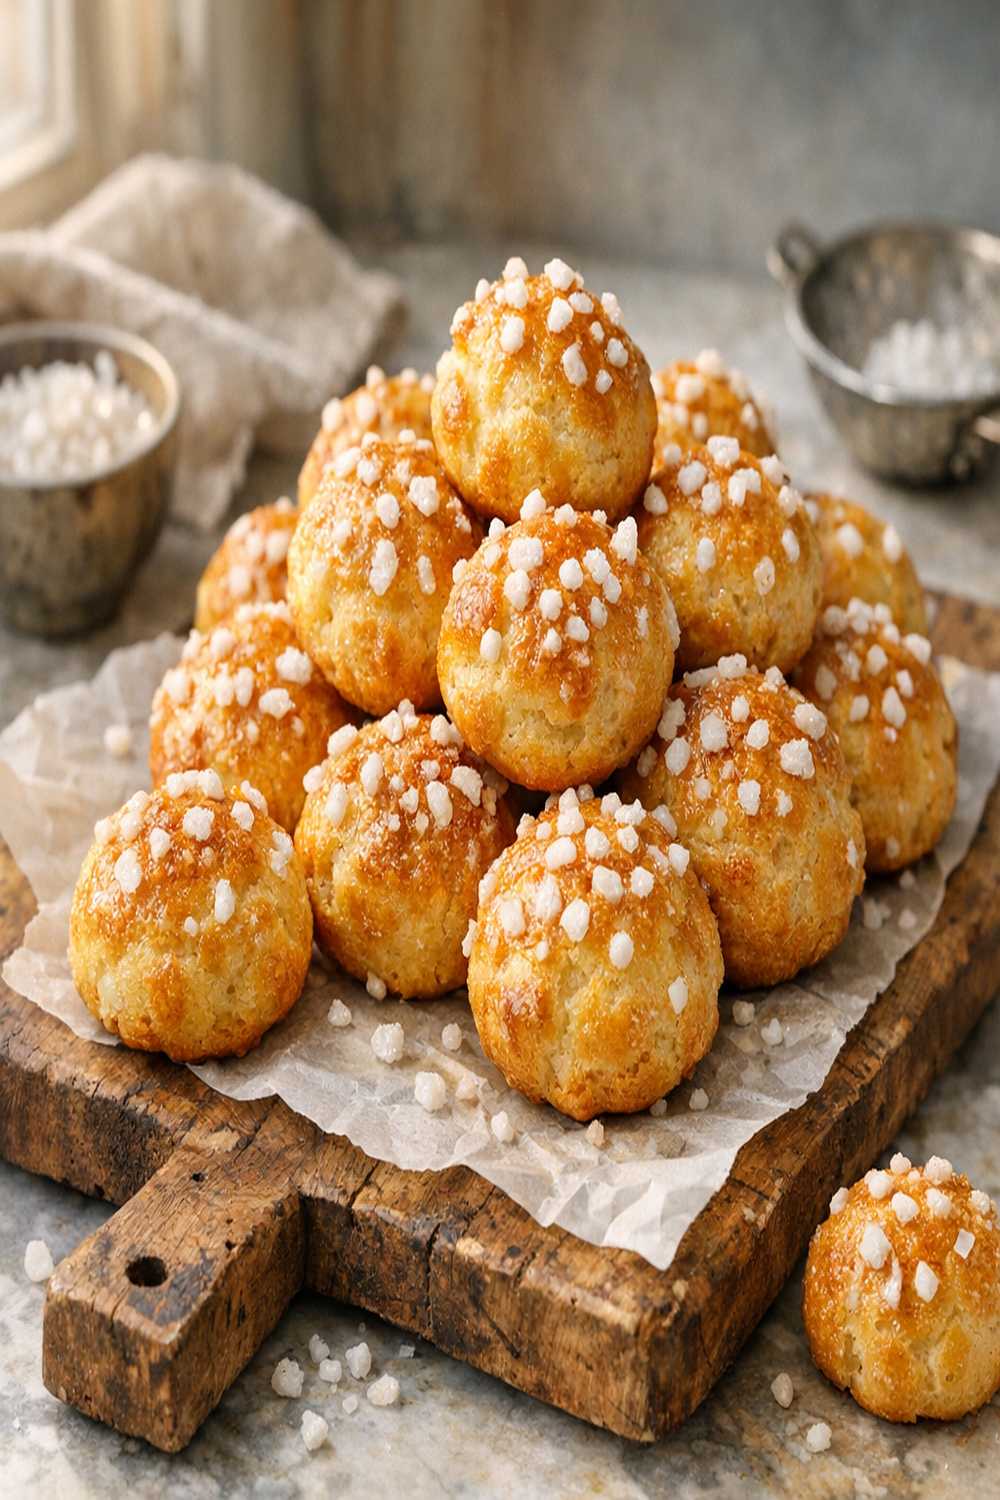
A chouquette (pronounced shoo-ket) is a small, airy French pastry puff made from choux dough—that magical batter that seems to defy physics by puffing up into these ethereal, hollow shells. Unlike their larger cousins, profiteroles, chouquettes are bite-sized treasures, finished with a delicate pearl sugar coating and often a light syrup glaze.
These pastries originated in France and have become a beloved patisserie staple, particularly in Paris. What makes them special is their texture: crispy on the outside with a light, airy interior that’s almost cloud-like. The pearl sugar adds a subtle crunch and a touch of sparkle that makes each bite memorable.
I love them because they represent everything I believe in as both a nutritionist and a home cook: they’re portion-controlled indulgence. You can enjoy two or three of these delicate puffs and feel completely satisfied, knowing you’ve honored both your desire for something special and your body’s actual needs. That’s mindful indulgence at its finest.
Why You’ll Love This Chouquette Recipe
- Surprisingly Simple Technique – Despite looking like they require pastry school training, chouquettes rely on just one basic dough and straightforward steps. If you can follow a process and stir with intention, you can make these.
- Portion-Perfect Indulgence – As a dietitian, I’m passionate about helping people enjoy rich foods mindfully. These small puffs are naturally portion-controlled, allowing you to experience real luxury without excess.
- Make-Ahead Magic – These can be prepared ahead, frozen, and baked fresh on the day you need them. This is professional-level convenience for home cooks.
- Impressive Yet Achievable – Your guests will assume you spent hours perfecting these, but the actual hands-on time is minimal. That’s the kind of cooking I celebrate.
- Naturally Gluten-Free Adaptable – With one simple flour swap, you can create a version for gluten-sensitive guests without sacrificing texture or taste.
- The Sound and Texture – That crackling pearl sugar contrasting with the soft, pillowy interior is sensory perfection. Eating these is an experience, not just nutrition.
The Ingredients
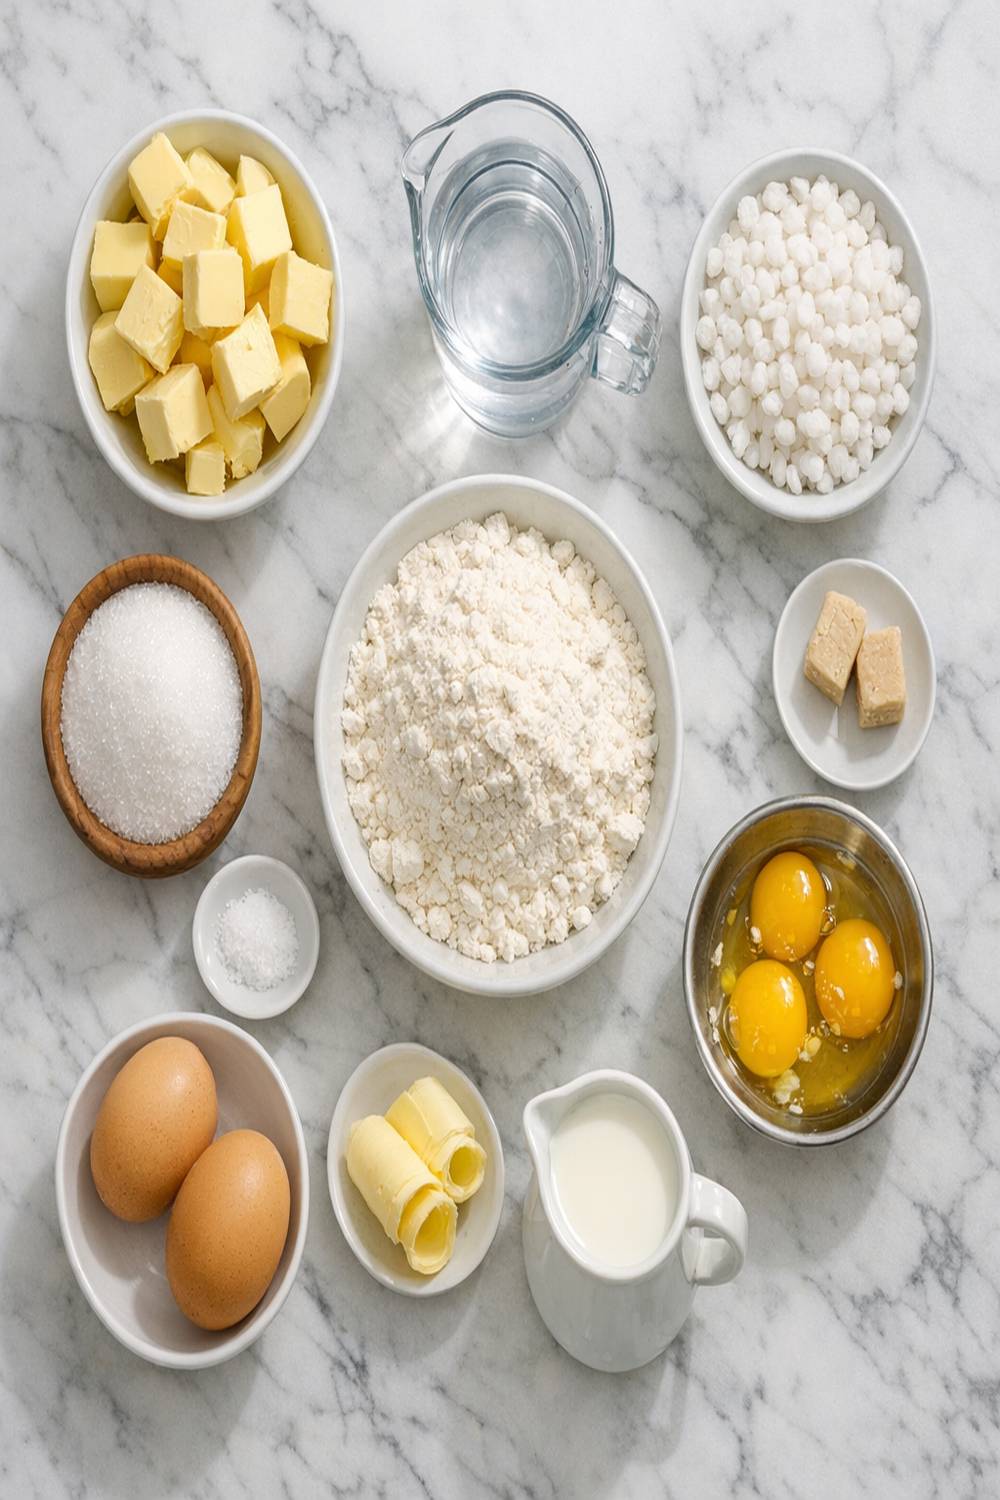
These humble ingredients—water, butter, flour, eggs, and sugar—work together through a technique called pâte à choux to create something almost magical. I’ve organized them into two groups to keep things clear: one for the dough and one for the finishing sugar elements. Makes approximately 24-28 small chouquettes.
For the Choux Dough
- ¼ teaspoon fine sea salt (enhances flavor and strengthens gluten development)
- 1 tablespoon granulated sugar (helps with browning and slight sweetness)
- 6 tablespoons unsalted butter (I use European-style for superior flavor and higher fat content)
- 4 large eggs (room temperature—this is crucial for proper incorporation and rise)
- 1 cup filtered water (room temperature yields the most consistent results)
- 1 cup all-purpose flour (125 grams, spooned and leveled, never packed)
For the Pearl Sugar Glaze
- 2 tablespoons filtered water (for dissolving)
- 2 tablespoons pearl sugar (also called nib sugar—the iconic topping that creates that beautiful crunch)
- 2 tablespoons granulated sugar (creates the syrup base)
How to Make Chouquettes?
I’m going to walk you through this step by step, with the sensory details and timing you need. This is the kind of cooking where your senses matter as much as your timer. Trust the process, but also trust what you see, smell, and feel happening in that saucepan.
Step 1: Prepare Your Workspace and Preheat
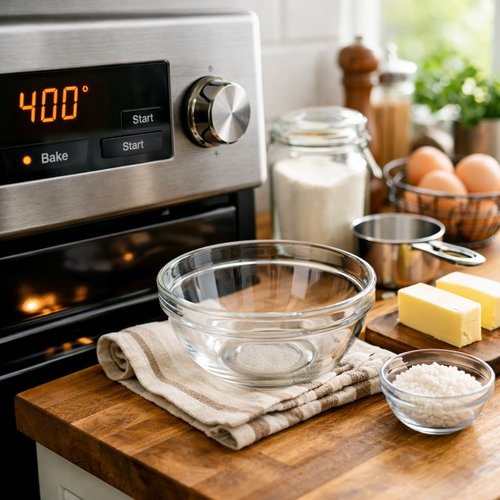
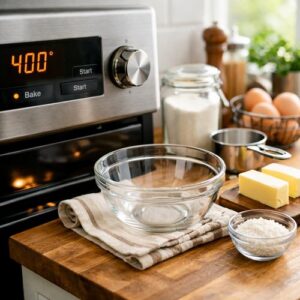
Start by setting your oven to 400°F and allowing it a full 15 minutes to preheat. This temperature is critical—it’s hot enough to create that initial burst of steam that makes your puffs rise, but not so hot that they brown before they fully set.
While the oven heats, line a heavy-duty baking sheet with parchment paper. I recommend using a professional-grade aluminum sheet, not a dark nonstick one, because dark sheets conduct heat too aggressively and can over-brown the bottoms. Position your oven rack in the center of your oven for even heat distribution.
Step 2: Create the Base Mixture
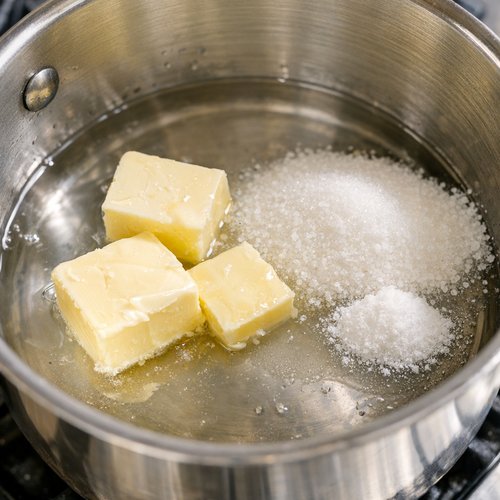
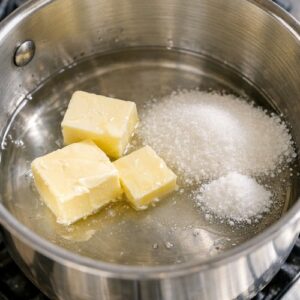
In a medium saucepan (not nonstick—you need that friction for the next steps), combine your filtered water, unsalted butter, granulated sugar, and fine sea salt. Over medium heat, bring this mixture to a full rolling boil. You’ll know it’s ready when you see vigorous bubbles across the entire surface, about 3-4 minutes.
This isn’t just heating—this is a crucial step where the butter emulsifies into the water, creating an ideal medium for your flour. The salt has already begun its work of seasoning and strengthening the gluten strands you’re about to develop.
Step 3: Incorporate the Flour with Purpose
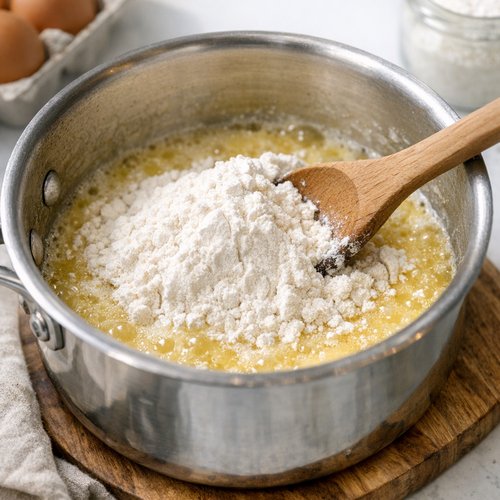
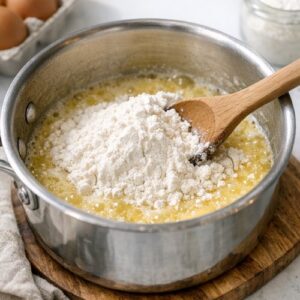
Remove your saucepan from heat immediately when the mixture reaches a boil. Add all of your flour at once—this is important, no gradual additions. Using a sturdy wooden spoon (wood is ideal because it won’t conduct heat as aggressively as metal), stir with vigorous, intentional strokes for about 1-2 minutes until the mixture transforms into a smooth, cohesive dough ball.
You’ll notice the dough beginning to pull away from the sides of the pan. This is exactly what you want. The heat is cooking the flour, and your stirring is developing the gluten network that will trap steam and create those precious air pockets.
Step 4: Cool and Incorporate Eggs
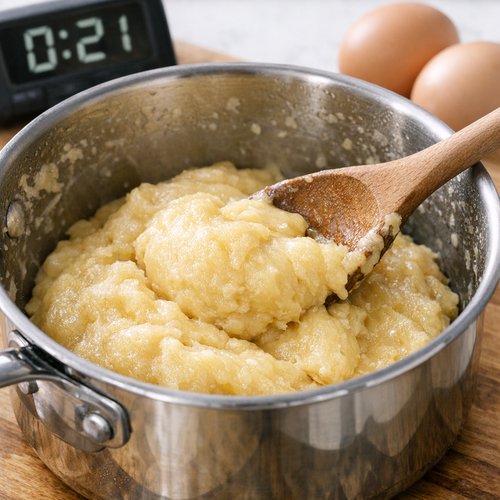
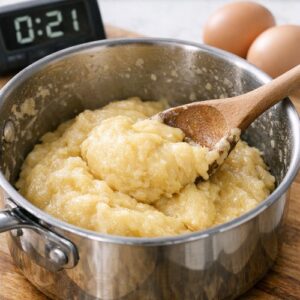
Let this dough cool for exactly 2 minutes. I use a timer for this because it matters. The dough should still be warm but cool enough that it won’t scramble your eggs. You want the temperature to be around 140-150°F if you’re checking with an instant-read thermometer.
This is where the magic really happens. Add your eggs one at a time, whisking vigorously after each addition for about 30-45 seconds. The dough will look broken and separated at first—this is completely normal. Keep whisking with confidence. After all four eggs are incorporated, you’ll have a smooth, glossy dough with a ribbon-like quality to it.
The dough should fall from your spoon in ribbons and slowly incorporate back into itself. If it’s too stiff, your oven rise will be limited. If it’s too loose, your puffs will spread too much. This is the moment where feel matters as much as precision.
Step 5: Prepare Your Glaze
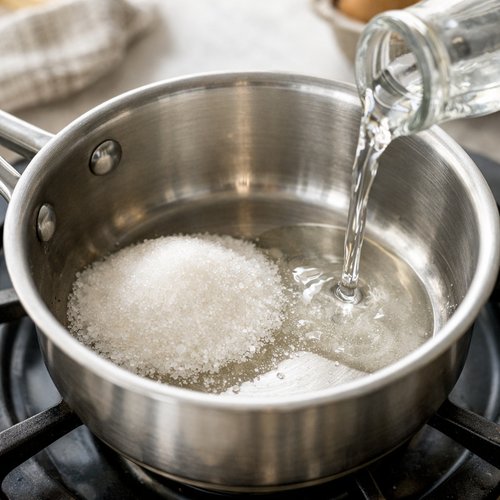
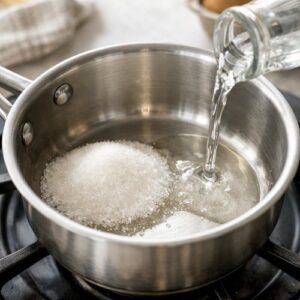
While your dough rests, make the finishing glaze. In a small saucepan, combine 2 tablespoons of granulated sugar and 2 tablespoons of filtered water over medium heat. Stir constantly until the sugar completely dissolves, about 1 minute. You’re not making caramel here—the mixture should remain clear and thin.
Remove from heat and let it cool to room temperature. This takes about 3-5 minutes. If the glaze is still hot when you brush it on, it can make your puffs soggy. Patience here yields better results.
Step 6: Shape Your Chouquettes
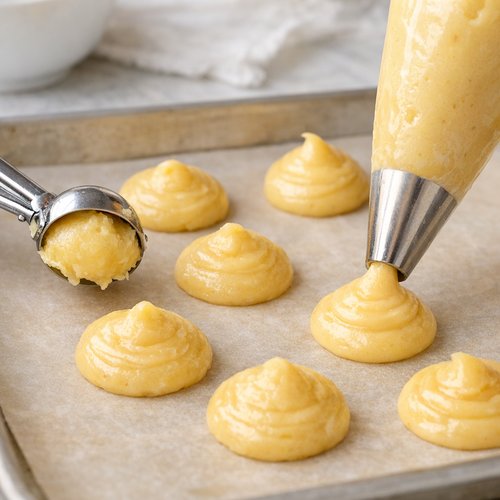
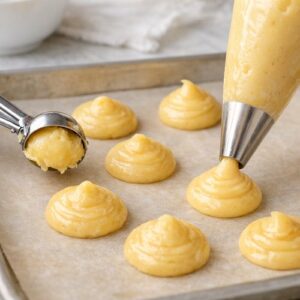
Transfer your dough to a piping bag fitted with a ½-inch round tip, or use a small cookie scoop (a leveled 1-tablespoon scoop is ideal). I prefer the piping method for consistency and control. If you’re using a scoop, position the dough mounds about 1½ inches apart on your prepared baking sheet. These will expand as they bake.
Alternatively, you can use two teaspoons—one to scoop a walnut-sized amount of dough, the other to gently push it onto the sheet. The puffs don’t need to be perfectly round; rustic is actually more authentic and charming.
Step 7: Glaze and Add Pearl Sugar
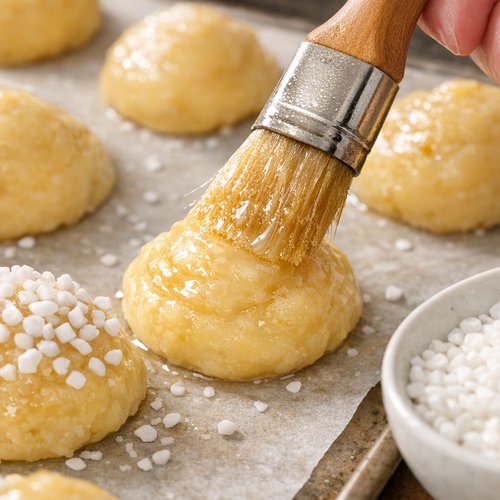
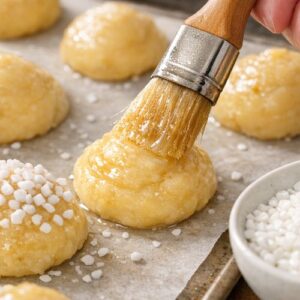
Using a pastry brush, gently brush each dough mound with your cooled sugar glaze. Be generous—this adds flavor and helps the pearl sugar adhere. Immediately sprinkle pearl sugar over each puff, about ½ teaspoon per puff. The sugar should cover the top and sides.
This is the step that makes chouquettes unmistakably beautiful. That pearl sugar will caramelize slightly and create a delicate crackle when you bite in.
Step 8: Bake to Golden Perfection
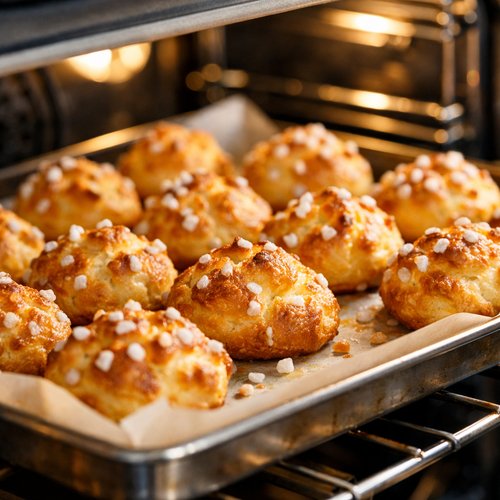
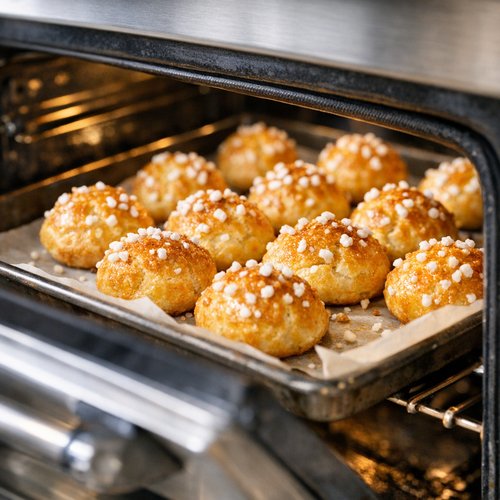
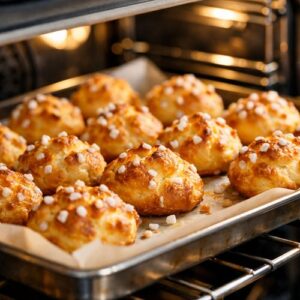
Place your baking sheet in the preheated oven and bake for 20-25 minutes, until the puffs are deeply golden brown and feel light and crispy when you tap them. They should look set and no longer wet or doughy. The color should be a rich golden-brown, not pale or overly dark.
During the last 2 minutes of baking, you might notice them getting darker—this is the pearl sugar caramelizing, and it’s exactly what you want.
Step 9: The Critical Cool-Down
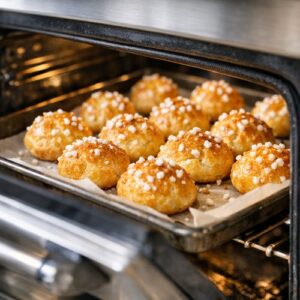
When the timer goes off, turn off your oven and crack the door open about 3-4 inches. Leave the chouquettes in the oven with the door ajar for exactly 5 minutes. This gradual adjustment from hot to room temperature prevents them from deflating. It’s the difference between a beautifully risen puff and a sad, collapsed pastry.
After those 5 minutes, remove the baking sheet and place it on a cooling rack. The chouquettes will continue to set as they cool. Serve them warm or at room temperature, preferably within 2 hours of baking for optimal crispness.
Expert’s Nutritional Tip
As a registered dietitian, I want to highlight something important about eggs in this recipe. The four eggs provide not just structure, but also high-quality protein and choline, a nutrient critical for brain health that many people don’t get enough of. The yolks are particularly nutrient-dense, containing lutein for eye health and selenium for thyroid function.
By using eggs from pasture-raised hens, which you can often find at farmers markets or through local farms, you’re increasing the omega-3 content and overall nutrient density of these pastries. It’s a small choice that amplifies the nutrition of an indulgent treat. This is mindful indulgence in action: choosing higher-quality ingredients so that fewer of them nourish you more completely.
Tips and Tricks
- Room Temperature is Non-Negotiable – This applies to both your eggs and your water. Room temperature ingredients incorporate smoothly into the warm dough without temperature shock. I keep eggs out of the fridge for at least 30 minutes before baking.
- Use a Wooden Spoon for Stirring – Metal heats up too quickly and can create hot spots in your dough. A wooden spoon distributes heat more gently and gives you better tactile feedback about dough consistency.
- Don’t Skip the 2-Minute Cool – This is the only thing preventing scrambled egg dough. I set a timer and don’t eyeball it. Two minutes is the sweet spot.
- Invest in a Good Piping Bag – A sturdy, quality piping bag makes shaping infinitely easier and more consistent. I use heavy-duty canvas bags that I wash and reuse. Disposable bags are wasteful and prone to tearing.
- Pearl Sugar is Worth Finding – Regular granulated sugar will slide off and burn. Pearl sugar, also called nib sugar, has a larger crystal structure that holds during baking. It’s available online and at specialty baking stores.
- Parchment Paper Prevents Sticking – Don’t use greased baking sheets. Choux dough needs just enough friction to hold its shape as it rises. Parchment is perfect.
- Watch for the Golden Color – Color is your best indicator of doneness. Pale puffs are underbaked and will deflate. Golden-brown puffs are properly set and will hold their structure.
- The Crack-Door Cool is Critical – This is what separates restaurant-quality chouquettes from deflated disappointments. That gradual temperature transition is non-negotiable.
Make-Ahead Guide
One of my favorite things about chouquettes is their flexibility for advance preparation. This is restaurant-kitchen knowledge that home cooks don’t always realize applies to their own kitchens.
Freezing Unbaked Dough: After shaping your puffs on the baking sheet and applying glaze and pearl sugar, freeze the entire sheet for at least 4 hours or up to 2 weeks. When you’re ready to bake, place them directly from freezer to oven—no thawing necessary. Extend baking time by 3-5 minutes to account for the cold start.
Freezing Baked Puffs: Cool completely, then store in an airtight container in the freezer for up to 3 weeks. Reheat in a 350°F oven for 5-7 minutes to restore crispness. Never reheat in the microwave, which creates steamy condensation and destroys the texture you worked so hard for.
Room Temperature Storage: Keep cooled chouquettes in an airtight container at room temperature for up to 24 hours. After that, they begin to soften. Serving within 12 hours of baking yields the best texture.
Dough Preparation Timing: You can prepare the entire batch of dough up to 1 hour before baking. Store it covered at room temperature. Don’t refrigerate choux dough—the cold interferes with the oven spring.
Common Mistakes to Avoid
After years of making these and teaching others to do the same, I’ve seen the same pitfalls repeat. Let me save you from making them:
- Adding Flour Too Gradually – Some recipes say to add flour slowly, which creates lumps. Add all the flour at once and stir vigorously. Your dough will be smooth and beautiful.
- Skipping the Cool-Down Period – Impatience kills chouquettes. That 5-minute cool with the oven door open prevents deflation. There’s no shortcut here.
- Using Cold Eggs – Cold eggs won’t incorporate properly into warm dough, resulting in a broken, separated dough that won’t rise evenly. Room temperature eggs make all the difference.
- Opening the Oven Door Too Early – Resist every instinct to peek during baking. Humidity and heat escape, and your puffs collapse. Trust the timing and only open when the full bake time has passed.
- Using Regular Sugar Instead of Pearl Sugar – Regular granulated sugar won’t create that iconic crackle. It’ll slide off, burn, and disappoint. Pearl sugar is worth the small effort to source.
- Baking on Dark Baking Sheets – Dark surfaces conduct heat too aggressively and burn the bottoms before the insides are set. Use light aluminum or line dark sheets with an extra layer of parchment.
Seasonal Variations
While chouquettes are perfect year-round, the seasons offer beautiful opportunities to shift their character:
Spring: Add a touch of orange zest to the dough (about ½ teaspoon), and finish with a light glaze infused with fresh lemon juice instead of plain water. The citrus brightness feels like spring blooming in your mouth.
Summer: Serve these alongside fresh blender sorbet recipe creations—strawberry, peach, or raspberry. The cool, tart sorbet contrasts beautifully with the warm puff’s subtle sweetness.
Fall: Dust the finished puffs with a mixture of pearl sugar and ground cinnamon before baking. It’s like autumn in pastry form. You could also add a touch of vanilla extract (about ¼ teaspoon) to the dough itself.
Winter: Create a festive version by using vanilla sugar or infusing the glaze with a touch of pure peppermint extract (just ¼ teaspoon to avoid overwhelming the delicate flavor). These become elegant additions to holiday dessert tables.
Can I Store Chouquette?
Storage depends on how you’re thinking ahead. If you’ve just baked a batch and want to enjoy them over the next day or two, here’s what works:
Refrigerator Storage: Store cooled chouquettes in an airtight container in the refrigerator for up to 3 days. They’ll soften gradually, which some people actually prefer. Before serving, you can refresh them in a 300°F oven for 3-5 minutes to restore a bit of crispness.
Freezer Storage (Baked): Completely cooled chouquettes freeze beautifully for up to 3 weeks in an airtight, freezer-safe container. Thaw at room temperature for 20-30 minutes, then refresh in a 350°F oven for 5-7 minutes to restore that signature crispness and pearl sugar crackle.
Freezer Storage (Unbaked): This is my favorite option. Prepare, shape, glaze, and freeze your puffs on a baking sheet (uncovered for the first 4 hours, then transfer to a freezer bag) for up to 2 weeks. Bake directly from frozen, adding 3-5 minutes to the baking time.
Never Use the Microwave: Microwaves create steam that destroys the textural perfection you’ve worked for. This is one of the few absolutes in baking.
Nutrition Information
Per serving (one chouquette, based on USDA food database standards and professional nutrition analysis software): approximately 85 calories, 5.2g fat, 8.1g carbohydrates, 0.4g fiber, and 2.1g protein. The sugar content is modest at approximately 2.8g per puff, making these far more balanced than many French pastries.
What I appreciate nutritionally is the presence of whole eggs, which provide choline and selenium—nutrients many people miss. The butter provides fat-soluble vitamins A, D, and E, essential for nutrient absorption and hormonal function. While these are indulgent, they’re nutritionally substantive indulgences.
For those tracking macronutrients, the ratio is balanced enough that these can fit into various eating approaches. Two chouquettes with a cappuccino or espresso make a complete, satisfying breakfast or afternoon break. A portion of three chouquettes totals approximately 255 calories with 15.6g fat and 24g carbohydrates, making them a nutritionally appropriate treat that doesn’t derail your day.
What Can I Serve With Chouquettes?
These elegant little puffs deserve equally thoughtful accompaniments. I think about what will balance their richness and celebrate their delicate nature:
- Strong Espresso or Cappuccino – This is the classic pairing for a reason. The bitter coffee cuts through the sweetness and the steam from the milk complements the warm pastry. I always serve these together.
- Fresh Whipped Cream and Berries – Cool cream and tart berries provide textural and flavor contrast. This turns a simple pastry into something special enough for entertaining.
- Chocolate Sauce – A dark, high-quality chocolate sauce (melted good chocolate with a touch of cream) can be served alongside for dipping. This echoes the best profiterole recipe tradition, but in miniature form.
- Sorbet – A blender sorbet recipe brings freshness and temperature contrast. Serve one warm chouquette alongside a small scoop of sorbet for an elegant dessert.
- Champagne or Prosecco – For special occasions, these pair beautifully with sparkling wine. The bubbles, sweetness, and sophistication of champagne honors the elegance of the pastry.
- Honey and Ricotta – Spoon a touch of quality honey and fresh ricotta alongside for dipping. It’s simple, elegant, and speaks to French bistro culture.
- Simply with Tea – An afternoon cup of good quality tea—whether black, oolong, or herbal—is all you need. This is how my abuela served them, and it remains perfect.
Substitutes
- Gluten-Free Flour Instead of All-Purpose – Use a 1:1 gluten-free baking blend with xanthan gum already included. The technique remains exactly the same. You may notice very slightly less rise, but these will still be delicious and impressive.
- Ghee or High-Quality Oil Instead of Butter – If you need dairy-free chouquettes, use clarified butter (ghee) or a neutral high-smoke-point oil like light avocado oil. The rise will be excellent, though the flavor will be slightly less rich. I still recommend butter for the best result.
- Coconut Sugar Instead of Granulated Sugar – If you prefer a lower glycemic option, coconut sugar works beautifully. Use the same amount. It will give a slightly deeper, molasses-like undertone to the glaze.
- Turbinado Sugar Instead of Pearl Sugar – If you can’t find pearl sugar, turbinado crystals offer a similar crunch. The crystals are larger and won’t melt into the dough like regular granulated sugar would.
- Duck or Goose Eggs Instead of Chicken Eggs – These larger eggs are richer and create incredibly luxurious puffs. You might use 3 duck eggs instead of 4 chicken eggs. The flavor becomes even more decadent.

Chouquette Recipe
Ingredients
Method
- Start by setting your oven to 400°F and allowing it a full 15 minutes to preheat. This temperature is critical—it's hot enough to create that initial burst of steam that makes your puffs rise, but not so hot that they brown before they fully set. While the oven heats, line a heavy-duty baking sheet with parchment paper. I recommend using a professional-grade aluminum sheet, not a dark nonstick one, because dark sheets conduct heat too aggressively and can over-brown the bottoms. Position your oven rack in the center of your oven for even heat distribution.
- In a medium saucepan (not nonstick—you need that friction for the next steps), combine your filtered water, unsalted butter, granulated sugar, and fine sea salt. Over medium heat, bring this mixture to a full rolling boil. You'll know it's ready when you see vigorous bubbles across the entire surface, about 3-4 minutes. This isn't just heating—this is a crucial step where the butter emulsifies into the water, creating an ideal medium for your flour. The salt has already begun its work of seasoning and strengthening the gluten strands you're about to develop.
- Remove your saucepan from heat immediately when the mixture reaches a boil. Add all of your flour at once—this is important, no gradual additions. Using a sturdy wooden spoon (wood is ideal because it won't conduct heat as aggressively as metal), stir with vigorous, intentional strokes for about 1-2 minutes until the mixture transforms into a smooth, cohesive dough ball. You'll notice the dough beginning to pull away from the sides of the pan. This is exactly what you want. The heat is cooking the flour, and your stirring is developing the gluten network that will trap steam and create those precious air pockets.
- Let this dough cool for exactly 2 minutes. I use a timer for this because it matters. The dough should still be warm but cool enough that it won't scramble your eggs. You want the temperature to be around 140-150°F if you're checking with an instant-read thermometer. This is where the magic really happens. Add your eggs one at a time, whisking vigorously after each addition for about 30-45 seconds. The dough will look broken and separated at first—this is completely normal. Keep whisking with confidence. After all four eggs are incorporated, you'll have a smooth, glossy dough with a ribbon-like quality to it. The dough should fall from your spoon in ribbons and slowly incorporate back into itself. If it's too stiff, your oven rise will be limited. If it's too loose, your puffs will spread too much. This is the moment where feel matters as much as precision.
- While your dough rests, make the finishing glaze. In a small saucepan, combine 2 tablespoons of granulated sugar and 2 tablespoons of filtered water over medium heat. Stir constantly until the sugar completely dissolves, about 1 minute. You're not making caramel here—the mixture should remain clear and thin. Remove from heat and let it cool to room temperature. This takes about 3-5 minutes. If the glaze is still hot when you brush it on, it can make your puffs soggy. Patience here yields better results.
- Transfer your dough to a piping bag fitted with a ½-inch round tip, or use a small cookie scoop (a leveled 1-tablespoon scoop is ideal). I prefer the piping method for consistency and control. If you're using a scoop, position the dough mounds about 1½ inches apart on your prepared baking sheet. These will expand as they bake. Alternatively, you can use two teaspoons—one to scoop a walnut-sized amount of dough, the other to gently push it onto the sheet. The puffs don't need to be perfectly round; rustic is actually more authentic and charming.
- Using a pastry brush, gently brush each dough mound with your cooled sugar glaze. Be generous—this adds flavor and helps the pearl sugar adhere. Immediately sprinkle pearl sugar over each puff, about ½ teaspoon per puff. The sugar should cover the top and sides. This is the step that makes chouquettes unmistakably beautiful. That pearl sugar will caramelize slightly and create a delicate crackle when you bite in.
- Place your baking sheet in the preheated oven and bake for 20-25 minutes, until the puffs are deeply golden brown and feel light and crispy when you tap them. They should look set and no longer wet or doughy. The color should be a rich golden-brown, not pale or overly dark. During the last 2 minutes of baking, you might notice them getting darker—this is the pearl sugar caramelizing, and it's exactly what you want.
- When the timer goes off, turn off your oven and crack the door open about 3-4 inches. Leave the chouquettes in the oven with the door ajar for exactly 5 minutes. This gradual adjustment from hot to room temperature prevents them from deflating. It's the difference between a beautifully risen puff and a sad, collapsed pastry. After those 5 minutes, remove the baking sheet and place it on a cooling rack. The chouquettes will continue to set as they cool. Serve them warm or at room temperature, preferably within 2 hours of baking for optimal crispness.
Notes
FAQs
Why Did My Chouquettes Collapse After Baking?
The most common cause is opening the oven door too early or too frequently during baking. The sudden loss of steam pressure causes them to deflate. The second most common culprit is not completing that critical 5-minute cool-down with the oven door ajar. That gradual temperature transition is what prevents collapse. Finally, ensure your dough incorporated properly—undercooked dough in the center won’t support the structure. If you’re seeing this repeatedly, video yourself making the dough to check that you’re stirring vigorously enough when you add the eggs.
Can I Make These Without a Piping Bag?
Absolutely. Use a small cookie scoop (1-tablespoon size) or two teaspoons. One teaspoon scoops, the other scrapes the dough onto the sheet. The results will be slightly less uniform, but actually, I find rustic variation charming. Some of my favorite batches have come from the two-spoon method because you can control the size better and create personality in each puff.
Why Is My Dough Too Stiff or Too Loose?
Stiff dough usually means you didn’t fully incorporate all the eggs. Each egg should be whisked in thoroughly until the dough regains smoothness before adding the next. Loose dough usually indicates you added eggs that were too warm or you’re adding extra liquid somewhere. Room temperature eggs are crucial. If your dough is stiff, warm it gently (over barely simmering water, stirring constantly) for 30 seconds, then whisk in a tiny bit of warm water. If it’s too loose, you’ve likely made a mistake earlier—most doughs can’t be fixed mid-stream. Learn from it and adjust next time.
Can I Use Salted Butter Instead of Unsalted?
Technically yes, but I don’t recommend it. Salted butter has variable salt levels depending on the brand, and this makes your recipe less reliable. Since you’re already adding precisely measured sea salt, use unsalted butter so you control the sodium completely. This is especially important since these are small pastries where salt balance is noticeable.
How Do I Know When They’re Actually Done Baking?
Color is your primary indicator: they should be deep golden brown, not pale or dark. When you tap a finished puff, it should feel light and crispy, not doughy or wet. If you’re uncertain, remove one from the oven, break it open (be careful—it’s hot), and check the interior. It should be mostly hollow with no wet dough. If it’s still doughy, return them to the oven for another 2-3 minutes. This tactile test gives you confidence and teaches you what done looks like.
What’s the Difference Between Chouquettes and Profiteroles?
The dough is identical—both use choux pastry. The difference is size and filling. Chouquettes are small, bite-sized, and finished simply with pearl sugar and glaze (no filling). Profiteroles are larger, usually hollow and filled with ice cream or pastry cream, then topped with chocolate sauce. If you want to explore best profiterole recipe options, that’s the direction to go. For now, chouquettes are the elegant, unfilled version—like the refined older sibling.
More Recipes You’ll Love
- Best Profiterole Recipe – The larger, filled cousin of chouquettes, perfect when you want to create something more substantial and spectacular.
- Best Recipe For Pavlova – Another egg-white based French classic that celebrates simplicity and technique with stunning results.
- Blender Sorbet Recipe – The perfect light, refreshing counterpart to serve alongside warm chouquettes for elegant entertaining.
- Boba Balls Recipe – Another technique for creating something delicate and impressive from simple ingredients.
Making chouquettes changed how I think about indulgence. These small, elegant puffs taught me that luxury doesn’t require excess. It requires intention, quality ingredients, respect for technique, and the willingness to slow down and savor the moment. Every time you make these, you’re not just baking—you’re reclaiming kitchen magic that feels lost in our rushed world.
These are the pastries my abuela made, that thousands of Parisians enjoy with their afternoon coffee, that you can create in your own kitchen with nothing but patience and presence. That’s the beauty of this recipe: it proves that the most impressive things often come from the simplest places. Savor the joy of cooking!