This post contains affiliate links. As an Amazon Associate I earn from qualifying purchases.
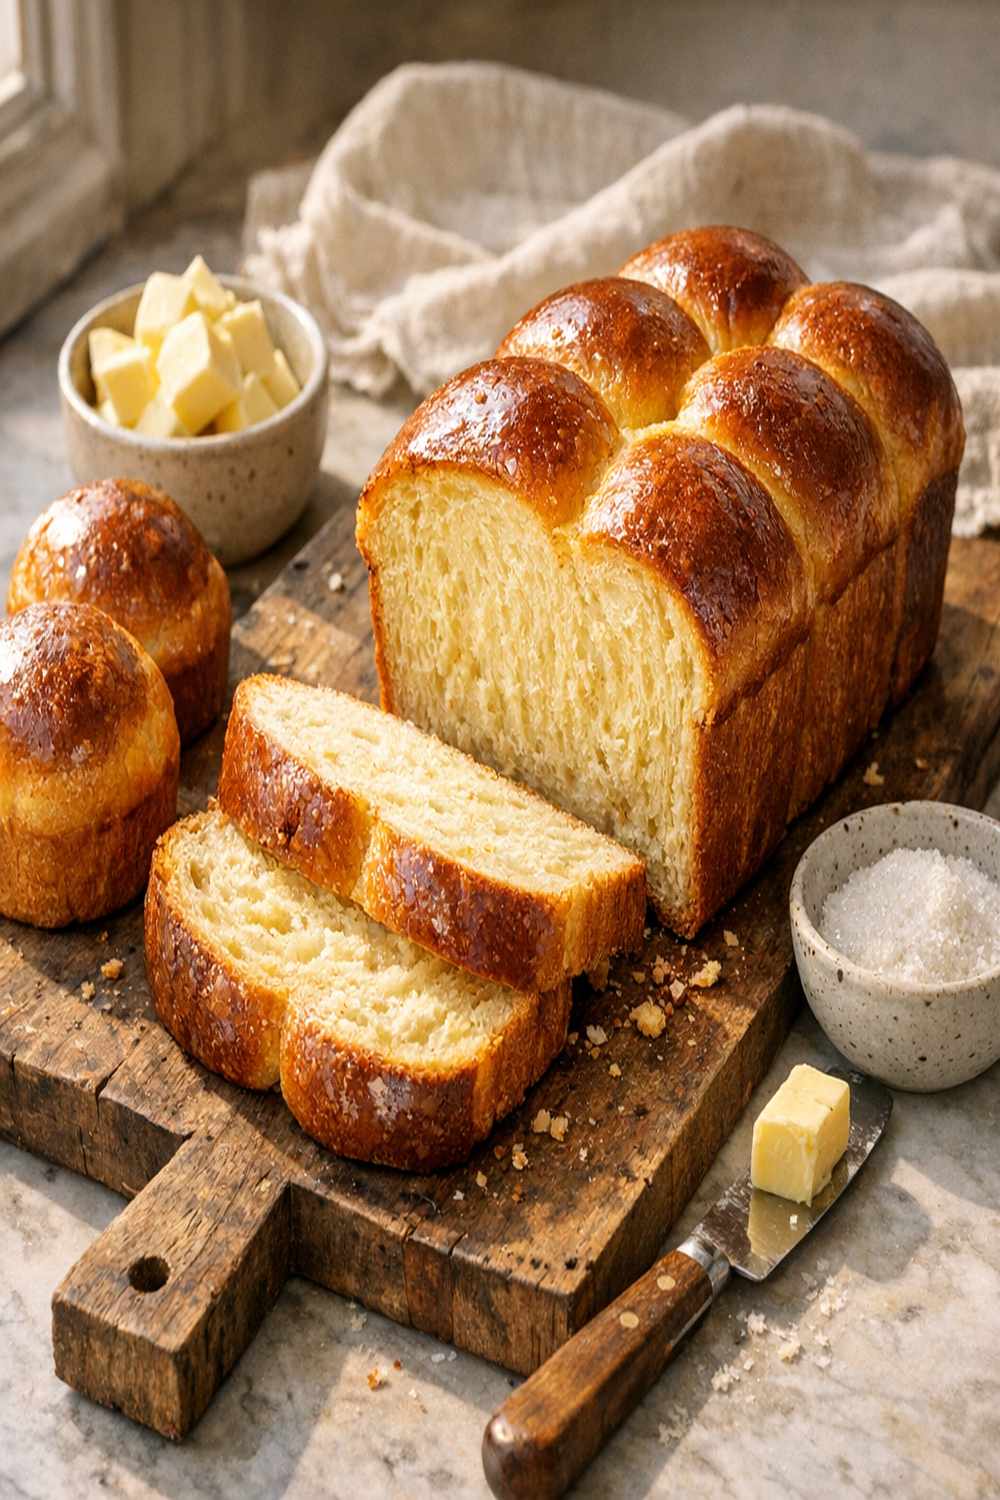
I still remember standing in my abuela’s kitchen at five in the morning, watching her fold golden butter into silky dough with the kind of practiced grace that only comes from decades of devotion. The brioche she created that day—pillowy, rich, and impossibly tender—taught me something fundamental: indulgence and mindfulness aren’t opposing forces. They’re partners in the pursuit of culinary joy. Brioche, which originated in Normandy, France, during the seventeenth century, represents one of the most elegant expressions of this philosophy. This buttery, egg-enriched bread became a symbol of luxury precisely because it demanded patience, precision, and respect for ingredients. Today, I’m sharing my approach to crafting a classic brioche that honors that tradition while grounding you in the science that makes each bite transcendent.
The Food Science Behind Perfect Classic Brioche Recipe
As a registered dietitian, I’ve spent years studying how ingredients interact at a molecular level. What fascinates me most about brioche is how it represents a masterclass in culinary chemistry. This isn’t just bread—it’s an emulsion, a fermentation, and a structural marvel all working in harmony. My recipe honors the clinical nutrition principles I use professionally while celebrating the indulgent richness that makes brioche so utterly craveable.
The magic of brioche lives in its ratio: approximately 20 percent fat by weight relative to flour, combined with whole eggs that act as both moisture and emulsifiers. This creates a tender crumb structure that’s fundamentally different from everyday bread. The yeast ferments slowly over many hours, developing complex flavors while the gluten network strengthens just enough to provide structure without toughness.
The Science Behind Classic Brioche Recipe
Understanding the chemistry of brioche transformation helps you execute this recipe with confidence. When you combine warm milk with active dry yeast and honey, you’re creating an ideal environment for fermentation. The yeast cells activate and begin consuming sugars, producing carbon dioxide that creates lift and ethanol that contributes subtle flavor notes. This process, called alcoholic fermentation, typically requires 45 minutes to an hour at room temperature for the initial bloom phase.
The eggs serve multiple purposes beyond moisture. Their lecithin content acts as a natural emulsifier, helping the butter distribute evenly throughout the dough rather than separating. This creates that signature tender crumb. Meanwhile, the proteins in eggs contribute to structure—just enough to hold everything together without creating the chewy texture of a standard bread.
Here’s where technique becomes critical: butter incorporation. Brioche demands cold butter folded in gradually while the dough is cool enough to hold its structure. When you add cold butter to warm dough, the fat melts unevenly, creating pockets that become air chambers during baking. These pockets—visible as delicate layers in the finished loaf—are what make brioche distinct. The Maillard reaction during baking creates that beautiful golden crust and nutty, complex flavor that develops as proteins and sugars react under heat, typically around 375°F.
Why This Recipe Is Nutritionally Superior
Let me be transparent: brioche is an indulgent food, and I’m not here to pretend otherwise. But within that indulgence, we can make choices that support your wellbeing. This recipe uses whole eggs rather than egg whites alone, providing choline—a nutrient crucial for brain health and supported by USDA nutrition research showing that one large egg contains approximately 147 milligrams of choline, contributing to cognitive function and cellular health.
The honey I use as the primary sweetener offers advantages beyond simple sugar. Raw honey contains trace enzymes, antioxidants, and polyphenols that refined white sugar lacks. While both contain similar calorie counts, the micronutrient profile differs meaningfully. Additionally, the extended fermentation process—which can reach 12 to 18 hours with cold overnight rising—allows beneficial bacteria to break down some starches, slightly reducing the glycemic impact compared to rapidly-made breads.
- Choline from eggs – supports neurological function with 147mg per large egg, contributing to memory and concentration
- B vitamins from yeast fermentation – thiamine, niacin, and B6 increase during the fermentation process, supporting energy metabolism
- Selenium and manganese – present in both flour and butter, supporting antioxidant defense systems with approximately 35mcg and 0.7mg respectively per serving
- Fat-soluble vitamin A – concentrated in high-quality butter, supporting vision and immune function with approximately 684 IU per tablespoon
Ingredient Deep Dive
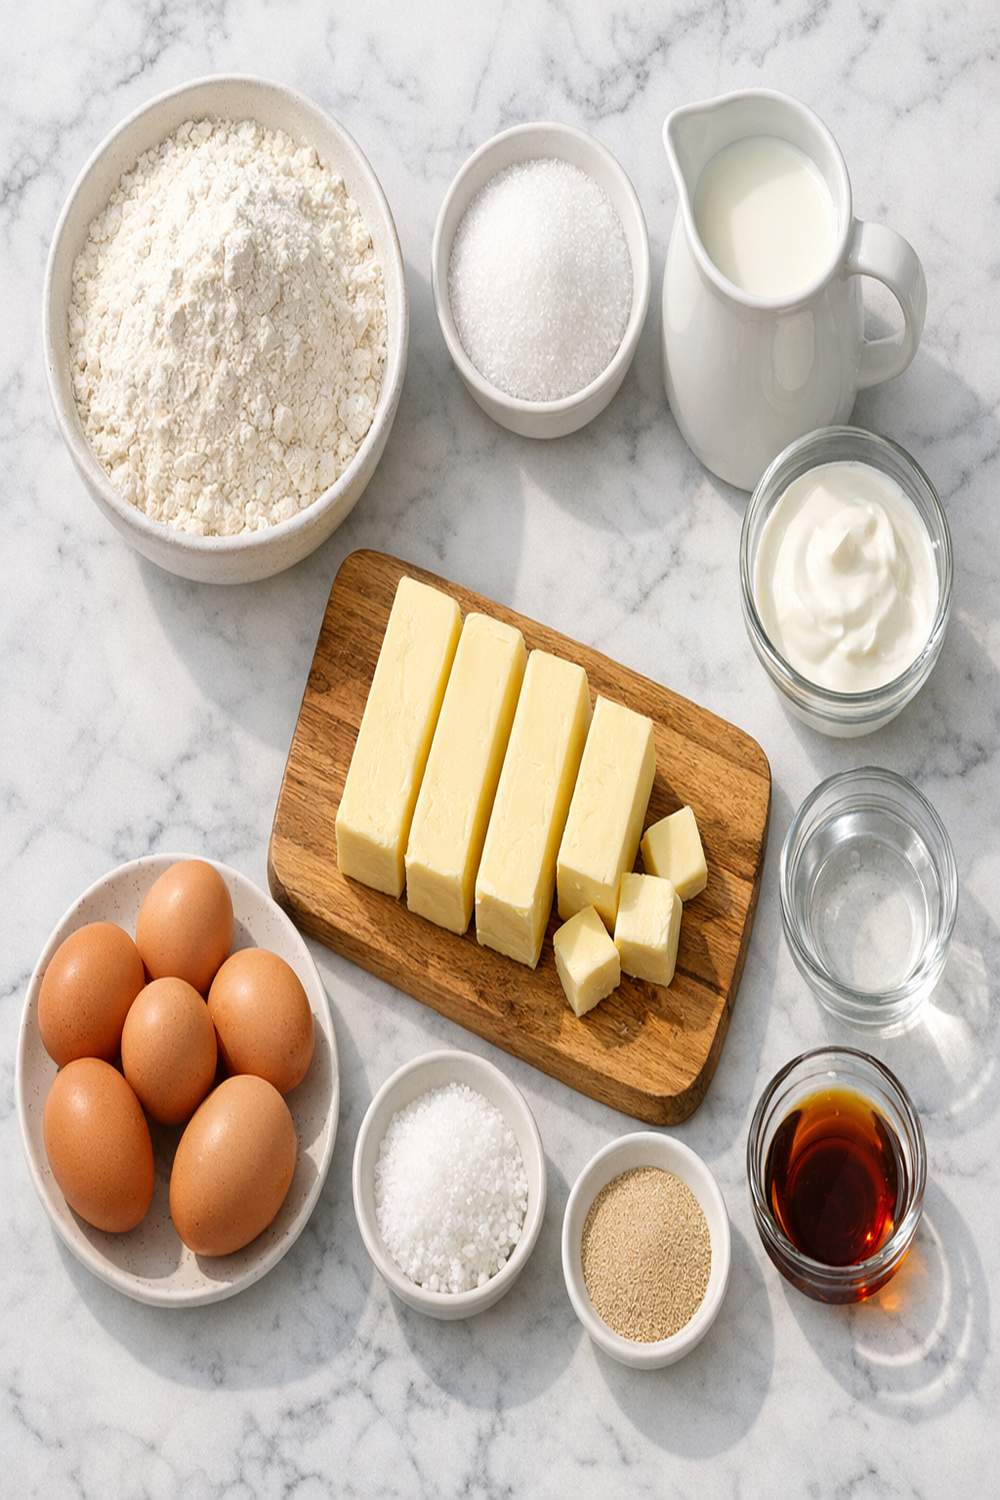
Each ingredient in my brioche recipe serves a specific functional purpose. Understanding these roles transforms you from someone following instructions into someone who truly understands the craft. Let me walk you through each component and explain precisely why it matters.
- 2 grams ground cardamom, optional (traditional French brioche flavoring that pairs beautifully with butter and eggs)
- 1 large egg yolk (additional fat and emulsification power, creating silky dough texture)
- 10 milliliters raw honey (provides fermentable sugars while contributing subtle floral notes and trace micronutrients)
- 9 grams active dry yeast (living microorganisms that ferment sugars and develop flavor through extended rising periods)
- 1½ teaspoons fine sea salt (controls fermentation speed and enhances gluten development through ionic interaction)
- 250 grams unsalted European-style butter, cold and cubed (creates fat pockets for tender crumb, builds richness and flavor)
- 120 milliliters warm milk (creates hydration and dissolved minerals that support yeast fermentation)
- 10 milliliters pure vanilla extract (enhances perceived sweetness and adds aromatic complexity)
- 60 grams granulated cane sugar (provides immediate energy for yeast while contributing to browning through the Maillard reaction)
- 500 grams all-purpose flour (creates gluten network that traps gas and provides structure)
- 5 large eggs at room temperature (acts as both moisture and natural emulsifier through lecithin content, binding ingredients seamlessly)
Makes one large brioche loaf, approximately 10 to 12 slices.
The Technique: How to Make Classic Brioche Recipe Properly
My approach to brioche combines professional technique with the kind of mindfulness I encourage in every kitchen. This isn’t a rushed process—and that’s precisely what makes it worthwhile. You’ll need reliable equipment: a stand mixer with dough hook attachment, a digital thermometer, a banneton proofing basket (or a bowl lined with a floured kitchen towel), and a Dutch oven for baking. These tools aren’t luxuries; they’re investments in precision and consistency.
Step 1: Awaken Your Yeast With the Sponge Method
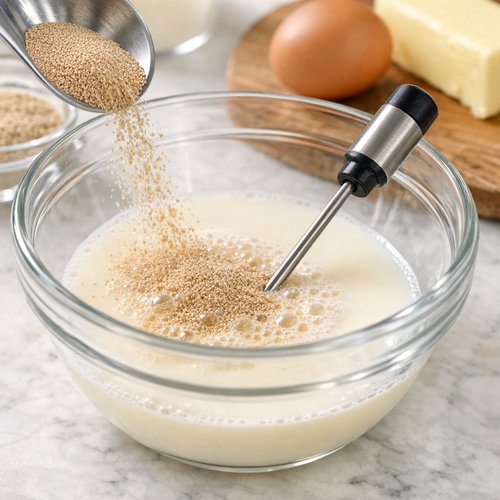
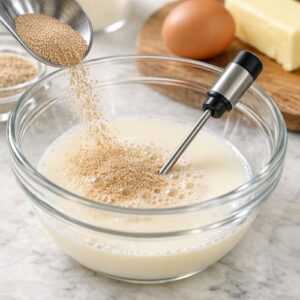
Begin by combining your 120 milliliters of warm milk (ideally 110°F, which you can verify with your thermometer) with the 9 grams of active dry yeast and 10 milliliters of honey in your stand mixer bowl. Stir gently and let this mixture rest for 5 to 7 minutes. You’ll observe the surface becoming foamy and fragrant—this visual cue tells you the yeast is viable and actively fermenting. This preliminary stage, called the sponge method, builds yeast population and creates the foundation for excellent flavor development. The honey isn’t just sweetness; it provides immediately accessible carbohydrates that yeast metabolizes to begin gas production.
Step 2: Build Your Dough Foundation
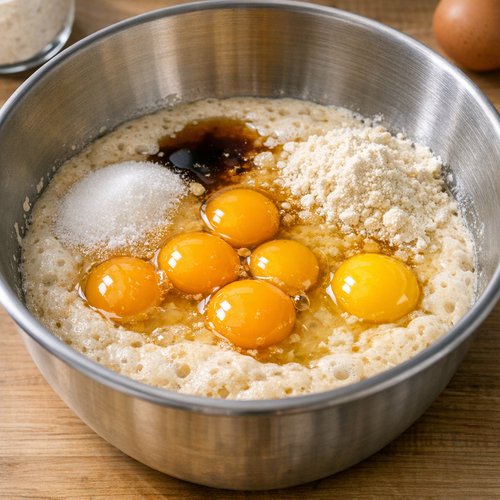
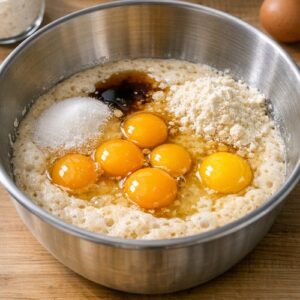
Once your sponge is visibly active, add your 5 room-temperature eggs, 1 large egg yolk, 10 milliliters of vanilla extract, 60 grams of sugar, and 500 grams of all-purpose flour to the mixer bowl. Using the dough hook attachment on medium speed, mix for 8 to 10 minutes until a shaggy dough forms. You’re developing the gluten network at this stage—the proteins in flour (glutenin and gliadin) are aligning and bonding, creating the elastic matrix that will trap fermentation gases. The dough should come together but appear slightly sticky; this is correct. Add your 1½ teaspoons of fine sea salt in the final minute of mixing. Salt regulates fermentation speed by controlling yeast activity through osmotic pressure—too much salt kills yeast, but the right amount slows fermentation beneficially, allowing flavor compounds to develop.
The dough at this point should feel soft, slightly tacky, and smooth. It shouldn’t be stiff or dry.
Step 3: The Critical Butter Integration
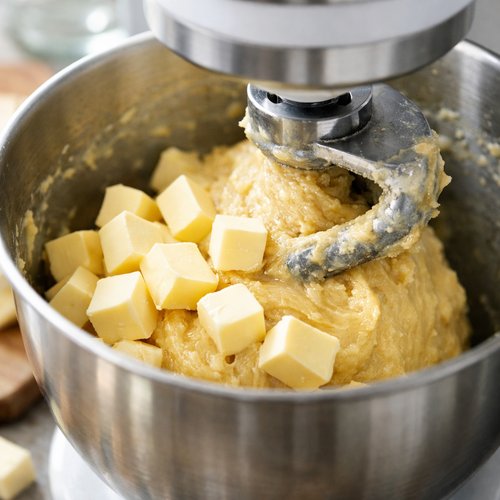
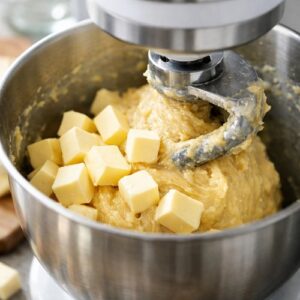
This step separates brioche masters from frustrated bakers. With your mixer running on medium-low speed, add your 250 grams of cold, cubed unsalted European-style butter gradually—approximately 5 to 6 cubes at a time. Wait until each addition is nearly fully incorporated before adding the next batch. This process requires 12 to 15 minutes total. Why such patience? When you add room-temperature butter to warm dough, it melts completely and separates from the dough, creating a greasy mess. Cold butter, however, breaks into small pieces that distribute throughout without melting immediately. The dough temperature should stay around 75°F to 78°F during this process; if it exceeds 80°F, refrigerate the dough for 15 minutes before continuing.
As you incorporate butter, you’ll observe the dough transforming from shaggy to silky, almost glossy. It should feel smooth and slightly sticky but hold together cohesively. This transformation indicates successful emulsification—the eggs’ lecithin is binding fat and water phases together into a stable system.
Step 4: First Rise and Bulk Fermentation
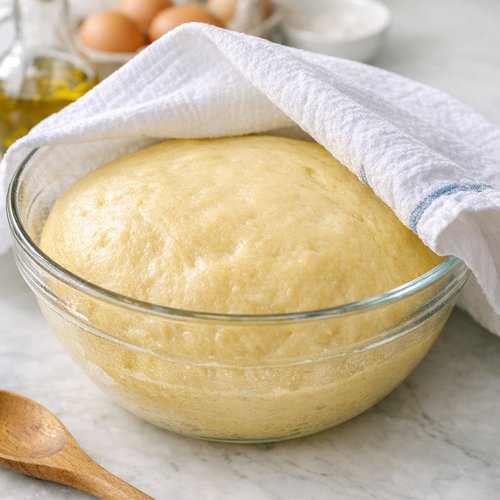
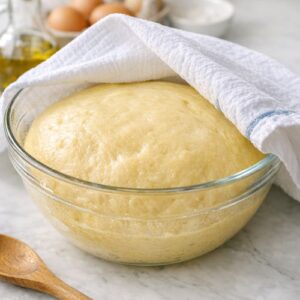
Transfer your dough to a lightly oiled bowl and cover it with a damp kitchen towel or plastic wrap. This bulk fermentation period is where flavor develops. Allow the dough to rise at room temperature (70°F to 72°F is ideal) for 3 to 4 hours, or until it has increased in volume by approximately 50 to 75 percent. You’re not looking for doubling here—brioche’s rich fat content slows fermentation compared to standard dough. During this time, yeast cells are multiplying and metabolizing sugars, producing ethanol and CO₂. The longer, slower fermentation at cooler temperatures favors complex flavor development over rapid gas production.
For overnight preparation (my preference for superior flavor), refrigerate the dough after 30 minutes of room-temperature rising and let it ferment in the refrigerator for 12 to 18 hours. Cold fermentation dramatically increases flavor complexity while making the dough easier to shape.
Step 5: Shape Your Brioche
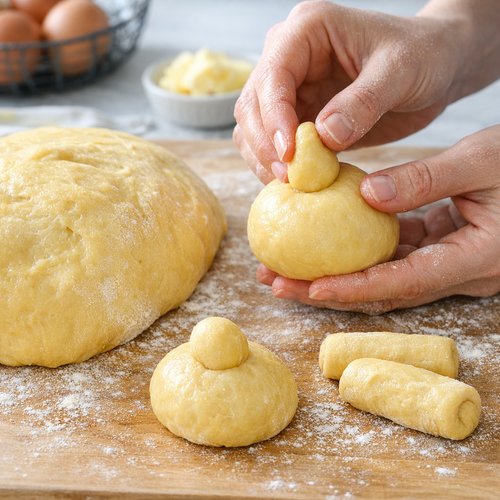
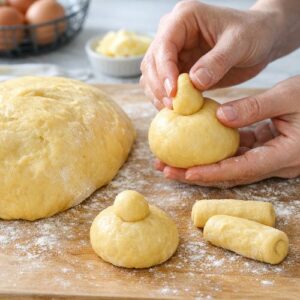
Remove your dough from the refrigerator approximately 30 minutes before shaping to take the slight chill off. Turn it out onto a lightly floured work surface—you shouldn’t need to add much flour due to the dough’s inherent richness. For a classic brioche loaf, gently shape the dough into a round, tucking the edges underneath to create surface tension. This tension helps the dough rise upward rather than spreading outward during the final proof.
Place your shaped brioche seam-side up in a floured banneton proofing basket, or in a bowl lined with a generously floured kitchen towel. If you lack a proofing basket, a round mixing bowl works beautifully. Cover with plastic wrap or a shower cap—yes, a shower cap provides an excellent seal that prevents drying while allowing minimal air exchange.
Step 6: Final Proof and Egg Wash
Allow your shaped brioche to proof for 2 to 3 hours at room temperature until it increases by approximately 50 percent in volume and feels airy when gently poked. The poke test is critical: your finger should leave a slight indent that springs back slowly—not immediately (underproofed) and not remain as a depression (overproofed). Overproofed brioche may collapse during baking, while underproofed brioche won’t develop the delicate crumb structure that makes this bread special.
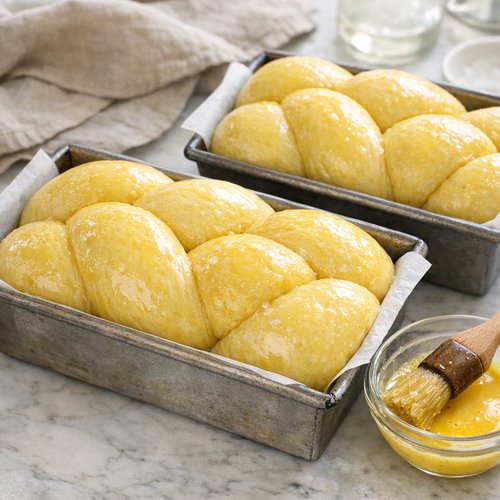
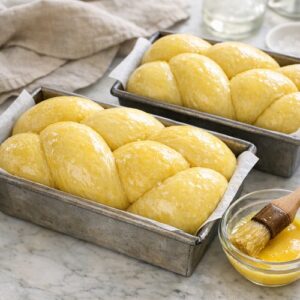
While your brioche is proofing, preheat your oven to 375°F. Twenty minutes before baking, prepare an egg wash by whisking together 1 large egg with 15 milliliters of water or cream. Gently invert your proofed brioche onto a parchment-lined baking sheet. Brush the entire surface with egg wash—this creates the characteristic golden sheen and promotes even browning through the Maillard reaction. Some bakers prefer a second egg wash layer 15 minutes into baking for extra shine; I find one thorough coating sufficient.
Step 7: Bake to Golden Perfection
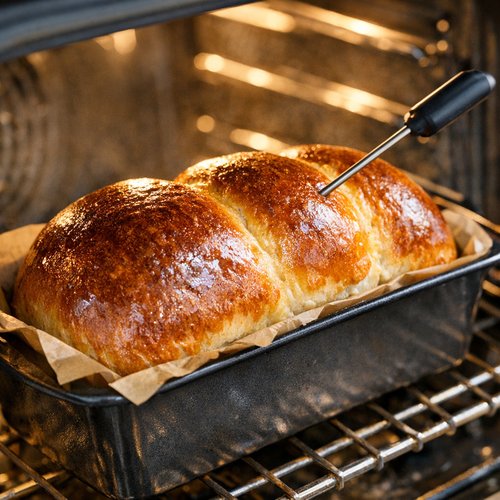
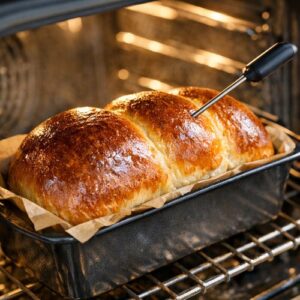
Place your egg-washed brioche in your preheated 375°F oven. Bake for 30 to 35 minutes until the top is deep golden brown and a digital instant-read thermometer inserted into the center registers 190°F to 195°F. This internal temperature indicates that the starch in the flour has gelatinized and the proteins have coagulated—the structure is set. If your brioche is browning too quickly but the interior hasn’t reached temperature, tent it loosely with aluminum foil for the final 10 to 15 minutes.
Remove from the oven and allow your brioche to cool in the pan for 15 minutes before turning it out onto a wire rack. This initial cooling period allows the crumb to set without becoming tough. Complete cooling takes approximately 2 hours. I know waiting feels eternal, but slicing into warm brioche before it’s fully set creates a gummy texture. Patience here is crucial.
Professional Tips From the Kitchen
- Temperature precision determines texture – Brioche is temperature-sensitive. Dough that’s too warm ferments too quickly, developing insufficient flavor and creating a coarse crumb. Dough that’s too cool ferments sluggishly. Keep your dough between 75°F and 78°F during mixing and initial bulk fermentation. Use your thermometer, not guesswork.
- Overnight cold fermentation is non-negotiable for my approach – The 12 to 18 hour refrigeration period in step 4 dramatically increases flavor complexity. Cold fermentation allows yeast to work slowly, developing esters and other flavor compounds that rushed fermentation misses. This step alone elevates brioche from good to transcendent.
- European-style butter makes a measurable difference – Standard American butter contains approximately 80 percent butterfat, while European-style butter reaches 86 percent butterfat with lower moisture content. This higher fat percentage creates richer flavor and silkier crumb. Source high-quality butter from a local dairy if possible—the difference is perceptible and worth the investment.
- Don’t skip the poke test for proof accuracy – Visual volume increase can deceive you. The poke test—gently pressing your floured finger into the dough and observing how quickly it springs back—accurately indicates fermentation progress better than timer alone.
- Invest in a Dutch oven for superior crust development – While you can bake brioche directly on a baking sheet, using a preheated Dutch oven for the first 15 minutes of baking traps steam, promoting better oven spring and crust structure. Remove the lid for the final 15 to 20 minutes to develop that golden color.
Common Mistakes to Avoid
Using warm butter instead of cold. This is the most frequent brioche failure point. Warm butter melts into the dough instead of creating those precious fat pockets. Your brioche becomes dense and greasy rather than tender and airy. Always cube your butter and refrigerate it until you’re ready to add it.
Skipping the overnight cold fermentation. I understand the temptation to rush. But brioche made with only room-temperature fermentation tastes flat and one-dimensional. The cold fermentation period is where magic happens. Plan accordingly—make your dough the day before shaping and baking.
Overproofing the final rise. Brioche dough is delicate. When overproofed, the gluten network loses elasticity and the dough collapses during baking, creating a dense crumb instead of the tender layers you’re pursuing. Learn the poke test and trust it more than time.
Slicing before complete cooling. This breaks the still-setting crumb structure, creating that gummy texture I mentioned. I know it smells incredible and you want to taste it immediately. But two hours of cooling makes the difference between good brioche and extraordinary brioche.
Seasonal Variations
One of my favorite aspects of working with brioche is its adaptability across seasons while maintaining its essential character. During spring and summer, I incorporate fresh citrus zest—2 teaspoons of lemon or orange zest added during the initial mixing—which brightens the butter’s richness without overwhelming it. The citric acid also subtly affects fermentation speed, slightly accelerating it.
Autumn invites warming spices. In addition to the optional cardamom, I sometimes add ½ teaspoon of ground cinnamon and a pinch of nutmeg. These spices contain volatile oils that develop during baking’s heat, adding aromatic complexity that pairs beautifully with brioche’s buttery sweetness.
Winter is when I embrace the brioche’s indulgence most fully. A tablespoon of high-quality vanilla bean paste (scraping out the actual vanilla bean specks) replaces the extract, and I sometimes incorporate 50 grams of candied orange peel, finely chopped, during the final mixing stages. The preserved citrus adds texture and sophisticated flavor notes.
Spring also welcomes a variation I love: incorporating 75 grams of chopped pistachios during the final mixing stage, creating a pistachio brioche that’s absolutely stunning sliced and toasted.
Ingredient Substitutions and Their Impact
- Active dry yeast -> Instant yeast (bread machine yeast): Use 6 to 7 grams instead of 9 grams. Instant yeast ferments faster due to smaller particle size, potentially creating more aggressive fermentation. Reduce bulk fermentation time by approximately 15 to 20 minutes if using instant yeast to prevent overproofing.
- Honey -> Granulated cane sugar: The fermentation proceeds identically, but you lose honey’s trace minerals and subtle floral notes. The final flavor becomes slightly less complex, though still delicious. Use equal weight (10 grams).
- All-purpose flour -> Bread flour: Bread flour’s higher protein content (12 to 14 percent versus 10 to 12 percent in all-purpose) creates stronger gluten development, resulting in slightly chewier crumb. The brioche becomes less tender. I don’t recommend this substitution unless you specifically prefer that texture.
- Unsalted butter -> Salted butter: Reduces your control over total sodium content. Use salted butter only if you reduce added salt to 1 teaspoon. Flavor profile remains nearly identical.
- Whole eggs -> Egg whites only: Creates a noticeably less rich brioche with paler color (losing the yolk’s pigments) and less emulsification power. The crumb becomes less tender. Not recommended—eggs are fundamental to brioche’s character.
Dietary Adaptations
Gluten-free brioche: Replace the 500 grams all-purpose flour with a high-quality gluten-free flour blend containing xanthan gum or psyllium husk fiber (which replaces gluten’s binding function). Expect a slightly denser crumb and shorter shelf life. Increase the bulk fermentation time by 15 to 20 minutes as gluten-free doughs ferment differently. Use King Arthur or Bob’s Red Mill brands specifically formulated for bread-baking.
Dairy-free brioche: Replace the 250 grams unsalted butter with coconut oil (refined, to minimize coconut flavor) and replace the 120 milliliters milk with unsweetened almond or oat milk at the same volume. Dairy-free brioche develops slightly less rich flavor and golden color due to reduced milk proteins contributing to browning. The texture remains tender but slightly less luxurious. Include an additional teaspoon of vanilla extract to compensate for reduced dairy richness.
Vegan brioche: Replace the 5 eggs and 1 yolk with a plant-based egg replacer (typically 3 to 4 tablespoons of commercial replacer mixed with water, or 5 tablespoons of aquafaba—the liquid from canned chickpeas—mixed with 1 tablespoon cornstarch). Use coconut oil and non-dairy milk as noted above. Vegan brioche requires increased mixing time (add 2 to 3 minutes) to develop adequate structure without eggs’ binding power. The result is good but noticeably less tender than traditional brioche.
Lower-carb adaptation: This is genuinely challenging because flour is fundamental to brioche’s structure. A reasonable approach replaces 150 grams of the all-purpose flour with almond flour and includes an additional 30 grams of psyllium husk fiber. Expect denser crumb, shorter shelf life, and different texture. This adaptation truly creates a different bread rather than brioche as classically understood.
Can I Store Classic Brioche Recipe?
Storage science matters enormously with brioche because its high fat content behaves differently than standard bread during storage. Properly stored brioche remains fresh for approximately 3 to 4 days at room temperature in an airtight container or wrapped tightly in plastic wrap. The butter actually protects the crumb from drying by creating a moisture barrier around starch granules—a phenomenon called retrogradation delay.
For extended storage, freezing is ideal. Wrap cooled brioche tightly in plastic wrap, then place in a freezer bag, removing as much air as possible. Properly frozen brioche maintains quality for up to 3 months. Thaw at room temperature for 2 to 3 hours before serving. I often slice brioche before freezing, which allows you to remove individual slices for toasting without thawing the entire loaf.
Toasting refrigerated or room-temperature brioche revives texture beautifully. Even day-old brioche sliced and toasted develops a crispy exterior while the interior remains tender. The heat briefly re-gelatinizes starches, creating that fresh-baked quality. I recommend toasting at 375°F for 8 to 10 minutes until golden.
Never refrigerate unsliced brioche. Refrigeration accelerates retrogradation (the firming of starch molecules), making your brioche stale within 2 days. Room-temperature storage or freezing are your only good options.
Nutrition Information
Per slice (based on 12 slices per loaf): approximately 380 calories, with 18 grams of total fat (11 grams saturated), 42 grams of carbohydrates, 8 grams of protein, and 2 grams of fiber. Sodium content is approximately 240 milligrams per slice.
The fat profile deserves explanation. While brioche contains significant saturated fat from butter and eggs, these fats also carry fat-soluble vitamins. The saturated fat from high-quality European butter includes butyric acid and conjugated linoleic acid (CLA) when the butter comes from grass-fed sources—compounds with emerging research suggesting metabolic benefits. This doesn’t make brioche “health food,” but it contextualizes the nutritional reality: this is indulgent bread that includes worthwhile micronutrients when made with quality ingredients.
The 8 grams of protein per slice comes entirely from eggs and flour—both high-quality protein sources. The 42 grams of carbohydrates represent primarily starch from flour with some simple sugars from honey. The 2 grams of fiber comes from whole wheat characteristics in all-purpose flour and from yeast cell walls that remain in the finished bread.
From a registered dietitian’s perspective: brioche is celebration food. It’s not everyday bread, and I don’t recommend treating it that way. But within the context of an overall balanced diet emphasizing vegetables, whole grains, lean proteins, and healthy fats, a slice or two of excellent brioche contributes joy without requiring guilt. Mindful indulgence means eating excellent food in reasonable portions with full presence.
Expert’s Nutritional Tip: The Choline Connection
As a registered dietitian, I emphasize a nutrient most recipes ignore: choline. Each large egg in this recipe contains approximately 147 milligrams of choline, predominantly concentrated in the yolk. With 5 whole eggs plus 1 additional yolk, your brioche contains roughly 882 milligrams of choline total—distributed across the entire loaf.
Choline is essential for acetylcholine production, a neurotransmitter crucial for memory, attention, and cognitive processing. The USDA acknowledges choline’s importance yet many Americans consume insufficient amounts. While brioche isn’t a choline supplement, it does contribute meaningfully to intake when made with whole eggs rather than egg whites or commercial egg replacers. Consuming one slice of brioche covers approximately 15 to 20 percent of the Adequate Intake (AI) for choline, depending on your age and gender.
Make-Ahead Guide
Brioche is perhaps the most make-ahead-friendly bread you can bake. Here’s my professional timeline for maximum convenience and flavor:
Day 1 (Evening): Prepare through step 4 (bulk fermentation). After 30 minutes at room temperature, cover your dough and refrigerate for 12 to 18 hours. This overnight cold fermentation is where extraordinary flavor develops.
Day 2 (Morning or Afternoon): Remove dough from refrigerator and allow it to rest at room temperature for 30 minutes. Shape according to step 5 and place in your proofing basket. At this point, you have two options: proceed with final proofing immediately, or refrigerate the shaped dough for up to 8 hours before the final proof. This secondary refrigeration adds even more flavor.
Day 2 (Evening or Day 3 Morning): Remove shaped brioche from refrigerator if refrigerated, allow 30 minutes tempering, then proceed with final proof and baking steps 6 and 7.
Alternatively, if you bake Day 2, let your finished brioche cool completely, then wrap tightly and refrigerate overnight. Brioche actually improves slightly in flavor on day two as flavors integrate. Toast slices before serving for optimal texture.
For maximum time efficiency while maintaining flavor: prepare dough Day 1 evening, shape Day 2 morning after removing from bulk fermentation, perform final proof and bake Day 2 afternoon or evening. This gives you fresh brioche for Day 2 breakfast or Day 3 morning.
What Can I Serve With Classic Brioche Recipe
The richness of brioche demands thoughtful pairings that complement rather than compete with its butter-egg decadence. From a flavor chemistry perspective, brioche’s sweet, buttery profile pairs beautifully with foods offering tartness, subtle bitterness, or textural contrast.
My favorite approach features brioche toasted and served with high-quality, cultured butter and preserved fruits—apricot jam or fig compote. The tartness of preserved fruit cuts through richness while the residual sweetness maintains harmony. The Best Recipe For Pavlova would actually pair wonderfully for a decadent brunch, as would the Best Profiterole Recipe for an over-the-top dessert course featuring complementary choux pastry.
Savory applications deserve mention: brioche makes spectacular foundations for French toast when paired with a custard featuring cardamom and vanilla. The bread’s butter content means you need less cooking fat, and the existing sweetness lets you feature egg custard’s delicate flavor. Brioche also makes excellent toast for pairing with soft cheeses like brie or burrata, where the bread’s richness enhances creamy textures through complementary fat content.
For breakfast applications, I serve brioche alongside Greek yogurt with fresh berries and a drizzle of raw honey. The tartness and brightness of yogurt and berries provide necessary contrast to brioche’s richness. A simple green salad with lemon vinaigrette and toasted brioche croutons offers another sophisticated pairing where the acidity cuts through fat while the bread’s sweetness adds unexpected complexity to the salad experience.
- Preserved fruit compote – tartness cuts through fat while residual sweetness maintains balance; choose apricot, fig, or raspberry for compatibility with brioche’s vanilla notes
- Cultured butter and sea salt – additional fat and umami depth complement rather than compete with brioche’s existing richness
- Soft cheeses (brie, burrata, ricotta) – complementary fat content creates harmonious mouthfeel; the cheese’s savory profile contrasts brioche’s sweetness
- Greek yogurt with fresh berries – tartness and brightness provide essential contrast; the dairy connection creates coherent flavor profiles
- Chocolate ganache – brioche’s tender crumb absorbs chocolate beautifully; the sweetness pairing works when using dark chocolate (70% cacao or higher) for slight bitterness

Classic Brioche Recipe
Ingredients
Method
- Begin by combining your 120 milliliters of warm milk (ideally 110°F, which you can verify with your thermometer) with the 9 grams of active dry yeast and 10 milliliters of honey in your stand mixer bowl. Stir gently and let this mixture rest for 5 to 7 minutes. You'll observe the surface becoming foamy and fragrant—this visual cue tells you the yeast is viable and actively fermenting. This preliminary stage, called the sponge method, builds yeast population and creates the foundation for excellent flavor development. The honey isn't just sweetness; it provides immediately accessible carbohydrates that yeast metabolizes to begin gas production.
- Once your sponge is visibly active, add your 5 room-temperature eggs, 1 large egg yolk, 10 milliliters of vanilla extract, 60 grams of sugar, and 500 grams of all-purpose flour to the mixer bowl. Using the dough hook attachment on medium speed, mix for 8 to 10 minutes until a shaggy dough forms. You're developing the gluten network at this stage—the proteins in flour (glutenin and gliadin) are aligning and bonding, creating the elastic matrix that will trap fermentation gases. The dough should come together but appear slightly sticky; this is correct. Add your 1½ teaspoons of fine sea salt in the final minute of mixing. Salt regulates fermentation speed by controlling yeast activity through osmotic pressure—too much salt kills yeast, but the right amount slows fermentation beneficially, allowing flavor compounds to develop. The dough at this point should feel soft, slightly tacky, and smooth. It shouldn't be stiff or dry.
- This step separates brioche masters from frustrated bakers. With your mixer running on medium-low speed, add your 250 grams of cold, cubed unsalted European-style butter gradually—approximately 5 to 6 cubes at a time. Wait until each addition is nearly fully incorporated before adding the next batch. This process requires 12 to 15 minutes total. Why such patience? When you add room-temperature butter to warm dough, it melts completely and separates from the dough, creating a greasy mess. Cold butter, however, breaks into small pieces that distribute throughout without melting immediately. The dough temperature should stay around 75°F to 78°F during this process; if it exceeds 80°F, refrigerate the dough for 15 minutes before continuing. As you incorporate butter, you'll observe the dough transforming from shaggy to silky, almost glossy. It should feel smooth and slightly sticky but hold together cohesively. This transformation indicates successful emulsification—the eggs' lecithin is binding fat and water phases together into a stable system.
- Transfer your dough to a lightly oiled bowl and cover it with a damp kitchen towel or plastic wrap. This bulk fermentation period is where flavor develops. Allow the dough to rise at room temperature (70°F to 72°F is ideal) for 3 to 4 hours, or until it has increased in volume by approximately 50 to 75 percent. You're not looking for doubling here—brioche's rich fat content slows fermentation compared to standard dough. During this time, yeast cells are multiplying and metabolizing sugars, producing ethanol and CO₂. The longer, slower fermentation at cooler temperatures favors complex flavor development over rapid gas production. For overnight preparation (my preference for superior flavor), refrigerate the dough after 30 minutes of room-temperature rising and let it ferment in the refrigerator for 12 to 18 hours. Cold fermentation dramatically increases flavor complexity while making the dough easier to shape.
- Remove your dough from the refrigerator approximately 30 minutes before shaping to take the slight chill off. Turn it out onto a lightly floured work surface—you shouldn't need to add much flour due to the dough's inherent richness. For a classic brioche loaf, gently shape the dough into a round, tucking the edges underneath to create surface tension. This tension helps the dough rise upward rather than spreading outward during the final proof. Place your shaped brioche seam-side up in a floured banneton proofing basket, or in a bowl lined with a generously floured kitchen towel. If you lack a proofing basket, a round mixing bowl works beautifully. Cover with plastic wrap or a shower cap—yes, a shower cap provides an excellent seal that prevents drying while allowing minimal air exchange.
- Allow your shaped brioche to proof for 2 to 3 hours at room temperature until it increases by approximately 50 percent in volume and feels airy when gently poked. The poke test is critical: your finger should leave a slight indent that springs back slowly—not immediately (underproofed) and not remain as a depression (overproofed). Overproofed brioche may collapse during baking, while underproofed brioche won't develop the delicate crumb structure that makes this bread special. While your brioche is proofing, preheat your oven to 375°F. Twenty minutes before baking, prepare an egg wash by whisking together 1 large egg with 15 milliliters of water or cream. Gently invert your proofed brioche onto a parchment-lined baking sheet. Brush the entire surface with egg wash—this creates the characteristic golden sheen and promotes even browning through the Maillard reaction. Some bakers prefer a second egg wash layer 15 minutes into baking for extra shine; I find one thorough coating sufficient.
- Place your egg-washed brioche in your preheated 375°F oven. Bake for 30 to 35 minutes until the top is deep golden brown and a digital instant-read thermometer inserted into the center registers 190°F to 195°F. This internal temperature indicates that the starch in the flour has gelatinized and the proteins have coagulated—the structure is set. If your brioche is browning too quickly but the interior hasn't reached temperature, tent it loosely with aluminum foil for the final 10 to 15 minutes. Remove from the oven and allow your brioche to cool in the pan for 15 minutes before turning it out onto a wire rack. This initial cooling period allows the crumb to set without becoming tough. Complete cooling takes approximately 2 hours. I know waiting feels eternal, but slicing into warm brioche before it's fully set creates a gummy texture. Patience here is crucial.
Notes
FAQs
Why does my brioche taste dense and gummy rather than light and tender?
This indicates one of three issues: inadequate gluten development during mixing, overproofing during final rise, or insufficient cooling before slicing. Ensure your mixer runs for the full 8 to 10 minutes during initial mixing to develop gluten structure. Use the poke test during final proof—your finger should leave a slowly-springing indent, not a permanent depression. Most critically, allow your brioche to cool for the full 2 hours at room temperature before slicing. The crumb is still setting during this period. Slicing prematurely breaks the crumb structure before it firms, creating gumminess.
Can I use instant yeast instead of active dry yeast?
Yes, with adjustments. Instant yeast (also called bread machine yeast) ferments faster due to smaller particle size and higher cell concentration. Use 6 to 7 grams instant yeast instead of the 9 grams active dry yeast, and reduce bulk fermentation time by 15 to 20 minutes. Monitor your dough carefully—