
This post contains affiliate links. As an Amazon Associate I earn from qualifying purchases.
I still remember standing on my mother’s kitchen step stool, my small hands pressed into butter and powdered sugar as she guided me through making shortbread for the first time. The simplicity astounded me—just a handful of ingredients transformed into something so luxuriously tender it practically dissolved on your tongue. That memory sparked my lifelong love affair with baking, and it’s why I’m sharing this easy cocoa shortbread cookie recipe that delivers bakery-quality results in under an hour with minimal equipment and maximum flavor. Whether you’re looking for an elegant gift, a mindful afternoon project, or the perfect pairing with your evening tea, these rich chocolate cookies prove that indulgence and nutrition-conscious choices can beautifully coexist.
Decadent Dark Cocoa Shortbread Cookies: Bakery-Quality Results in 45 Minutes
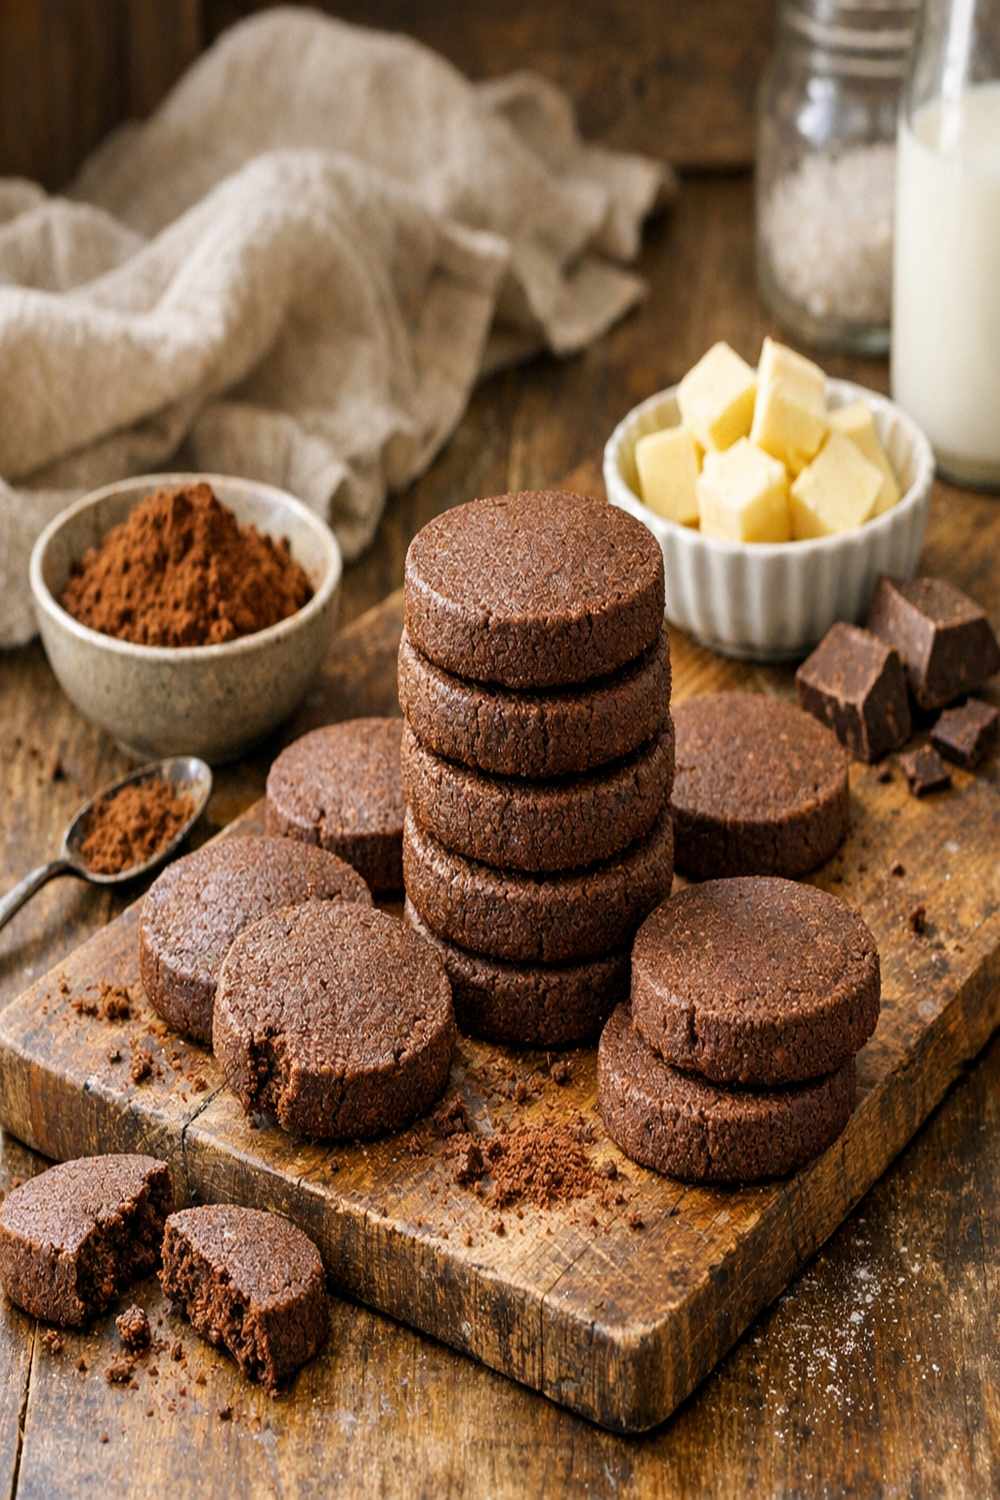
This is the only shortbread recipe you’ll ever need. I’ve crafted it to showcase pure, unadulterated chocolate flavor while maintaining the delicate snap and tender crumb that makes shortbread irresistible. As a registered dietitian, I appreciate that real butter, quality cocoa powder, and whole ingredients create a treat that nourishes both body and soul—no artificial flavors, no mystery ingredients, just the luxurious simplicity my mother taught me.
Why You’ll Love This Recipe
- Ready in 45 minutes total – including 1 hour of strategic chilling time, which means you can have warm cookies on the table tonight without stress
- Just 6 simple, recognizable ingredients – no specialty items required, though I’ll share my preferred sourcing for each one
- Perfectly crispy-tender texture – that signature shortbread snap paired with a luxuriously melting center that feels indulgent on every bite
- Infinitely customizable – serve plain, dipped in dark chocolate, dusted with fleur de sel, or paired with your favorite beverage for countless flavor combinations
- Make-ahead friendly – bake them today and enjoy them for up to four days, or freeze the dough for unexpected guests
What You Need
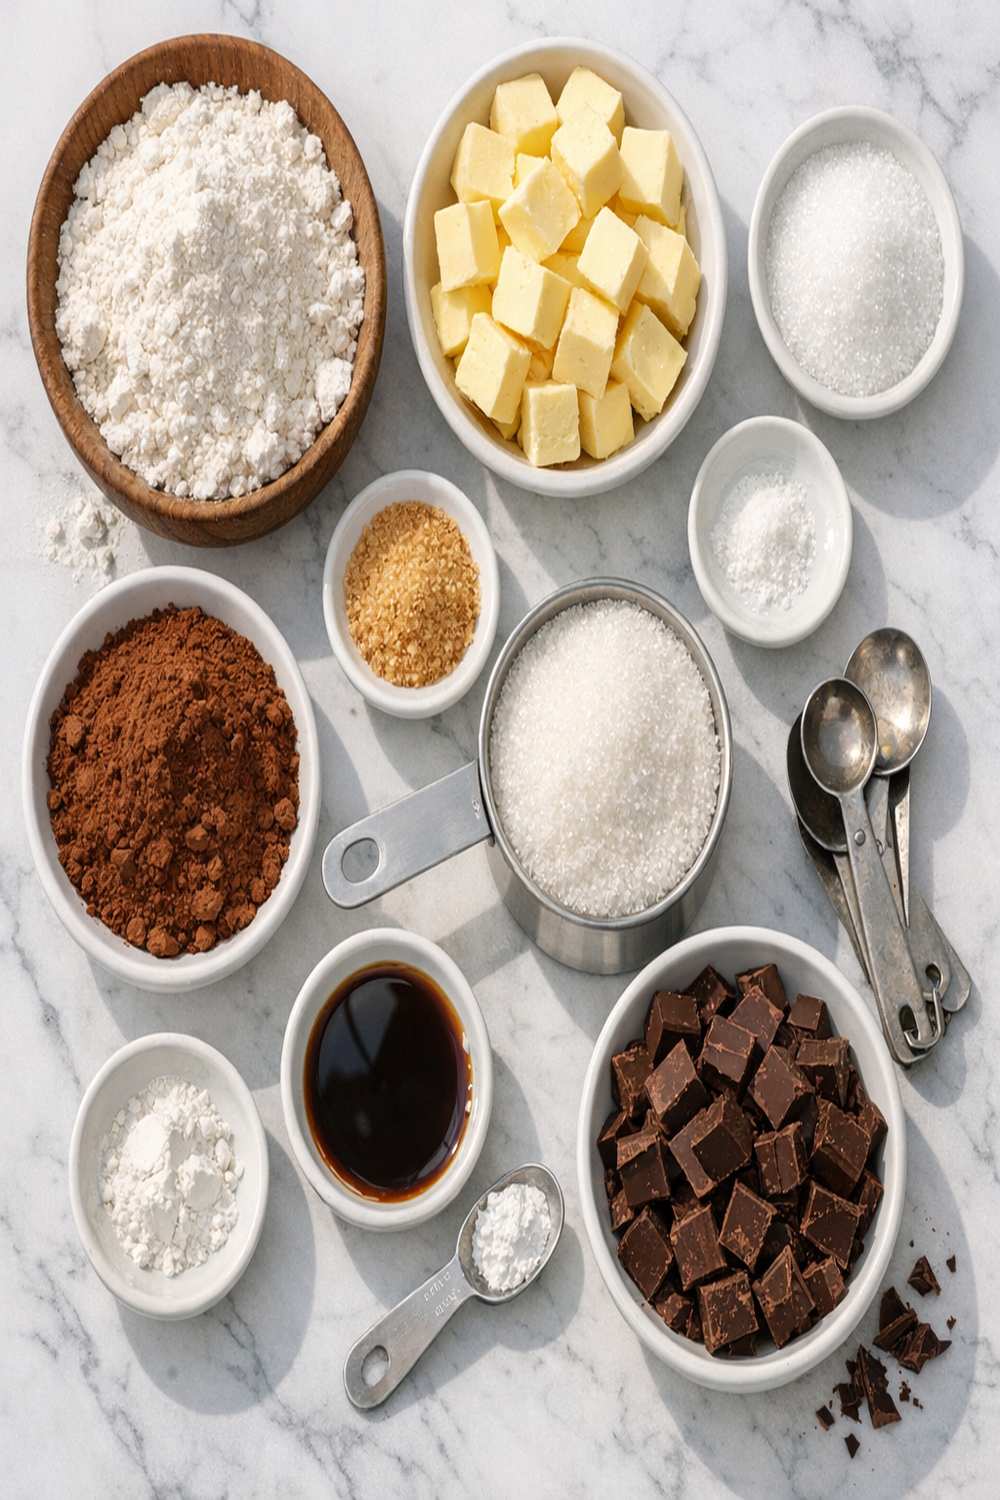
Just six essential ingredients, all of which I’m particular about sourcing thoughtfully:
- 1 cup (226g) salted butter (I use grass-fed butter from local dairies when possible—the rich, golden color and complex flavor elevates everything)
- 1 cup (113g) powdered sugar (sifted to remove lumps for smoother incorporation)
- 1¾ cups (217g) all-purpose flour (spooned and leveled, never packed, for accurate texture)
- ¼ cup (20g) unsweetened cocoa powder (Dutch-process for deeper, more luxurious flavor and darker appearance)
- 1 teaspoon pure vanilla extract (never imitation—the flavor difference is worth the investment)
- ¼ teaspoon fine sea salt (enhances the cocoa’s complexity and balances sweetness naturally)
Yield: Makes approximately 36 cookies
Equipment I Recommend
You don’t need much, but having the right tools makes this process genuinely enjoyable. I use my KitchenAid stand mixer with the paddle attachment—it creams the butter to exactly the right fluffy consistency without overmixing, which is crucial for tender shortbread. If you don’t have a stand mixer, a hand mixer works beautifully, or you can cream by hand with a wooden spoon (it’s meditative, honestly).
For baking, I invest in quality parchment paper or silicone baking mats to prevent sticking and ensure even browning. I also use a sharp chef’s knife or dough scraper to slice the dough log cleanly—this prevents the edges from crumbling and keeps cookies uniform. A tall drinking glass for chilling the dough roll upright prevents one flat side and maintains that beautiful round shape.
How to Make Cocoa Shortbread Cookies in 6 Essential Steps
Here’s exactly how to create these luxurious cookies:
Step 1: Cream Butter and Sugar Until Fluffy and Pale
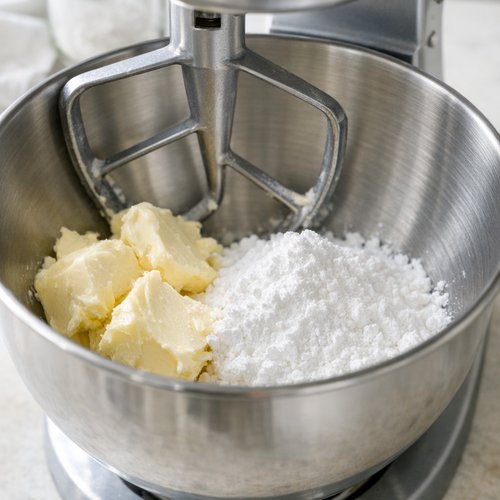
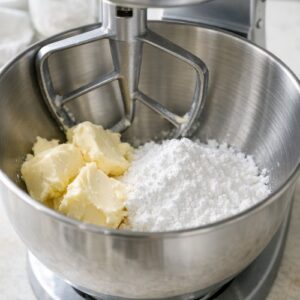
Place your softened salted butter and powdered sugar into the mixer bowl. I let my butter sit on the counter for about 15 minutes until it yields slightly to finger pressure—not soft, just ready. Beat on medium speed for approximately 1 minute until the mixture transforms from grainy to fluffy, light, and creamy. You’ll notice the color becomes noticeably paler and the texture becomes almost mousse-like. This crucial step incorporates air into the dough, creating that signature tender crumb. Stop and scrape down the bowl sides and bottom thoroughly with a rubber spatula.
Step 2: Incorporate Cocoa Powder and Vanilla
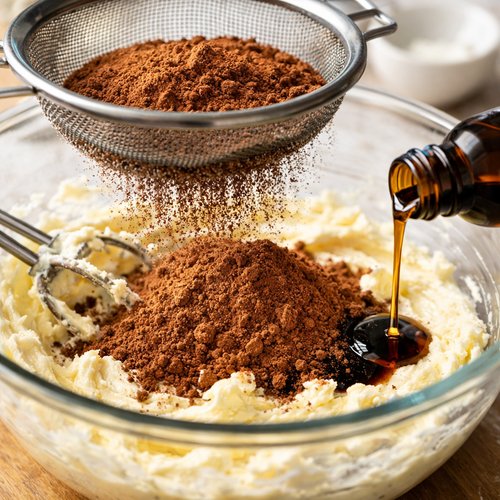
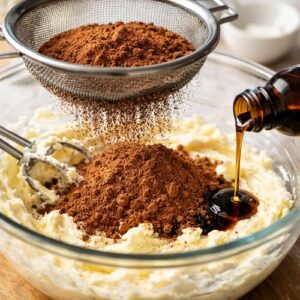
Sift the cocoa powder directly into the creamed mixture, then add vanilla extract. I sift the cocoa to eliminate any lumps that might create bitter spots in the finished cookies. Mix on medium speed for about 30 seconds until the cocoa is completely distributed and the dough takes on a rich, chocolatey color. The mixture should look uniform with no streaks of white or patches of cocoa powder remaining. Again, scrape the bowl thoroughly—cocoa powder loves hiding in the corners.
Step 3: Add Flour and Salt, Mix Until Just Combined
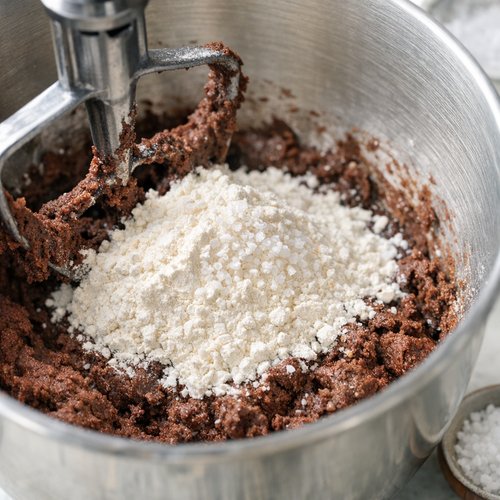
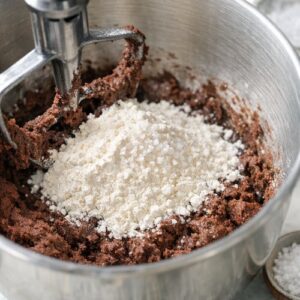
Add the flour and sea salt together, mixing on low speed until the dough comes together. This is where patience matters most. Overmixing develops gluten, which makes shortbread tough instead of tender. Mix for about 45 seconds total, stopping halfway through to scrape the bottom and sides of the bowl—dough gets caught down there and won’t incorporate properly otherwise. The mixture should look like fine, uniform crumbs that hold together when squeezed, not a smooth ball.
Step 4: Shape into a Log and Wrap for Chilling
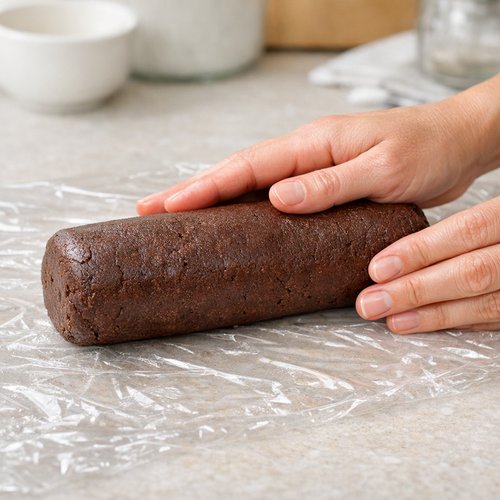
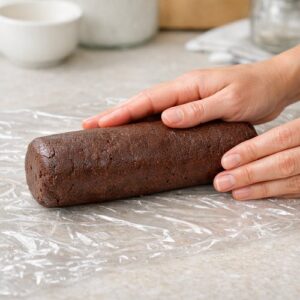
Lay out a piece of plastic wrap and transfer the dough onto it, then use your hands to form it into a compact log about 2 inches in diameter. I find it helpful to work the dough gently—it’s already perfectly mixed, so I’m just encouraging it into shape. Wrap the log snugly in plastic wrap, then gently roll it back and forth on your counter to smooth out any cracks and create an even diameter. For perfectly round cookies, place the wrapped log standing upright in a tall drinking glass and refrigerate.
Step 5: Chill Until Completely Firm, Then Slice
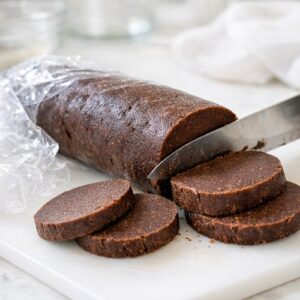
Refrigerate the dough log for at least 1 hour, or up to overnight. Cold dough is non-negotiable for shortbread—it prevents the cookies from spreading and helps them maintain that crispy-tender texture. When ready to bake, remove from the refrigerator and let it sit at room temperature for just 2 minutes so the knife glides through cleanly. Using a sharp chef’s knife, slice the log into ¼-inch thick rounds, wiping the blade clean between cuts for neat edges.
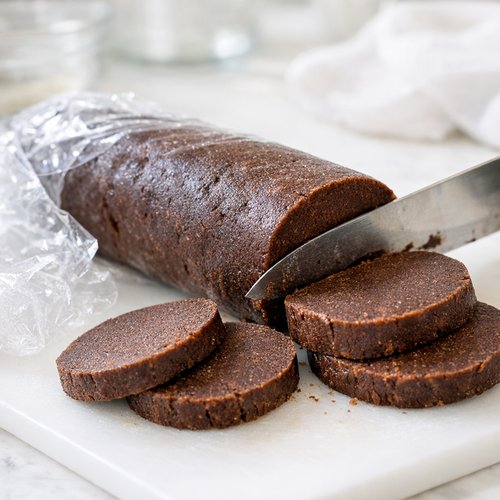
Step 6: Bake Until Just Set, Cool Completely
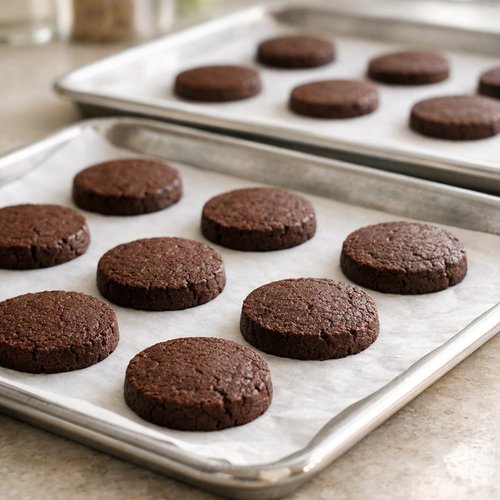
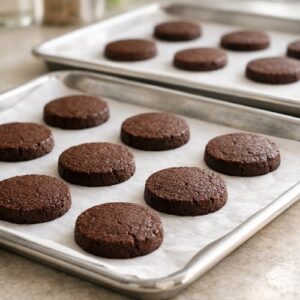
Preheat your oven to 350°F and line two baking sheets with parchment paper. Arrange the sliced cookies 2 inches apart on the prepared sheets. Bake for 14 to 17 minutes—they’re done when the glossy sheen disappears and the edges are just barely set but the centers still look slightly tender. They’ll continue cooking on the hot pan as they cool. Let them rest on the baking sheet for 5 minutes, then transfer to a wire rack to cool completely. This might be the hardest part—the aroma is absolutely intoxicating—but allowing them to cool completely ensures the perfect texture.
Expert’s Nutritional Tip: Understanding Cocoa’s Hidden Benefits
As a dietitian, I’m particularly fascinated by cocoa powder’s nutritional profile. Dutch-process cocoa powder (which I recommend for this recipe) undergoes alkalization, which neutralizes cocoa’s natural acidity and creates that luxurious dark color and mellow flavor. More importantly, cocoa contains powerful polyphenols—compounds with antioxidant properties that support heart health and cognitive function. One ounce of cocoa powder contains approximately 12 grams of fiber and is naturally rich in minerals like magnesium, copper, and manganese. This doesn’t make shortbread a health food, but it does mean that choosing quality cocoa powder adds genuine nutritional value to your indulgence. I source my cocoa from single-origin suppliers whenever possible, prioritizing ethical sourcing and vibrant flavor profiles.
5 Ways to Customize This Recipe
- Espresso-Cocoa Shortbread – Add 1 teaspoon of instant espresso powder to the cocoa mixture for sophisticated depth. The bitterness of espresso beautifully enhances chocolate’s complexity. This pairs wonderfully with my this simple cake for a complete coffee-lover’s afternoon.
- Sea Salt and Dark Chocolate Dipped – After baking and cooling completely, dip half of each cookie in melted 70% dark chocolate and sprinkle with fleur de sel before the chocolate sets. The salt amplifies cocoa’s natural bitterness and creates elegant contrast.
- Spiced Cocoa Variation – Add ¼ teaspoon each of cinnamon, cayenne pepper, and cardamom to the cocoa mixture. These warming spices transform the flavor profile into something mysteriously luxurious and perfect for holiday gifting.
- Mini Bite-Size Version – Divide the dough into two logs and slice into thinner ⅛-inch rounds. These create delicate, elegant bites perfect for tea service or cocktail parties, and they bake in just 10 to 12 minutes.
- Raspberry Shortbread Sandwich Cookies – Make cookies as directed, then sandwich two cookies together with a small dollop of raspberry jam and a thin layer of dark chocolate ganache in the middle. The tartness of raspberry beautifully complements cocoa’s richness.
Make It Ahead and Meal Prep Tips
- Bake the dough log up to 3 days ahead – Wrap the chilled, unsliced log in plastic wrap and store in the refrigerator. When you’re ready for fresh cookies, simply slice and bake. This saves you 15 minutes on serving day and ensures maximum freshness. You can also freeze the unbaked dough log for up to 3 months—simply thaw slightly and bake without adjusting time.
- Prepare cookies for gifting in advance – Bake a full batch when you have time, then layer cooled cookies between parchment paper in an airtight container. These keep beautifully for 4 days at room temperature, making them perfect for last-minute hostess gifts or holiday packages. I often make these on a quiet weekend afternoon and portion them into small gift boxes throughout the season.
- Strategic ingredient prep – Sift your cocoa powder and flour together the night before in a small bowl. This saves 2 minutes on baking day and prevents lumps. Make sure your butter is at the correct temperature when you’re ready to start—this saves you 5 to 10 minutes versus waiting for cold butter to soften.
Quick Substitutions
- Unsalted butter instead of salted – If you only have unsalted, simply add ¼ teaspoon of fine sea salt directly to the butter and sugar mixture during creaming. Salted butter in this recipe is my preference because it adds subtle complexity and enhances the cocoa flavor.
- Natural cocoa powder instead of Dutch-process – You can absolutely use natural cocoa powder, though the cookies will be slightly less dark and have a more pronounced cocoa tang. The texture remains the same. I prefer Dutch-process for the luxurious appearance and mellow flavor, but both work beautifully.
- Superfine sugar if you don’t have powdered sugar – Whiz granulated sugar in a food processor for 1 to 2 minutes to create superfine texture, then measure and use as directed. The cookies will have a slightly less refined crumb, but they’ll still be delicious.
- Almond extract for vanilla – Use ½ teaspoon of pure almond extract in place of vanilla for a completely different flavor profile. This creates an almost marzipan-like quality that pairs beautifully with the cocoa.
Common Mistakes to Avoid
Mistake 1: Using butter that’s too warm or too cold. If your butter is too soft, the dough spreads during baking and cookies become thin and crispy rather than tender and snappy. If it’s too cold, it doesn’t cream properly and you end up with dense cookies. Aim for butter that’s about 65 to 70 degrees Fahrenheit—it should yield slightly to pressure but still hold its shape.
Mistake 2: Overmixing after adding flour. I see this constantly. Once flour enters the mixer, stop mixing the moment you don’t see streaks of flour anymore. Another 10 seconds of mixing develops gluten and makes shortbread tough. Remember: we’re creating a tender, delicate cookie, not kneading bread.
Mistake 3: Skipping the chilling step or not chilling long enough. I understand the temptation to skip ahead when you want cookies immediately, but chilled dough is essential. Room-temperature dough spreads excessively, creating thin wafers instead of the cookies we’re after. One hour minimum—overnight is even better.
Mistake 4: Slicing the dough unevenly. Uneven slices bake at different rates. The thin ones turn too crispy while the thick ones remain underbaked. Use a sharp knife and take your time. If you’re worried, use a bench scraper or pizza cutter for more control.
How to Store and Reheat
Room temperature storage (best option): Keep cooled cookies in an airtight container for up to 4 days. I layer mine between parchment paper to prevent sticking and preserve that pristine appearance. These cookies actually taste best at room temperature—the butter’s flavor is most prominent and the texture remains perfect.
Freezer storage: Freeze baked cookies in an airtight container or freezer bag for up to 3 months. Simply remove and let them come to room temperature for 15 minutes before serving. The texture remains unchanged. Unbaked dough logs freeze beautifully for up to 3 months—slice directly from frozen (you may need an extra 1 to 2 minutes of baking time) or thaw slightly for easier slicing.
Reheat if needed: If cookies have softened, crisp them up by placing on a baking sheet and warming in a 275°F oven for 5 to 7 minutes. They’ll regain their snap. However, these cookies truly don’t need reheating—they’re just as luxurious on day four as they are fresh from the oven.
Nutrition at a Glance
Each cookie contains approximately 95 calories, 6 grams of fat (mostly from quality butter), 10 grams of carbohydrates, and 1 gram of protein. The cocoa powder contributes 0.5 grams of fiber per cookie along with beneficial antioxidants. Based on USDA nutrition databases, one cookie also provides approximately 18 mg of magnesium and 12 mg of calcium. These are not health foods, but they’re crafted with intention using quality ingredients that nourish rather than deplete. I always recommend enjoying one or two cookies mindfully with a beverage you love rather than mindlessly consuming several at once—this approach honors both the food and your body’s wisdom.
Seasonal Variations
- Fall Version: Add ¼ teaspoon each of pumpkin pie spice and a tiny pinch of clove to the cocoa mixture. This creates a sophisticated autumnal flavor that’s completely different from the classic but equally luxurious. Pair with spiced chai tea or apple cider.
- Winter Holiday Version: Stir in ¼ teaspoon of peppermint extract along with the vanilla, then dip baked cookies in dark chocolate and sprinkle with crushed candy canes while the chocolate is still wet. This transforms simple shortbread into a festive treat reminiscent of the this simple cake I make every December.
- Spring Version: Reduce cocoa powder to 3 tablespoons and add ¼ teaspoon of lavender extract for delicate floral notes. These pair beautifully with Honey Vanilla Pots de Crème for an elegant springtime dessert course.
- Summer Version: Sandwich cooled cookies with a thin layer of dark chocolate ganache and serve alongside these homemade cookies for sophisticated ice cream sandwich experiences.
Serve It With
These luxurious cookies deserve equally thoughtful pairings. I serve them with hot tea or coffee—the cocoa flavor shines against Darjeeling, Earl Grey, or a quality single-origin espresso. They’re also stunning alongside this simple cake for an elegant dinner party, or simply on their own as an afternoon mindfulness moment. For something unexpected, try pairing with a small glass of ruby port or Banyuls wine—the richness complements the shortbread’s buttery depth beautifully.
- Hot chocolate or drinking chocolate – The cocoa flavor echoes perfectly, creating a luxurious pairing that feels indulgent but balanced
- Specialty coffee drinks – Espresso, cortado, or flat white highlight the cookie’s subtle bitterness and buttery richness
- Herbal teas – Chamomile, lavender, or mint tea provide a gentle, complementary contrast to the chocolate’s depth
- Fine wines or spirits – Ruby port, Banyuls, or even a small glass of cognac creates an elevated tasting experience

Cocoa Shortbread Cookie Recipe
Ingredients
Method
- Place your softened salted butter and powdered sugar into the mixer bowl. I let my butter sit on the counter for about 15 minutes until it yields slightly to finger pressure—not soft, just ready. Beat on medium speed for approximately 1 minute until the mixture transforms from grainy to fluffy, light, and creamy. You'll notice the color becomes noticeably paler and the texture becomes almost mousse-like. This crucial step incorporates air into the dough, creating that signature tender crumb. Stop and scrape down the bowl sides and bottom thoroughly with a rubber spatula.
- Sift the cocoa powder directly into the creamed mixture, then add vanilla extract. I sift the cocoa to eliminate any lumps that might create bitter spots in the finished cookies. Mix on medium speed for about 30 seconds until the cocoa is completely distributed and the dough takes on a rich, chocolatey color. The mixture should look uniform with no streaks of white or patches of cocoa powder remaining. Again, scrape the bowl thoroughly—cocoa powder loves hiding in the corners.
- Add the flour and sea salt together, mixing on low speed until the dough comes together. This is where patience matters most. Overmixing develops gluten, which makes shortbread tough instead of tender. Mix for about 45 seconds total, stopping halfway through to scrape the bottom and sides of the bowl—dough gets caught down there and won't incorporate properly otherwise. The mixture should look like fine, uniform crumbs that hold together when squeezed, not a smooth ball.
- Lay out a piece of plastic wrap and transfer the dough onto it, then use your hands to form it into a compact log about 2 inches in diameter. I find it helpful to work the dough gently—it's already perfectly mixed, so I'm just encouraging it into shape. Wrap the log snugly in plastic wrap, then gently roll it back and forth on your counter to smooth out any cracks and create an even diameter. For perfectly round cookies, place the wrapped log standing upright in a tall drinking glass and refrigerate.
- Refrigerate the dough log for at least 1 hour, or up to overnight. Cold dough is non-negotiable for shortbread—it prevents the cookies from spreading and helps them maintain that crispy-tender texture. When ready to bake, remove from the refrigerator and let it sit at room temperature for just 2 minutes so the knife glides through cleanly. Using a sharp chef's knife, slice the log into ¼-inch thick rounds, wiping the blade clean between cuts for neat edges.
- Preheat your oven to 350°F and line two baking sheets with parchment paper. Arrange the sliced cookies 2 inches apart on the prepared sheets. Bake for 14 to 17 minutes—they're done when the glossy sheen disappears and the edges are just barely set but the centers still look slightly tender. They'll continue cooking on the hot pan as they cool. Let them rest on the baking sheet for 5 minutes, then transfer to a wire rack to cool completely. This might be the hardest part—the aroma is absolutely intoxicating—but allowing them to cool completely ensures the perfect texture.
Notes
FAQs
Can I make this recipe with unsalted butter?
Absolutely. Salted butter is my preference because the salt enhances cocoa’s complexity and balances sweetness, but unsalted works perfectly. If using unsalted, simply add ¼ teaspoon of fine sea salt to the butter-sugar mixture during creaming. The final result will be virtually identical.
Why did my cookies spread too much during baking?
This happens for two reasons: either the butter was too warm when mixed, or the dough wasn’t chilled long enough. Room-temperature or warm dough spreads excessively in the oven. Always chill for at least 1 hour, preferably overnight. If spreading occurred despite proper chilling, your butter was likely too soft—next time, let it sit for just 10 to 15 minutes before using.
Can I make the dough ahead and refrigerate it for several days?
Yes, and I actually recommend it. Wrap the dough log tightly in plastic wrap and refrigerate for up to 3 days. Cold dough sometimes becomes very hard, so let it sit at room temperature for 2 to 3 minutes before slicing, just until the knife glides through without cracking the edges. You can also freeze the unbaked dough log for up to 3 months.
My cookies turned out too crispy. What went wrong?
Shortbread should be crispy on the outside but tender inside. If yours are completely crispy throughout, you likely overbaked them. These cookies continue cooking on the hot pan after removing from the oven, so take them out when the glossy sheen just disappears—they should still look slightly underbaked. Also, ensure your oven temperature is accurate using an oven thermometer.
Can I double this recipe?
Absolutely. Simply double all ingredients and mix as directed, though you may need to mix in two batches if your stand mixer isn’t large enough. The baking time and temperature remain exactly the same. I often double or triple this recipe for gift-giving and holiday parties.
What’s the difference between Dutch-process and natural cocoa powder?
Dutch-process cocoa undergoes alkalization, which neutralizes natural acidity and creates a darker color and mellower flavor. Natural cocoa powder is more acidic and has a pronounced cocoa tang. Both work in this recipe, though I prefer Dutch-process for the luxurious appearance and balanced chocolate flavor. Check your cocoa powder’s label—it should specify which type you’re purchasing.
More Quick Recipes You’ll Love
- Brown Sugar Boba Pearls Recipe – Create luxurious pearls for custom beverages that pair beautifully with afternoon cookies
- Honey Vanilla Pots de Crème – An elegant dessert that shares shortbread’s philosophy of quality ingredients and mindful indulgence
- Horchata Boba Recipe – A refreshing beverage pairing for summer cookie service
A Final Word on Mindful Indulgence
These cocoa shortbread cookies taught me something profound about balance. As a registered dietitian, I used to believe indulgence and nutrition were opposing forces. Then I realized that truly nourishing ourselves means honoring both our body’s physical needs and our soul’s need for beauty, pleasure, and tradition. These cookies, made with quality butter, pure cocoa, and honest ingredients, offer both. They’re not “health food,” but they’re made with intention—no fillers, no confusion, just the luxurious simplicity my mother taught me decades ago in her kitchen.
I encourage you to make these tonight. Invite someone you love to pull up a stool while you cream the butter, or make them quietly for yourself as an act of self-care. Let the aroma fill your kitchen. Taste the first warm cookie with your full attention. This is what cooking is really about—creating moments of genuine connection and pleasure. Savor the joy of cooking!