Ingredients
Method
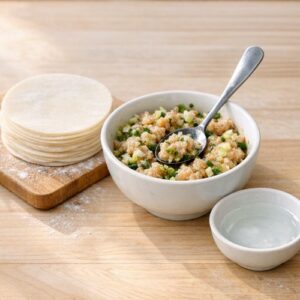
Step 1: Create Your Dumpling Wrappers (Or Prep Store-Bought)
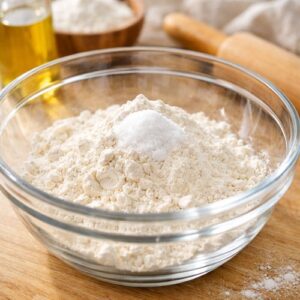
- If you're making wrappers from scratch—and I deeply encourage this at least once, as it connects you to the tradition—combine your flour and salt in a large mixing bowl. Create a small well in the center, then add your water gradually while mixing with chopsticks or a fork. This Chinese technique prevents the water from spreading everywhere and gives you better control over hydration. Once the mixture becomes shaggy, turn it out onto a lightly floured surface and knead for 8-10 minutes using the heel of your hand, folding the dough back toward you with each push. You'll know the dough is ready when it transforms from rough to silky and smooth, almost like a baby's skin. This is the moment when glutenin and gliadin proteins have properly networked, creating elasticity that will allow you to roll impossibly thin wrappers. Cover your dough with a damp kitchen towel and let it rest for 30 minutes—this is non-negotiable. Resting allows the gluten network to relax, making the dough far easier to work with. This step honors the Chinese understanding that patience produces superior results. After resting, divide your dough into four equal portions. Roll one portion into a tight cylinder about the thickness of your pinky finger, then cut it into 12 small pieces. Using a wooden rolling pin (I prefer wood because it grips the dough better than metal), roll each piece into a thin circle approximately 3.5-4 inches in diameter. The edges should be slightly thinner than the center—this prevents thick, doughy borders that American palates sometimes expect. Stack your finished wrappers between parchment paper to prevent sticking, and cover with plastic wrap until you're ready to fill them. If using store-bought wrappers, simply remove them from the refrigerator about 10 minutes before assembling to bring them to room temperature. They'll be more pliable and less prone to tearing.
Step 2: Prepare Your Filling With Respect for Both Traditions
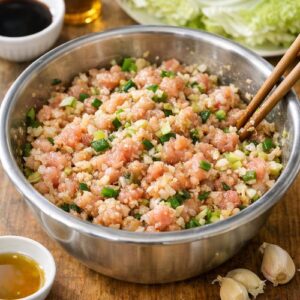
- This is where your ingredient quality becomes absolutely apparent. I recommend purchasing your chicken thighs from a farmer's market or specialty butcher if at all possible. Ask them to grind it fresh for you, or bring it home and pulse it yourself in a food processor—you'll have better texture control than pre-ground versions. The color should be darker than chicken breast, almost rosy, with visible marbling of fat throughout. In a medium mixing bowl, combine your ground chicken with the Napa cabbage, ginger, scallions, soy sauce, sesame oil, white pepper, salt, and cornstarch. The cornstarch is crucial—it absorbs excess moisture that the cabbage will release during cooking, preventing soggy, weeping dumplings. Using a spoon or your (clean) hands, mix gently but thoroughly until all ingredients are evenly distributed. Do not overmix, as this can develop too much gluten and create a dense, bouncy filling rather than a tender one. Taste a tiny pinch of the raw filling—yes, raw chicken is safe in very small quantities, and this is how professionals adjust seasoning. Does it need more soy sauce? More ginger? This is your moment to achieve perfect balance between the umami-forward Chinese base and the bright American emphasis on fresh aromatics. Cover and refrigerate your filling for at least 30 minutes, or up to 8 hours ahead.
Step 3: Assemble Your Dumplings With Meditative Intention
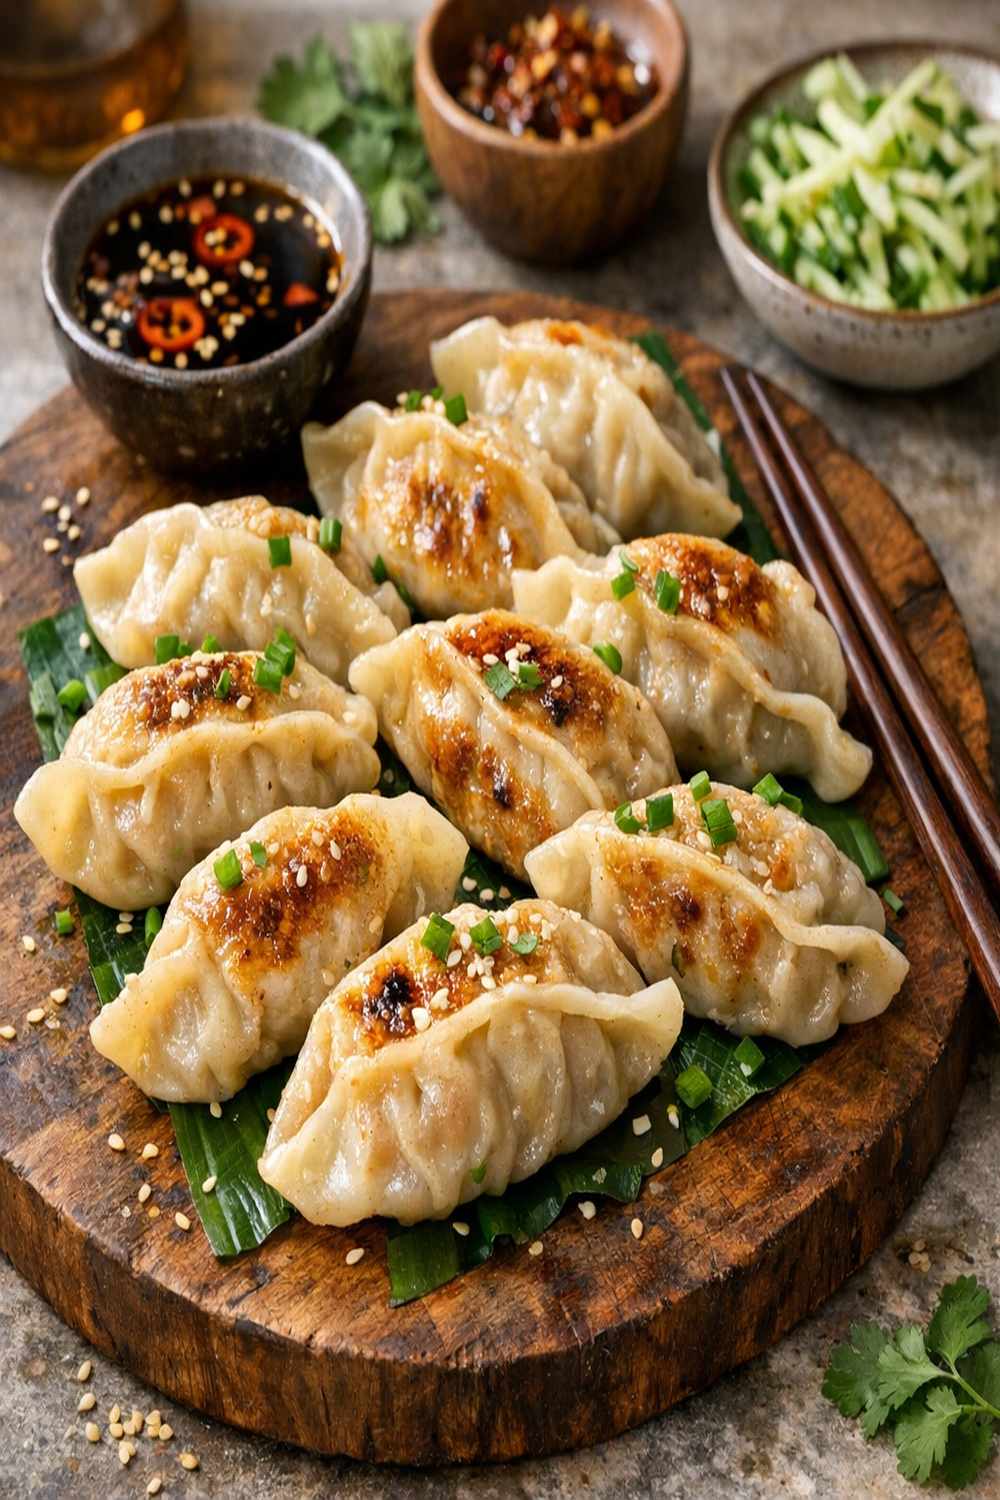
- Set up your workspace with three components: your stack of wrappers, your filling in a small bowl with a teaspoon inside, and a small dish of water. This is where the meditative magic happens. I recommend assembling in batches of 12-16, which takes about 15-20 minutes and keeps your wrappers from drying out. Place a wrapper in the palm of your non-dominant hand. Spoon exactly 1 teaspoon of filling into the center—this is the critical measurement that separates beautiful dumplings from messy ones. Too much filling, and your wrapper won't seal properly; too little, and your dumplings feel insubstantial. Dip your index finger into the water dish and run it around the entire outer edge of the wrapper, creating a seal zone. Now fold your wrapper in half, creating a half-moon shape. Press the center of the seal firmly between your thumb and index finger. This is where you can get creative while honoring the Chinese tradition of precise pleating by adding your own touch—perhaps a slight wave or two along the sealed edge, or a decorative press with your pinky. This isn't about perfect uniformity; it's about intentional, careful work. Place your finished dumplings seam-side up on a parchment-lined sheet pan or wooden board. Don't let them touch, as they'll stick together. If you're not cooking immediately, cover them loosely with plastic wrap and refrigerate for up to 4 hours, or freeze for up to 3 months. Frozen dumplings can go directly into boiling water—no thawing needed.
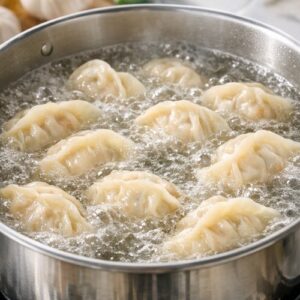
Step 4: Boil Your Dumplings (The Traditional Chinese Method)
- Bring a large pot of water to a rolling boil—you want enough water that the dumplings have room to float freely without crowding. This is important for even cooking. Working in batches of 12-16 dumplings, gently drop them into the water using a slotted spoon, then give them a gentle stir to prevent sticking to the bottom. They'll sink initially, then float to the surface after 3-4 minutes as the filling cooks and expands. Once they're floating, give them another 2-3 minutes of cooking time, then remove them with a slotted spoon and transfer to a parchment-lined plate. They should be tender, with the filling cooked through but still moist. Repeat until all your dumplings are boiled. At this point, you can serve them immediately with your dipping sauce, or proceed to the next step for that luxurious pan-fried finish.
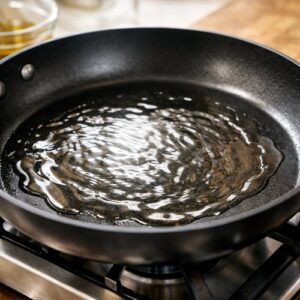
Step 5: Pan-Fry for Indulgent Texture (The American Addition)
- Heat a large skillet over medium-high heat and add 1 tablespoon of your neutral oil. Once it's shimmering—you should see ripples across the surface—arrange about 8-10 boiled dumplings flat-side down in the pan. Don't move them. This is where patience pays dividends. Let them sit undisturbed for 2-3 minutes until the bottoms develop a golden-brown crust. You're looking for color, which indicates that the Maillard reaction is occurring—a chemical transformation that creates hundreds of new flavor compounds. Gently flip each dumpling and cook the other side for another 1-2 minutes until it's also golden and crispy. Transfer to your serving plate and repeat with the remaining dumplings, adding another ½ tablespoon of oil for each batch. This dual-cooking method—gentle boiling followed by luxurious pan-frying—creates texture that neither culture achieves alone: tender, delicate wrappers with pockets of crispy, caramelized edges.